Pages

Tuesday, October 27, 2015

Purple Cauliflower Soup with Caramelized Onions and Cêpes

Some people just know me so well, it brings tears to my eyes.  Like my good friend who offered me a purple cauliflower for no apparent reason other than to see my reaction and what I would possibly be doing to it.  It's almost as if she knew she was giving it a good home by offering it to me.  Those are the types of gifts that touch me deeply.
The dizzying purple color was putting me into wild food trances.  I imagined a vibrant purple soup and how sexy it would be if I blended it into a smooth velvety creamy texture.  I imagined how I would decorate it with caramelized onions and sautéed cepe mushrooms and garlic croutons.
All my dreams came true except for the color.  I thought roasting it as opposed to boiling it would help it keep its color.
Alas.. my sexy vibrant purple soup was taupe.. but oh was it delicious and Earthy.. just the way I like it!
Serves 3-4
Ingredients
1 head purple cauliflower, broken into small florets
3 carrots, cut into sticks
1 head garlic, skin on
1/2 tsp ground cumin
1/2 tsp ground coriander
1/4 tsp salt
Olive oil to toss
1-2 cups water
Toppings:
2 large yellow onions, sliced into moons
1-2 large cêpe mushrooms, or 200g wild mushrooms, sliced
2 Tbsp olive oil
drizzle balsamic vinegar
garlic rubbed croutons
dollop of yogurt (optional)
1 chile de arbole (optional)
Directions
1.  Mix the ground cumin, coriander, and salt together and sprinkle on the cauliflower florets and carrot sticks.  Drizzle it all with olive oil along with the head of garlic and place in a single layer in an oven tray.  Bake at 200°C 400°F for 20 minutes.
2.  While that is happening, make the toppings.  Heat 1 Tbsp olive oil in a pan and add the sliced onions.  Cook on medium until browned (about 10-15 minutes) and deglaze with the vinegar.  Set aside.
3.  Heat the other Tbsp olive oil in a pan and add the sliced cêpe mushrooms.  Cook on medium until glossy (about 10 minutes).  Set aside.
4.  When your good stuff is done roasting, transfer it to a pot and add just a bit of water.  Squeeze the garlic out of its paper and blend it all with an immersible hand blender.  If you like it thin, use more water.  I like it thick.  I probably used 1 1/2 cup.
5.  Heat through in case it cooled down before serving.

Serve hot ladled into bowls garnished with the desired toppings.

Set aside the disappointment about the color.. because taupe is pretty too!

Friday, October 23, 2015

Chicken Tajine with Preserved Lemon and Artichoke

Sacrilege!  Am I allowed to call this a tajine when I used chickpeas and quinoa?
Well, this type of cooking is not native to me so I have no issues with rule breaking.  There are certain things I would never permit if this was Indian food .  Certain things were made to be the way they need to be made.  I would never serve pasta with daal.. or beef korma.. nor would I ever put bacon in couscous (ok that's not Indian, but still, I wouldn't do it although I've seen people do it!)  I have no problem using paneer instead of tofu or subbing ground turkey for ground pork in Chinese recipes.  I also don't mind using Korean noodles in a Vietnamese dish.  This dish is the same.  I wanted all the little things separately and perfectly within the same dish.  The cooking method just happens to be called "tajine", which is why I permitted myself to name the dish this way.
Traditionally, a tajine is a slow cooked dish of vegetables and mixed spices with very little liquid that is sopped up with some sort of bread or couscous.  It can be made with meat or fish, but they are not submerged in the cooking liquid.  They are rather steamed or roasted atop the vegetables in a circular pyramidal clay cooking vessel also called a tajine.  They usually do not include any beans such as chickpeas.
I wanted chickpeas and I really don't regret it.. sorry purists.
Serves 4
Ingredients
4 chicken legs
1 cup cooked chickpeas (or 1 can, drained)
2 cloves
1 cinnamon stick
1 tsp cumin seeds
1 tsp whole black pepper
2 dried red chiles
2 preserved lemons, pulp discarded and rind sliced
1 can artichoke hearts, drained
1 large onion, sliced into moons
1 green chile, halved (I used a Kabyle chile)
few pinches saffron
1/4 cup water
garnish:
chopped cilantro
lime wedges
Directions
1.  Place the chickpeas at the bottom of the slow cooker along with the cloves, cinnamon stick, cumin, black pepper, dried chiles, and preserved lemon.  Layer on the onion, chicken legs, artichoke hearts, green chile, and saffron.  Pour the water in.  You want the chicken and artichokes to be above the water level so they will "roast" and not soak.
2.  Cook on low for 6 hours.

I served mine with some bulgur and cilantro.
After the hours of cooking, the chicken releases its juices to make a very tasty sauce.  I didn't feel it needed salt, but you might want to add a bit of fleur de sel to your plate.
I put the Kabyle chile on the top so I could easily remove it before serving.  I wanted it to infuse the cooking ambiance but I wanted to have it spice my own plate up and not the entire dish.
I feel I have finally figured out the preserved lemon thing.  You either leave them whole and then remove them after cooking or you'd better remove the pulp.  That pulp is very hard to palate so I was happy to not feel like my dinner was harassing me.
Although.. sometimes I like mealtime harassement...

Thursday, October 22, 2015

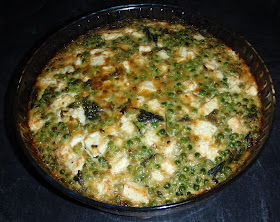
Green Pea and Feta Quiche with a Millet Crust

I stumbled upon this idea from while flipping through DesertCandy a few months ago.  The idea completely intrigued me.  Peas.. in a quiche??  I tweaked a few things but the basic idea is the same.  Put peas and cheese in a quiche.  How fabulous!
I've made this twice and each time was a success.  I was even asked to make it again for the next quiche occasion!
Serves 6 as an appetizer
Ingredients
2 Tbsp olive oil
1 onion, sliced into moons
drizzle balsamic vinegar
100g (3.5oz) fresh spinach
2 cups frozen peas
2 large cloves garlic, grated
200g (7oz) feta, cut into cubes
2 Tbsp freshly chopped mint
4 eggs
1/2 cup heavy cream
1 cup full milk (I used goat)
few pinches salt
lots of ground black pepper
1/2 cup millet, rinsed
Directions
1.  Heat 1 Tbsp olive oil in a sautée pan and cook the onions on medium heat until they are glossy and dark in color.  Deglaze with balsamic vinegar.  Remove from heat and set aside.
2.  Heat the other Tbsp olive oil in the same pan and add the fresh spinach.  Sautée for a few minutes with a pinch of fleur de sel, some pepper, and 1 of the grated garlic cloves.  This takes about 4 minutes.  Remove from heat and set aside.
3.  Rinse the frozen peas in a colander under warm water.  Drain and transfer to a mixing bowl and stir in the other clove of grated garlic and the chopped mint.  Smash some of the peas.  I used my hands and squished some.
4.  In a mixing bowl, beat the eggs until frothy.  Add the milk and cream and beat until frothy again.  Add a bit of salt and cracked black pepper.
5.  Oil your baking dish and spread the millet along the bottom.
6.  You are now ready to assemble.  Place the cooked onions over the millet, followed by the sautéed spinach.  Add the peas and try to even out the layer.  Press the feta cubes into the peas.  Help them nestle in and find their place.  Pour the egg and cream mixture over it all.
7.  Bake for 50 minutes at 185°C 365°F
8.  Let cool at least 1 hour before eating.

Serve warm or at room temperature.

The millet hardens the longer it sits to form a nice crust that is crunchy and tender all at once.
The mixture of ingredients is completely surprising but works like magic.  I absolutely love the texture of the half smashed, half whole peas and their natural sweetness contrasted with the feta.  Those two make a lovely pair...

Monday, October 19, 2015

Pear and Cocoa Bean Tart

It is pear season here in France, and although pears are not the fruit I go crazy nuts for, they can be quite sexy when paired with the right ingredients and served in the right crust.
Pears, Chocolate, and Ginger.. oh yes.. NOW we're talking!
I wanted to make something French for my American visitors.. which is quite hard because I mostly get off on making pumpkin pie, cookies, and burfi.. things all very familiar to my VIP guests.  While trying to come up with something not so out of the box, but something I had never thought to make, my trip to the market and the myriad varieties of pears on the stalls had me flowing with ideas.  In France, pears and chocolate are a typical dessert.  Usually the pear is poached and then dipped in a chocolate syrup.. or served with ice cream, chocolate, and whipped cream.  I'm pretty sure a chocolate & pear pie is a thing, too.. but I'm CERTAIN that they never put cinnamon or ginger in their desserts.
Which is why I was so happy to do it.. and why this dessert came out so classy!
Serves 8
Ingredients
Shortcrust:
100g (3.5oz) room temperature butter, cubed
130g (4.6oz) flour
100g (3.5oz) buckwheat flour
1 Tbsp nutritional yeast
Pinch salt
3 Tbsp cane sugar
1/2 tsp cinnamon
1 tsp ginger
1 egg yolk
5 cL water
Use the method, then pre-bake at 190°C 375°F for 10 minutes

Filling:
4 small pears, peeled, cored, and sliced crosswise (I used the Louise-Bonne variety)
1 egg + 1 egg yolk
Cream
1/2 tsp cinnamon
Pinch nutmeg
1 tsp ground ginger
1 packet vanilla sugar (or 1/2 tsp extract)
1 Tbsp cane sugar
15g (0.5oz) Crushed cocoa beans
40g (1.5oz) Dark chocolate shavings

Directions
1.  Beat the egg and extra yolk together in a mixing bowl until frothy, then beat in the cream, cinnamon, nutmeg, ginger, and sugar.
2.  Sprinkle 3/4 of the chocolate beans and shavings at the bottom of the pre-cooked shortcrust, then lay the pear slices, pressing them down diagonally onto the shavings.
3.  Pour the egg and cream mixture over the pear slices and sprinkle with the rest of the chocolate.
4.  Bake at 190° for 40 minutes or until golden.
5.  Let come to room temperature before serving (refrigerate for at least 1 hour).

This is probably the prettiest dessert I've every made.  I love the architecture of the slanted slices topped with dark chocolate.  It's also quite tasty and not too sweet, which is perfect for me.
The cocoa beans played a nice role presenting their deep roasted flavor that paired well with the pears and filling.  I've made this twice for completely different populations and I will be making it again with different fruit.. as long as I keep it pretty!

Sunday, October 18, 2015

Mushroom "Butter" Masala

I first made this as a test, just because I was craving mushrooms.  That day my camera was not functioning so I did not snap a shot of it.  I then made it for my best friend while she was visiting from San Diego.  We were so caught up in the action that I just completely forgot to snap a shot.  That day was amazing.  I learned to share my kitchen with others in a symbiotic way.  That day, cooking became more of a social activity than an individual therapy.  There are times when the journey is just as important as the destination.  I don't think there are many people with whom I would feel comfortable enough to cook with.. but this friend is like a part of me.  We've been through enough together to give her an open view into any part of my strange pathologies.  That day was so pleasant that I absolutely had to try it again.. because if I ever crave it again and I don't document it, how will I ever find the recipe again?
I freestyle so often that when something is perfect, I must absolutely photograph it and write it down so I can replicate it.. otherwise I'll just divert it into something else, which would still be good, but it wouldn't be THIS.
Serves 4-5 in a thali or 3 as a main dish
Ingredients
3 tomatoes
20 unsalted cashews
4 cups boiling water
3 Tbsp coconut oil (or butter or ghee)
1/2 tsp cumin seeds
1 tej petta (Indian bay leaf)
1/2 inch stick cinnamon
2 green cardamom pods
2 cloves
2 dried red chiles
1 onion, diced
350g button mushrooms, sliced thickly
1/8 tsp turmeric
1/2 tsp coriander powder
1/2 tsp chile powder
1 cup water
salt to taste
2-3 Tbsp coconut cream (or regular cream)
1/4 tsp garam masala
1/2 tsp methi (fenugreek leaves)
garnish:
fresh ginger cut into strips
chopped cilantro
Directions
1.  Make the cashew tomato paste.  Place the tomatoes and cashews in a bowl and pour the boiling water over them.  Let sit for at least 20 minutes, then drain, blend into a paste, and set aside.
2.  In a wok or heavy based dish, heat the coconut oil and add the cumin seeds, bay leaf, cinnamon, cardamom, cloves, and dried chiles.  Cook until the cumin starts to sputter.
3.  Add the onion and cook until translucent.
4.  Add the mushroom slices and cook on high, stirring, until glossy.
5.  Add the turmeric, coriander powder, and chile powder, then add the cashew-tomato paste.  Cook until it thickens and reduces.
6.  Add the water and stir, then simmer on low for 7-8 minutes.
7.  Add the cream, garam masala, and dried methi.  Cover and switch off the heat until ready to eat.
8.  Serve garnished with chopped cilantro and ginger strips.
I served mine in a thali with some Sweet Potato Panch Poran, Tandoori Okra, Whole Mung Dal, basmati rice, and rotis.
This dish must have taken it's toll on me because I made it during another kitchen activity session with a new friend.  I feel this is the beginning of a lovely adventure...

Monday, October 12, 2015

Oatmeal Cocoa Bean Cookies

After what seemed like an eternity of cookielessness, inspiration came to whisper into my ear, smelling of cocoa beans ans cinnamon.  This summer I visited the Valhala of chocolate.. The Valrhona city of chocolate where each step of the chocolate making process was accompanied by a taste test.  It was an interesting experience that tested touch, smell, and of course, the different parts of the tongue reacting to taste.  Aside from just gorging on quality chocolate, I was impressed the the cocoa tree and it's magnificent raw fruit, the cabosse.
The delicate white flesh from the cabosse is similar in taste and texture to a lychee, and the beans are actually the seeds of the fruit.  They must be fermented, then dried, then washed, then dried, then roasted before they can start to become what we know as chocolate.  They start to be edible after toasting, where they release their delicate chocolate aroma, but are still 100% bean, so not at all sweet.  Over the years I've been leaning more and more toward very dark chocolate..in the same way that I like my coffee black.  I feel like I'm tasting the real thing instead of eating candy.  Chocolate for me is more of a degustation than a snack.  It is a small taste of our Earth's many hidden treasures.  When I saw you could actually buy the whole untransformed toasted cocoa beans, I was thrilled.  They are slightly bitter but nice to chew on as the flavor develops while your saliva breaks it down.  When a good friend offered me a bag of these little beans, I decided to try cooking with them instead of just munching on them.  As it turns out, they work magic in oatmeal cookies!
Yield 3 dozen small cookies
Ingredients
115g (1/2 cup or 4oz) room temperature butter
105g (3.7oz) brown sugar or cassonade
1 egg
1 vanilla bean, scraped (or 1/2 tsp extract)
70g (2.5oz) flour
1/2 tsp baking soda
1/4 tsp salt
1/2 tsp ground cinnamon
Pinch nutmeg
1 1/2 cup oats
100g (3.5oz) dark chocolate, broken into bits (mine had coffee beans in it)
85g (3oz) roasted cocoa bean, crushed with a mortar and pestle into chunks
Directions
1.  Sift the flour, baking soda, spices, and salt together and set aside.
2.  Cream the butter and sugar together.
3.  Add the egg and vanilla and beat well until as homogenous as you can.
4.  At this point, I like to switch to a wooden spoon.  Add in the sifted dry ingredients a bit at a time until evenly incorporated.
5.  Stir in the oatmeal, crushed cocoa beans, and dark chocolate bits.
6.  Place 1 Tbsp sized balls of dough onto a baking sheet, separating each ball at least 1 1/2 inches apart.  With 1 Tbsp I had 3 dozen cookies.  They are a perfect size for me, but go ahead and make them bigger if that's what you prefer.
7.  Bake in a preheated oven at 190°C 375°F for 10-12 minutes.
8.  Remove and let cook on a wire rack at least 10 minutes before eating.

Ladies and Gentlemen.... cookie season has officially begun!