Search this blog

Translate

Showing posts with label Bread. Show all posts

Monday, July 10, 2017

Fish Tacos on Homemade Tortillas

Fish Tacos.
This made up 75% of my intake in college.  I could eat them everyday and not get sick of them.  I craved them when I was too sick to eat them and will seek out every single fish taco joint in California just to get a sneak peak of the chef's heart.
There are no words...
This being my favorite food for such a large part of my life, the only 2 reasons I had not made them before this year are:
1.  Before living here, I had easy access to them, so never a need to make them
2.  After living here, I had NO access to valid corn tortillas, or masa harina.
  What has changed?
I thought of buying masa on one of my trips back home and decided to try to make tortillas myself.
Major Breakthrough of the Year here!
So, making corn tortillas is actually not so difficult.  You just need to know the ziplock trick.  It's probably even easier with a tortilla press, but hey, it's not a requirement.

Yield 20 6 inch corn tortillas
Ingredients
2 cups masa harina (do not sub corn flour)
1 1/2 cups warm water
1/2 tsp kosher salt
Directions
1.  Mix everything together into a warm ball.
2.  Let rest for 30 minutes, covered with a kitchen towel.  During this time, the masa will absorb more moisture.
3.  Divide the mixture into 20 balls.. or wing it and make small balls that fit into the palm of your hand (I have small hands)
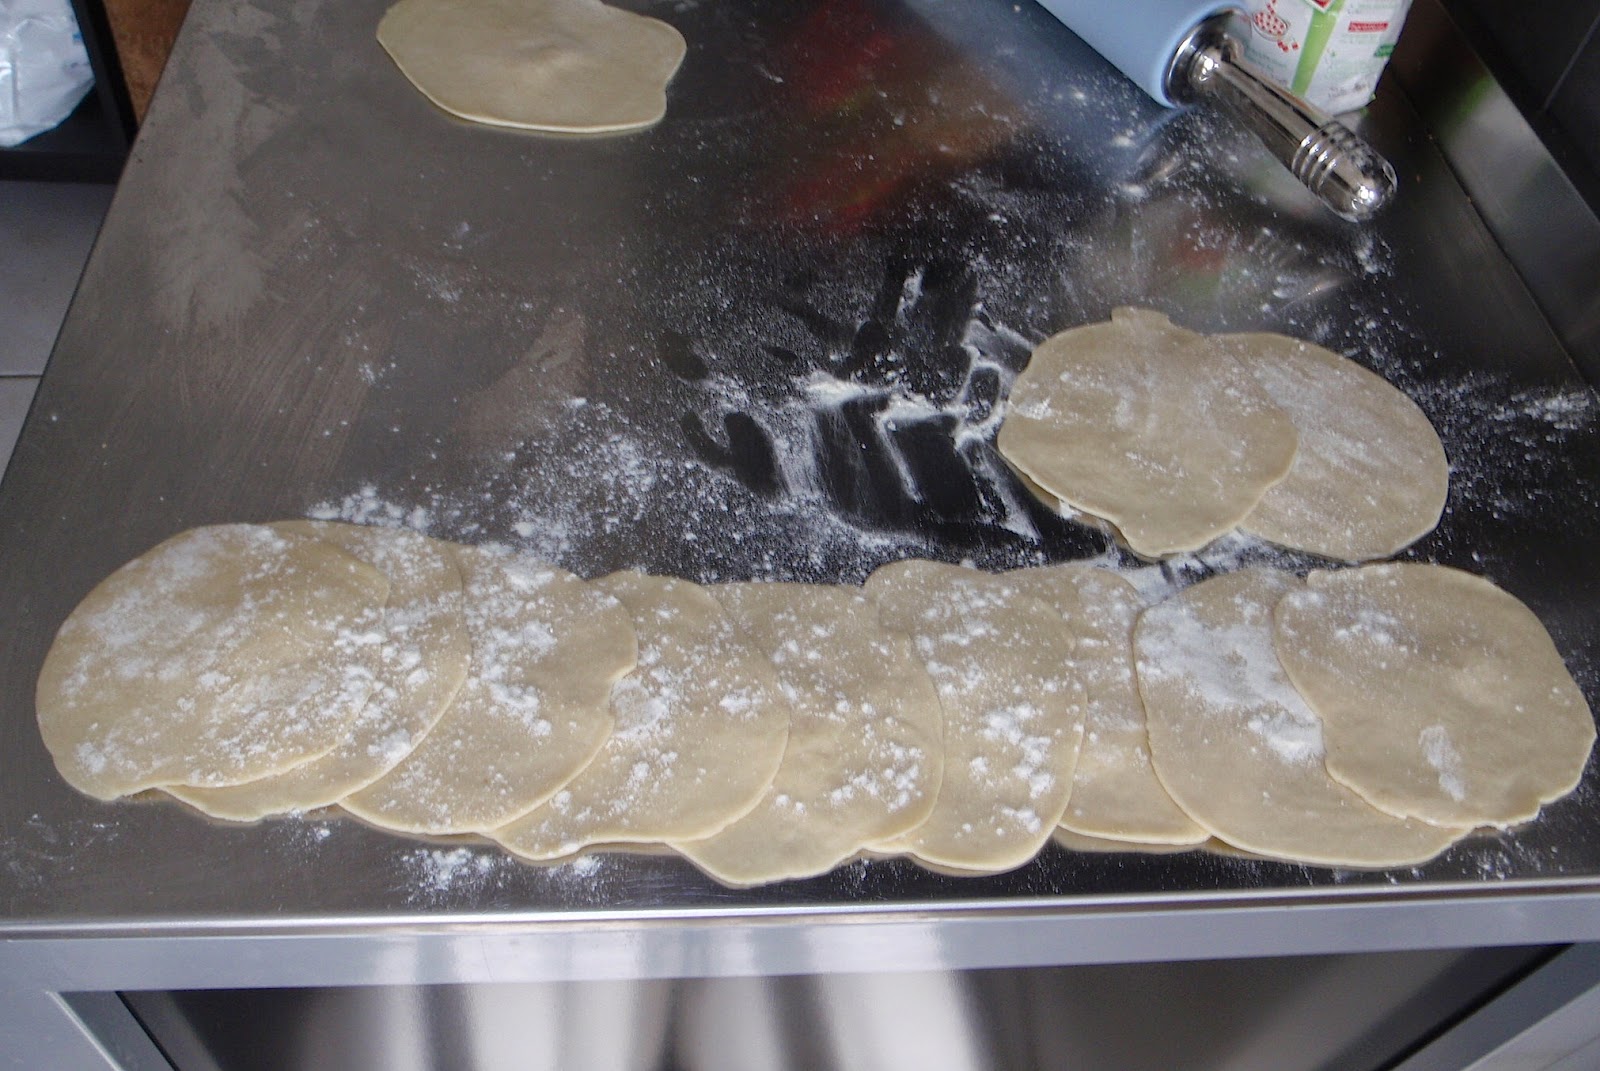
4.  Cut a large ziplock bag so you can open it like a magazine.  Place each ball in between the plastic and press into a tortilla.  Use a rolling pin to help, pressing from the inside toward the outside.
5.  Cook on a flat slightly oiled surface, flipping once.  I don't quite know about the cooking time.. just don't burn them or they will break when you use them as a vessel for your fish tacos.
6.  Place them in a tortilla warmer until ready to use.  If you don't have one, keep them wrapped in a clean kitchen towel.

Sooo easy!
I'll get to my fish taco recipe soon.. with that spicy Chipotle sauce and Guacamole.. mmMMmmMmm!!

Print Friendly and PDF

Friday, May 9, 2014

Baozi Chinese Steamed Meat Buns

Ever since receiving my bamboo steamer basket, I've been dreaming of baozi.. those fluffy savory steamed buns you can find at dim sum, usually filled with some meat based stuffing.  My fondest memory of baozi at the family owned Cambodian restaurant I used to go to when living in Picardie, the Angkor.  There they served one big one as an appetizer in an individual bamboo basket with some home made spicy sauce for dipping.  I had absolutely no idea how that strange piece of pleasure was made, and at that time, I didn't really care.. I had such easy access to it that it never even crossed my mind to make it myself.
Since moving to Lyon, I haven't found a "Vietnamese" or "Chinese" restaurant worth my time.  Don't get me wrong.. I'm sure they exist, but I've had so many disappointments that I'd rather eat homemade Chinese than some strange mass produced attempt to feed the crowds.
While researching, I stumbled upon Yi's video which made it look easy.
Yeast doesn't scare me.. but I wanted to try steamed leavened goodies.. plus, I like doing things with my little fingers.
Yield 12 buns
Ingredients
Dough:
250g white flour
3/4 tsp yeast (I used fresh)
25 mL warm water
115 mL warm milk
25g sugar
1/4 tsp salt
1/2 tsp baking powder
pinch baking soda
1 Tbsp oil
Stuffing:
200g ground beef (or chicken or turkey)
1/2 kohlrabi, grated (or 1 cup shredded cabbage)
1 handful kale, julienned
1 carrot, peeled and grated
2 handfuls black wood ear mushrooms, sliced thinly
1 egg
1 handful chopped cilantro
1 inch piece ginger, grated
1 Tbsp soy sauce
1 tsp sugar
1 Tbsp rice wine (I used rice vinegar)
1 tsp five spice
1/2 tsp sesame oil
1/4 tsp red pepper flakes
1 tsp pepper
1 Tbsp canola oil
Directions
1.  Make the dough.  Stir the warm water, milk, sugar, half the Tbsp of oil, and yeast together and let sit for a few minutes.  If using powdered yeast, it should foam.  I used fresh and it seems to fizz but not foam.  It actually seems like I can hear all the woken yeast life partying underwater.  I know I'm a little strange.
2.  Sift together the flour, salt, baking powder, and baking soda.  Pour in the liquid mixture and knead.    Do this for 15 minutes, then form a soft, but non sticky ball.  Use the other half Tbsp of oil to coat the ball.  Cover and let sit in a warm place.. like the oven (turned off please).  Leave it alone for minimum 2 hours.  It should double in size.
3.  While that is happening, make the stuffing.  I was planning on using chicken, but I had some ground beef ready to go and it worked out just perfectly.  In a large bowl, mix everything together with your hands until well incorporated.  Refrigerate for at least 30 minutes.
4.  When the dough has risen, knead it back into a ball, then separate it into 12 equal pieces.
5.  Roll each piece out into a 4 inch diameter disc.
Leave it a bit thicker in the center and thinner on the edges.  Get all the pieces ready and be sure to flour them to prevent them from sticking to each other.
6.  Take about 1 1/2 Tbsp stuffing and place into the center of one dough piece.  Then the technique is to make little folds starting on one side
and continuing all around the stuffing until the end is reached.
This is a technique I'm guessing becomes more natural the more you do it.  I felt like I was doing it wrong, but the end result came out just wonderfully.
Do this to all the pieces, then cover with a towel and let sit again for 30-45 minutes.  They will puff just slightly and that is what you want.
7.  Place the bamboo steamer in a wide pan with simmering water.  Place a few baozi in there making sure to have a piece of parchment paper under each one.  This will prevent the baozi from sticking to the bamboo.
8.  Steam on high heat (with a closed lid) for 15 minutes.  Then take off heat but do not uncover for 5 more minutes.
You are ready to serve.
I served mine with some steamed bok choy and a shredded kale salad and a bit of sriracha sauce.

I think I will be making these more often now that the bamboo steamer has no more secrets from me! I will try different fillings and different dipping sauces as well as different sizes.  I had 2 of these with 2 steamed bok choy halves for dinner and it was enough to fill me.  If I made them a little smaller they would be perfect as hors d'oeuvres for my next happy hour party.

I just can't get over how fluffy these come out after steaming.  The texture was exactly what I was expecting, and while they may not be as perfect as chez Angkor, they are pretty darn close!

Print Friendly and PDF

Friday, May 2, 2014

Fresh Yeast

Fresh yeast is one of those things you try once, and you can never go back to the powder ever again.
It gives fluffy tasty results in anything.  It's also cheaper than the packaged stuff and freezes well, so there really is no excuse to not use it.  I freeze it in 10g portions and then melt it between my fingers into the sugar water when I'm ready to use it.
I've used it in man'ouché, naan, and now bagels.
These bagels continued expanding even after the boil!
The end result is always more satisfying and full of emotion.
Bagels will now be a regular thing at the house.  I pretty much got a standing ovation from my guests.  I used the original recipe but made 10 intend of 12 so they were just slightly bigger in size.  I also used actual malt syrup instead of molasses and less salt.  Plus I may be a little better at getting the toppings on there.
I didn't have enough flour, but next time I'm definitely doubling the recipe (since there already gone anyway) and having a bagel brunch at the house.
Who's in?

Print Friendly and PDF

Thursday, January 2, 2014

Man'ouché Lebanese Bread with Sumac

I felt unusually inspired today.
While gazing distantly at my Saha cookbook, p 232 and 246.
I felt slightly saddened not to have any pita or Lebanese bread to eat with my hummus and falafels.
The answer was staring at me in the face with eloquent words and delicious descriptions… Man'ouché. A quick inventory of my pantry and yes, I have all the necessary ingredients!
(little did I know I would end up peeling chickpeas for almost 3 hours..)
These work best cooked in a stone oven.  The closest thing you can get to recreating a stone oven is with a pizza stone at the top rack of the oven at the highest temperature.  I suppose this would work on a cast iron skillet, but I have not tried so I cannot attest to the results.
Makes 12
Ingredients
12 oz (355g) flour (I used a mix of white and wheat)
1/2 tsp salt
7 oz (200 mL) warm water
3/4 tsp sugar
1 tsp yeast
1 Tbsp EVOO
well oiled bowl
Topping:
2 Tbsp EVOO
1 Tbsp sumac
Directions
1.  Stir the sugar into the water and add the yeast.  Let sit for at least 5 minutes.  The mixture should foam.
2.  Meanwhile sift the flour and salt together.
3.  Pour the water mixture into the flour and knead.
4.  As it starts coming together, add 1 Tbsp olive oil.  Knead for at least a good 10 minutes until the ball is nice, firm and elastic.
5.  Place the ball in a well oiled bowl, cover, and let rise at least 2 hours.  I let mine rise for much much longer.
6.  Punch down the dough and separate into 12 equal pieces.  Mine were about 45g each.  Lightly flour the balls and cover with a towel.  Let rest again another 10 minutes (while you preheat the oven).
7.  Roll out each piece to a 15cm diameter circle.  My circles are never perfectly round.. but you get the idea.  Brush with a mixture of olive oil and sumac.  I was supposed to have some zahatar in the mix, but I ran out while making my falafels.
8.  Place on the pizza stone and cook for approximately 2 minutes.  It should puff up a bit, but not harden.

Serve with hummus or baba ganoush or whatever you want, but the combination pictured below was simply divine.
Hummus, cucumbers, halved yellow cherry tomatoes, falafels with tahini yogurt sauce.
This time I made my falafels without adding bread crumbs or flour.  They were just simply the most perfect falafels I've ever imagined.. and they materialized.
Maybe it was the hours of labor peeling each individual chickpea with cramped hand muscles and raisin fingers.
Maybe it was just the love….

Print Friendly and PDF

Saturday, December 28, 2013

Pintade Pizza with Kale Pesto

There are many many things you can do with holiday leftovers..
Leave them as they are and keep eating the same meal over and over again,
make an omelet out of them
make a burrito or tacos (by the way, who was the genius who defined tacos in Lyon? tssk)
toss them into pasta or fried rice
sandwiches
soup..
this list can go on forever, and that's a good thing.
The last of my guinea fowl or pintade is going to be a fancy topping to my pizza.
I don't have any basil, so my sauce is going to be kale pesto.. because I don't do tomato sauce on homemade pizza.  Well, not yet anyway.
Ingredients
Dough:
100g all purpose flour
130g whole wheat flour
5g (1/2 tsp) salt
12 cL (4 fl oz) warm water
5g sugar
10g (2 tsp) yeast
2 tbsp EVOO
Cornmeal for rolling and base
oil for hands and bowl
Toppings:
Kale pesto
 
Griddled zucchini
Leftover shredded pintade or chicken or turkey
Sliced mozzarella
Roasted tomatoes
Parmesan + Shredded Swiss
Egg yolks after about 10 minutes at the highest oven temperature, then cooked 3 minutes all together
Chili oil or flakes for garnish

I reposted the dough ingredients, because it's my basic recipe I use for all my pizzas.

Satisfyingly delicious..
The kale pesto didn't have an overpowering kale flavor, which is good because it's kind of supposed to be an illusion.
We'll see more of that kale action over pasta very soon...

Print Friendly and PDF

Friday, December 27, 2013

Bagels from my Oven

I haven't had a decent bagel since living in the US.  Actually, longer than that because Florida doesn't really have extraordinary bagels the way San Diego does.  Purists would argue that New York is the only place to get a "real" bagel.
In any case, I haven't seen anything "real" here in France, although there are some pretty decent attempts popping up in Lyon.  Bagel shops are becoming trendy in Europe, which is great, but please stop putting that cheap nasty salty smoked salmon on them.. Pretty please?  Lox are not heavy in smoky flavor and in my opinion, are not interchangeable with smoked salmon!  I suppose putting a sashimi cut of salmon would be more appropriate than smoked.  Bah!
Anyway, when I saw that the Amateur Gourmet made his own bagels, the idea of making and eating bagels has been lingering around.  The only thing I was waiting for was an opportunity to buy malt syrup.  The original recipe calls for malt syrup, which I couldn't find anywhere here in France (seriously.. all over France) and couldn't find in Quebec either.  I supposed I could have purchased some online, but that's cheating.  My desire to start my bagel project surpassed my desire to obtain malt syrup, so I looked up substitutes, and it so happens that molasses is a worthy replacement.  Bingo!  I have molasses.
Let the bagel making begin!
Makes 12 small bagels.
Ingredients
4 cups American bread flour (I used 200g T110 whole wheat + 315g T65 white)
1 Tbsp kosher salt
1 1/2 cups (35 cL) warm water
4 tsp sugar
1/4 oz (7g) or 2 1/4 tsp active dry yeast
2 Tbsp malt syrup (I used 1 Tbsp molasses)
a very well oiled bowl
Toppings:
Black sesame seeds
White sesame seeds
Poppy seeds
Dried shallots
Flax seeds
Whatever other seeds you see fit
Directions
1.  Stir the sugar into the warm water and sprinkle the yeast on top.  Let it sit a few minutes until it foams, then stir in the malt syrup or molasses.
2.  Meanwhile, sift the flours and salt together.
3.  Pour the water yeast sugar into the flour mixture a little at a time, while kneading.  I poured the whole thing in with initially 480g flour.  It was too wet and I had to add more flour (thus the 515g which was perfect.)
4.  Knead and knead and knead for at least 30 minutes.  I don't have a kitchen aid and I'm glad I don't because it would take all the fun and love out of it.  So knead for a long time.  At the end you should have a slightly firm elastic ball that is not too dry.
5.  Place the ball into a well oiled bowl, making sure to cover the whole surface of the ball with oil.  Cover with a towel and let sit for at least 1 hour.  I let it for 2 because I had some errands to run.  During this step, it should rise, but not crazy insanely over the top.
6.  Punch the risen ball down, knead a bit, then separate the dough into 12 equal pieces.  Mine were approximately 75g each (about 2.6 oz.)
7.  Make a bagel shape with each ball of dough.  I flattened it a bit, then poked a hole through it and pinched it together against the palm of one hand for the round ring shape, trying to get it as equally distributed as possible.  The original recipe has you roll a log and then pinch it together, but that just risks it falling apart.   I find my method easier.  You want the hole to be a little larger than a quarter (or a 2€ haha)
8.  Do this to each piece and let them rest at least 10 minutes in a warm place.  I put them in my cold oven while I put the water to boil.
9.  In a large pot, bring some water with a handful of sugar to a very active simmer (not a full out boil).
10.  Reshape the raw bagel if needed before boiling.  Boil by 3 or 4 for 30 seconds on each side, then remove onto a rack so the they can drip dry.
They will shrivel a bit, but that's ok.
11.  While still "wet" sprinkle desired toppings over the bagels.  I did some all sesame, all poppy, all shallots, then I did a mix of everything including the flax seeds.
12.  Once they are all decorated, they are ready to be baked.  Preheat oven to 410°F (210°C).  Place the bagels on parchment paper with enough separation between them.
13.  Bake for 20 to 25 minutes, rotating once so that they have a nice caramel colored crust on top.
14.  Let cool on a wire rack for at least 30 minutes before digging in.

Your house will smell so good the neighbors will start wandering in and you'll have to politely shoo them away.
These are a good breakfast size, but I'll definitely make them bigger next time.  They were a little dense, but wonderfully chewy the way a bagel should be.  I'm guessing my flour did not have as much gluten as "bread flour."  This is a quadruple thumbs up recipe that tops any of the bagel places in Lyon (or in CA for that matter).

My stomach is growling as I imagine my "everything" bagel smeared with philadelphia cream cheese and dill, topped with thinly sliced salmon (yes, raw) sliced tomato, red onion slices, and capers…
Oh yes the pearly gates have let me in…
I just had 2 of these for dinner.
I'm realizing how lucky I was to have a lunch like this almost every day during my youth.  My mother used to pack all kinds of different bagel sandwich creations for me while others got PB & J..

Breakfast tomorrow morning will consist of a sesame seed bagel with cream cheese, roasted turkey, avocado, and an egg with some hot sauce.. just like old times =)

Print Friendly and PDF

Wednesday, October 30, 2013

I Heart Artichokes Pizza

Grilled or roasted artichoke heart to be more specific.
And not just on pizza, in pasta, or as a side to a nicely grilled piece of meat or fish...and in a dip, too.
Forget your childhood trauma and let me guide you to the light...
spread you out to 30cm diameter (the size of my pizza stone).
I made the dough the night before and let it work itself all night and all day.  This was the best pizza dough since the beginning of my pizza endeavors.
Lather you with pesto, decorate you with grilled artichoke hearts, roasted tomatoes
add some sliced mozzarella and ham (optional)
Sprinkle you with fresh pepper and a nice handful of parmesan, then in the oven you go, highest temp, bottom rack, on the pizza stone for 9 minutes,
then add egg yolks and cook another 2 minutes.

You'll have a perfect airy crust, crunchy on the outside, slightly chewy on the inside, and toppings bursting with flavor...
Bon appetit!

Print Friendly and PDF

Friday, September 13, 2013

Grilled Veggie Whole Wheat Pizza

My last pizza experiences were fabulous.  I'm amazed at the results the pizza stone gives to the dough, and how perfect it feels when you cut it and eat it.  Pizza used to intimidate me.  I feel I have conquered the beast.
This time I integrated whole wheat flour.  Next time, it will be completely whole wheat.  I was afraid the texture would be different than all purpose flour, but it was still just wonderfully perfect.  If my 100% whole wheat goes well, I'll have to try incorporating buckwheat flour.  Oooh.
Ah yes.. I found spaghetti squash today and it's getting me all excited and dandy for tomorrow's meal.  Double Oooh!
Back to the pizza.  I went the grilled veggie, ham, and egg route.  Eggs should be mandatory on pizza. 
Ingredients
Dough:
100g all purpose flour
130g whole wheat flour
5g (1/2 tsp) salt
15cL (5 fl oz) warm water
5g sugar
10g (2 tsp) yeast
2 tbsp EVOO
Cornmeal for rolling and base
Toppings:
Onions sautéed in EVOO and Basaalmic vinegar
Roasted zucchini
Roasted tomatoes
Roasted green bell
Sliced mozzarella
Ham
Parmesan
Egg yolks

When doing eggs on pizza, make sure to add them toward the end.  I added mine for 5 minutes and it was a little long.  2 minutes would have been perfect.
Either way, this 30cm pizza was enough for 2.5 people.  We were both really hungry but didn't make it to the end.
I'm going to gladly volunteer to be the half person tomorrow at breakfast.
Did I just shock some French people?  Pizza for breakfast?
Yes and yes!!!

Print Friendly and PDF

Sunday, August 25, 2013

Homemade Pizza on Pizza Stone

Ok ok.. My pizza stone is not solely for Naan.  It is also, most appropriately, for pizza.  Before I start getting adventurous with crazy pizza flour and oil combinations, I'm sticking to the simple, straightforward pizza dough the stone was made for.  I also want to master the normal before attacking the paranormal.  I'm giving the flour in weight, because US flour is different than French all purpose flour in density.. and it helps if a different flour than wheat needs to be used.
Ingredients:
220g all purpose flour
5g (1/2 tsp) salt
12cL (4 fl oz) warm water
5g sugar
10g (2 tsp) yeast
2 tbsp EVOO
Cornmeal for rolling and base
Directions:
1.  Stir the sugar into the warm water, then add the yeast and let sit for 5 minutes.  It should foam.
2.  Meanwhile, sift the flour and salt together.  Oil your hands and add the oil to the flour, mixingwell with your oiled hands, then make a well.
3.  When the yeast is foamy, add it into the flour well and incorporate with your oiled hands.  Doing this, rather than using a machine, will make you feel in touch with your inner human.. Or whatever species you are.  What I mean is, it makes you feel alive and aware of the process, which is very important.  Plus, you get to take your rings off and get your hands dirty.
Do this for a few minutes, until the dough has come together into a nice wet ball.
4.  Slather just a bit of EVOO over the dough ball and either cover and let rise in a warm spot for 2 hours, punchung it down after 1 hour, or plastic wrapping it and putting it in the fridge for a slow rise...16-24 hours later.  I chose the later route, because it's 10pm and I already ate and don't have any mozzarella or fresh basil right this second.  If I did, I would still be making pizza, regardless of whether I had already eaten or not.
5.  When ready to roll, prepare all the toppings you're going to be using.  Stretch out the dough to fit your pizza pan or pizza stone, sprinkling cornmeal liberally on the base.  Mine is 1 ft (30cm) in diameter, so I'm going for that.  I read somewhere not to use a rolling pin, but to do it by hand, if possible by tossing.  I tried, but gave in to the rolling pin, at least to get the round shape.  Then I pressed it with my fingers.
6.  Preheat the oven to the highest setting with the pizza stone inside on the lowest rack.  Slide the prepared pizza onto the stone and cook until done... about 8-10 minutes.  I'm going for crispy crust, chewy on the inside.  The cornmeal makes it perfect.

Toppings I used:
Rocket Pesto
Roasted artichoke hearts
Roasted tomatoes
Roasted bell
Mozzarella
Feta
Shredded swiss
Parmesan
Shredded chicken
Chili oil

I had been saving my roasted eggplant slices for this moment, and completely forgot about them.  Shame on me.
This pizza was beyond delicious!  Not only were the toppings wonderful together, the crust was exactly how I wanted it.  I was actually surprised at how perfect it came out.  I was told it was better than the place I usually go for pizza!
I kept a small part of the dough to secretly make one later with truffle oil...mmmmmmm

Print Friendly and PDF

Sunday, August 18, 2013

Naan

Naan has always intimidated me.  I tried making it once, when I was living in Florida, and it was a flop.  The bread was hard and not fluffy at all.  I used a different recipe without egg so it's one of the possible reasons it didn't work.  Also, in 2009 I was not experienced enough in the kitchen to attempt such things.  My how things have changed!  What I was making back then was delicious, of course, but much less technical and precise.  Anyway, the only real way to make naan is in a tandoor, right? Well, I'm hoping to prove this theory wrong...because I don't own a tandoor (yet?) but my pizza stone should do the trick.  Plus, I've never flopped a recipe from ShowMetheCurry...well at least not yet.
Yield 8 naan
Ingredients
2 cups (275g) all purpose flour
1 tsp salt
4 tsp oil
1/2 cup warm water
1 tsp yeast
1 tsp sugar
1 well beaten medium egg
2 Tbsp yogurt
Optional toppings:
minced garlic
nigella seeds
minced onion
Directions
1.  Microwave the water and sugar for 30 seconds, then add the yeast and let sit for a few minutes.  If you have fast acting, it should foam.  Today, mine foamed for the first time.  Oh how that made me happy!
2.  Sift together the flour and salt.  Add the oil and gently mix with your hands.
3.  In a separate mixing bowl, beat the yogurt into the egg, then add the water yeast mixture.
4.  Add the flour into the wet mixture a little at a time while kneading.  It should end up as a soft ball of dough.  You can add a few drops of oil to coat the ball so it avoids forming a hard skin while it rises.
5.  Cover with a towel and let it hang out in a warm place for at least 2 hours, punching it down after the first hour.  Mine is hanging out for longer, which is fine too.
6.  When ready, preheat your oven to the highest temperature with the puzza stone inside.  Divide the dough into 8 balls depending on how big you want your naan to be.
Roll each ball out to 1/2 cm thick ovals.
7.  When oven is hot, place the rolled naan onto the pizza stone and cook on the highest rack of the oven for 3-5 minutes without flipping.  They should be golden and bubbly.  Be careful not to wait too long or they will harden.  My first ones did until I figured out the technique.

These were not restaurant style, but good enough to make me do it again.  I think I might have too much Guju blood in me.  I can make a perfect roti... that's good enough for now, right?  I even think roti may have been more appropriate for the meal I served, but shhhh.
My guests loved them and reassured me that they were restaurant quality.

Print Friendly and PDF

Monday, April 29, 2013

Rotis

Something hard to live without when you're addicted to the part of life which yields the most pleasure...
Ingredients:
2 cups whole wheat flour (230g)
1/2 cup warm water
1/2 tsp salt
1 Tbsp oil
all purpose flour for rolling
 Directions:
1.  Sift the whole wheat flour and salt together.
2.  Add the warm water a little at a time and mix with your bare ringless hands.  Oil the hands to avoid the stickiness.
3.  Add a bit of oil if the dough is not moist enough.  Knead until even.
4.  Cover and let sit for at least 30 minutes.
5.  Separate dough into 16-20 balls.  I make about 6-8 balls for a 2 person meal.  This dough should last 4-6 meals for 1.  The dough can be frozen or stored several days refridgerated, so make as much as you want to eat, and store the rest.  Rotis are better when they're freshly made.
Roll out the balls into a more or less 1/16" thick circle.  I actually never measured, I just kind of eye it.  You don't want them too thick.  Sprinkle all purpose flour liberally to help you roll, or the dough will stick to the rolling pin.
6.  Cook in a hot skillet until it starts to bubble, then turn over until it puffs up.  The best is to put it on an open flame if you have a gas burner.  I do not.  It works just as well this way.  I wish papadams were this easy.

This takes some practice.  The first or 2nd time, you will feel discouraged because the rotis do not have the exact texture you were expecting, or they were too thick, or too hard.  Magically, you will find the correct rythm and thickness that suits you.  There is no other way to explain it.  Just like all good things in life, practice makes perfect.

Print Friendly and PDF

Monday, March 18, 2013

Cheesy Jalapeño Muffins

My baking urges are flaring up again.  This time I'm going the savory route.  I'm really not used to eating that much sugar and I've been overdosing lately.  Instead of making a spicy sweet cookie, I'm making a spicy savory muffin.  Besides, I finished all my mango slices and I can't turn back time.  I'm thinking these will be fun alongside a soup or even as a munchie.  If it's "too spicy" I may even get to have them all to myself.  Is that evil of me?
Yield 17
Ingredients:
2 cups (240g) whole wheat flour
1/2 tsp baking soda
1/4 tsp fresh cracked black pepper
1 Tbsp sugar
3/4 tsp salt
2 cups shredded swiss or cheddar (oh dear I wish I had cheddar on hand)
2 Tbsp dried onion
1/2 cup plain yogurt
2 Tbsp milk
1/2 cup cream cheese
1/4 cup (56g) melted butter
2 eggs
1 whole Moroccan chili, diced (or 2 large Tbsp)
squeeze of 1/2 a lemon
Directions:
 1.  In one bowl, sift together the dry ingredients and add the cheese and onion.
2.  In another bowl, whisk together the wet ingredients and add the chili.
3.  Gently add the wet ingredients to the dry ingredients until incorporated.
4.  Grease and flour your muffin tins and fill them up.
5.  Bake at 400°F (205°C) for 15-17 minutes.

The result is an extremely pleasant, not too spicy, moist, melt in your mouth, almost creamy "muffin."  At this point, it is more like a bread roll than a muffin for its fluffiness.  I inadvertantly closed my eyes during my first bite.   Mmmmmmm!!!
I had fun with the last batch and added a piece of sundried tomato on top.
I know I named these "jalapeño" muffins, but we don't have that variety of chilis here in France.  The closest I can find is a Moroccan chili.  If you can pick them by smell, you can hit the jackpot with a spicy one.  With that said, I'd probably add another one next time I make these.

These are heavenly slightly warmed alongside some Fish Chowder!

* I made these again with half cornmeal/half whole wheat flour, and actual cheddar.
Wow.. double mind blowing.  Perfect with some chili!!

Print Friendly and PDF