Search this blog

Translate

Sunday, May 18, 2014

Kung Pao Chicken and Cauliflower with Fried Rice

I'm really falling in love with Sichuan cuisine.  While waiting to actually get to travel to that lovely refined province and until I get my hands on some Pixian Doubanjiang and black vinegar, I found that this classic dish is quite easy to make and it's easy to have the ingredients on hand.  I wouldn't call this the authentic version.  I did have to sub rice vinegar for black vinegar and rice wine.. and I decided to use cashews instead of peanuts, but I think anyone would agree that no 2 households would make this dish in exactly the same way.
I love how it tasted better than restaurant style and with a lot less oil and salt.
Adapted from Yi Reservation (my new Chinese cuisine tutor)
Serves 4
Ingredients
1/2 lb (250g) cubed chicken breast
1/2 lb (250g) chopped cauliflower
3 Tbsp vegetable oil
1/2 cup unsalted cashews (or peanuts)
3-4 dried red chilis, cut in half crosswise and seeded
2 Tbsp grated ginger
2 chopped scallions
1 bell pepper, cut into 1 inch squares
Sauce:
1 Tbsp dark soy sauce (or GF alternative)
1 Tbsp light soy sauce (or GF alternative)
1 tsp sugar
1 1/2 Tbsp black vinegar (I subbed rice vinegar)
1/2 Tbsp corn starch diluted in 2 Tbsp water
Marinade:
1 tsp light soy sauce (or GF alternative)
1/2 Tbsp corn starch
1 Tbsp rice wine (I subbed rice vinegar)
1/2 tsp white pepper
Directions
1.  Mix the marinade ingredients together and separately marinate the chicken cubes and cauliflower for at least 20 minutes.  Prep the other ingredients during this time.
2.  Heat the oil in a wok and fry the cashews until golden.  Reserve and set aside.
3.  In the same oil, fry the chicken cubes without overcrowding the pan for 2 minutes or until they turn white.  Reserve and set aside.  This seals in the juices and prevents the chicken breast from being too dry.. and it really works.
4.  Leave about 2 Tbsp of the oil in the wok and throw out the rest.  Fry the red chilis until they turn dark, then add the ginger and scallions and cook for about 30 seconds.
5.  Add in the bell pepper and cook for another minute, then add the cauliflower and cook for another 2-3 minutes.
6.  Add the marinated chicken and stir fry for another few minutes.  It should start smelling wonderful.
7.  Add the sauce and cashews, toss well, then remove from heat, cover, and set aside until you are ready to eat.

Serve hot or warm with some fried rice.
For the easy but versatile fried rice:
Heat 1 Tbsp oil in a wide flat pan.  Add a beaten egg and peas in the center and cook while agitating, then add some rice, stir, then spread out the rice along the pan.  Wait a few minutes, then stir.  Keep adding rice in this way so all of it gets "fried" and none of it clumps.

I started out with chopsticks, but finished with a fork... I have to admit that it is easier to eat noodles with chopsticks than rice...

Print Friendly and PDF

Saturday, May 17, 2014

Avocado Banana Muffins

Here is another avocado moment I had recently.  I figured it would work out and be low fat and low sugar as well.  Why not have the best of all worlds?
Yield 15 muffins
Ingredients
2 over ripe bananas, mashed
1 1/2 (190g) avocado
2 eggs
100g blueberry jam
1 packet (7g) vanilla sugar
3/4 tsp baking soda
1/2 tsp baking powder
1/2 tsp salt
1heaping cup (130g) flour
Toppings:
shaved coconut
Directions
1.  Beat together the eggs, avocado, bananas, vanilla, and jam.
2.  In a separate mixing bowl, sift together the flour, salt, baking powder, and baking soda.
3.  Gently mix the wet ingredients into the dry ingredients.  The texture should not be dry.. it should be very goopy.
4.  Grease your muffin tins and fill them 3/4 to the top, then sprinkle with the coconut.
5.  Bake in a 375°F (180°C) oven for 18-20 minutes or until a toothpick comes out clean after a nice stab.

These are very tasty, but they do not have a muffin texture.  I thought the avocado would have the same properties as oil, but even though the raw texture was the same as my other muffins, the rising process didn't quite make it.  They are like little custard cups though, which are very pleasant and have a hint of avocado as the aftertaste.
I'd probably do this again, but as custard pie instead of muffins.  It is remarkable that they are without any added fat, and apart from the blueberry jam and vanilla, no extra sugar... and they are bursting with flavor!

Print Friendly and PDF

Friday, May 16, 2014

Ratatouille with Piment d'Espelette and Capers

This may be appalling to the purists, but here is the most heart warming and flavorful ratatouille I've ever had.  I followed most of the basic rules, but added some piment d'espelette into the seasoning and sprinkled some capers at the end.  I chose to serve mine under a poached egg, but that is completely optional.  Ratatouille goes well with any type of protein, but traditionally, it is served with lamb.
I'm not very traditional, but this is actually an authentic French recipe (apart from my 2 minor additions) and I don't think I'd make it any other way in the future.
The sexiest part of ratatouille is the eggplant.  Have I mentioned how delicious and creamy eggplant can make me delirious?  It does.. and every single time.  I tasted pieces of eggplant at various stages of cooking and my eyes closed in pleasure every time.
The other important part of making good ratatouille is having quality ingredients.  You want all those veggies to shine so they might as well be top notch on their own.  Last and definitely not least is the quality of the olive oil you use.  With the good stuff, a little will take you a long way and you won't need to season much because all the flavor will be in and absorbed by the olive oil.
I used some hand pressed stuff from a friend's olive trees.
I'm just remembering why I love living in France.
Ah yes, as I was chopping the veggies for this while doing a few other things at the same time in the kitchen, the exact thoughts that went through my mind and in this order were:

Damn this eggplant in olive oil is good I would probably just eat it half cooked like this.. oops it dripped on the floor...it IS true I do make a lot of bordel (mess) when I'm cooking... hmm how would "bordel" translate literally?... whorehouse?... haha vive la France!

Serves 4-5 as a side
Ingredients
1 very large eggplant, cubed
1 large zucchini, cubed
juice from 1 lime
1 large yellow onion, chopped
3 cloves garlic, minced
1 large bell pepper (I used greed corne de boeuf), chopped
2 large very juicy tomatoes, chopped
6 Tbsp very fine quality EVOO
1 tsp dried thyme
1 tsp dried basil
1 tsp fresh cracked pepper
2 (or more) tsp flake salt
1 tsp dried piment d'espelette
2 tsp capers
(optional) 1 poached egg per person
Directions
1.  Toss the eggplant and zucchini with the lime juice and 1 tsp of the flake salt.  Place in a colander and let "sweat" for 30 minutes.  During this time you can prep your other ingredients or talk to yourself.
2.  Heat 3 Tbsp olive oil in a wok and add the sweated eggplant cubes.  Stir well so all the pieces are coated with oil and add the basil and 1/2 tsp piment d'espelette.  Cook for about 5 minutes until tender, then reserve.  (I think the purists peel it, first but I like the purple sexiness in my food). 
3.  Add 2 more Tbsp olive oil in the wok and add the sweated zucchini.  Stir well and add the thyme and the remaining piment d'espelette.  Cook for a bit longer than the eggplant, then reserve with the eggplant.  I would have done both together, but my wok was not big enough and I wanted it to be decadent.
4.  Add the remaining 1 Tbsp of olive oil in the wok and add the chopped onions with the other tsp flake salt.  Cook until translucent.
5.  Add the garlic and bell peppers.  Stir fry about 1-2 minutes, then add the tomatoes.  (Purists will have you blanch, peel, and juice them first.. but I really don't believe that is necessary).
6.  When the tomatoes start becoming a bit mushy (maybe 2-3 minutes) add back in the eggplant and zucchini with all the delicious juice goodness it is witholding.
7.  Stir, cover, and cook on low heat for about 20-30 minutes, making sure that nothing sticks to the bottom of your wok.
8.  Stir in the capers, then taste and adjust the seasoning.  I didn't need to add anything.. it was perfect.

Serve as a side or as I did, a wholesome meal with a poached egg.
The best part of meals like this is that it's essentially a side dish, so tomorrow will be a whole other adventure for my re-invented ratatouille!

Print Friendly and PDF

Monday, May 12, 2014

Cilantro Lime Avocado Cookies

I've been speaking to my avocados, and they kindly advised me to use them in place of butter or oil in my oven.  Interesting, I replied, but won't you taint the flavors?
That's the whole point, they replied.
And so I agreed to give it a try.
Adapted from AtablespoonofLiz
yield 35 cookies
Ingredients
1/3 cup (75g) room temperature butter
1 small avocado, mashed (about 95g)
3/4 cup (120g) cane sugar
1 egg, beaten
2 Tbsp lime juice (I used 1 whole lime)
2 Tbsp lime zest (I zested 2 limes)
1/2 cup finely chopped cilantro
1 3/4 cup (240g) flour
1 tsp baking soda
1/2 tsp salt
topping:
cane sugar
pinch cayenne
shredded coconut
extra lime zest if you have it
Directions
1.  Sift together the flour, salt, and baking soda.
2.  In a separate mixing bowl, cream the butter and sugar together, then add the egg and avocado until the mixture is nice and smooth.
3.  Stir in the lime juice, zest, and cilantro until well incorporated.
4.  A little at a time, add the dry ingredients to the wet ingredients and mix well.  
5.  Plop tablespoon sized balls of dough, drop them into the topping, and press down on a cookie sheet.
6.  Bake for 175°C 350°F for about 12-15 minutes.  Carefully remove and let cool on a wire rack.

Be amazed at what a little thinking out of the box can produce.
The toppings are completely optional, but I feel like my cookies are naked without them.
The cilantro is subtle as is the avocado, but the mix of it all together is perfect with a hint of tang from the lime and a little kick from the cayenne topping.
I'd say these are a win.

Print Friendly and PDF

Sunday, May 11, 2014

Chinese Braised Chicken with String Black Mushrooms

I recently had a Chinese epiphany.
I want to make all types of authentic Chinese dishes, the ones you don't necessarily find in restaurants, but might find in a Chinese home.  Something about the hot broth, slippery noodles, crunchy wontons, chewy jiaozi, mint wrapped egg rolls, and fluffy buns that makes me go absolutely wild.  I love the way the culture makes a ton of different dishes and everybody shares them at the table.. sort of like an Indian thali.
Most of all, I love uncovering the mysteries behind the deep flavors.  So far, I have uncovered just a few, but it is motivating me to keep on going.
Here is an authentic northern Chinese dish inspired by Yi Reservation.
Serves 4-5
Ingredients
Marinade:
1 Tbsp grated ginger
2 Tbsp rice vinegar
1 tsp flake salt
Dish:
1 lb chicken legs or thighs, deboned and cubed (keep the bones)
1/2 Tbsp canola oil
2 dried red chilis
2 star anis
1 tsp sichuan pepper
2 cloves garlic, finely grated
1 carrot, peeled and thickly grated
1/2 kohlrabi, peeled and thickly grated
1 bok choy, sliced
3 Tbsp soy sauce (or GF alternative)
1 Tbsp rice vinegar
40g dried string black mushrooms (half a bag)
4 cups water
2 bunches cellophane noodles, soaked in warm water
1 tsp sesame oil
1 Tbsp sugar
1/2 tsp white pepper
chopped cilantro and scallions for garnish
Directions
1.  Mix the marinade ingredients together and rub all over the cubed chicken.  Refrigerate while you chop the vegetables.  I used skin on bone in chicken thighs.  The original recipe has you cut it into cubes bone and all, but I thought it might be more pleasant to eat without fishing pieces of bone out of my mouth, so I cut the meat off the bones, but kept the bones in there for the stock.
2.  In a large wok, heat the oil and fry the dried chills, star anis, and sichuan pepper for a few seconds until the aromas start wafting.
3.  Add in the garlic and marinated chicken with the bones.  Cook for about 5 minutes until the skins start curling.  You want to get a nice color on there, so don't overcrowd the pan.
4.  Add the carrots, kohlrabi, bok choy, soy sauce, and rice vinegar.  Stir fry for a few minutes.
5.  Add the dried mushrooms and the water.  Bring to a boil, then simmer, covered for about 20 minutes.  Your beautiful broth will develop during this time so don't cut it short.
6.  Add in the soaked noodles, sesame oil, sugar, and pepper and cook for another 5 minutes.
mmm isn't that lovely?

Serve garnished with chopped cilantro and scallions if you have them.
I served mine alongside some Baozi for the full blown experience.
I love how this is full of spice and flavor, but not fiery hot.  I was careful not to break the red chilis, since those are usually the culprit when I make my meals "too spicy."
There is a ma la event that happens if you bite into one of those sichuan peppercorns... your mouth and tongue go numb for a few seconds, and it's strangely pleasant.  I think they call that feeling Ma La.  Here the ma la is very very subtle, not overwhelming.... but it makes me want to try the full blown ma la very soon...

Print Friendly and PDF

Friday, May 9, 2014

Baozi Chinese Steamed Meat Buns

Ever since receiving my bamboo steamer basket, I've been dreaming of baozi.. those fluffy savory steamed buns you can find at dim sum, usually filled with some meat based stuffing.  My fondest memory of baozi at the family owned Cambodian restaurant I used to go to when living in Picardie, the Angkor.  There they served one big one as an appetizer in an individual bamboo basket with some home made spicy sauce for dipping.  I had absolutely no idea how that strange piece of pleasure was made, and at that time, I didn't really care.. I had such easy access to it that it never even crossed my mind to make it myself.
Since moving to Lyon, I haven't found a "Vietnamese" or "Chinese" restaurant worth my time.  Don't get me wrong.. I'm sure they exist, but I've had so many disappointments that I'd rather eat homemade Chinese than some strange mass produced attempt to feed the crowds.
While researching, I stumbled upon Yi's video which made it look easy.
Yeast doesn't scare me.. but I wanted to try steamed leavened goodies.. plus, I like doing things with my little fingers.
Yield 12 buns
Ingredients
Dough:
250g white flour
3/4 tsp yeast (I used fresh)
25 mL warm water
115 mL warm milk
25g sugar
1/4 tsp salt
1/2 tsp baking powder
pinch baking soda
1 Tbsp oil
Stuffing:
200g ground beef (or chicken or turkey)
1/2 kohlrabi, grated (or 1 cup shredded cabbage)
1 handful kale, julienned
1 carrot, peeled and grated
2 handfuls black wood ear mushrooms, sliced thinly
1 egg
1 handful chopped cilantro
1 inch piece ginger, grated
1 Tbsp soy sauce
1 tsp sugar
1 Tbsp rice wine (I used rice vinegar)
1 tsp five spice
1/2 tsp sesame oil
1/4 tsp red pepper flakes
1 tsp pepper
1 Tbsp canola oil
Directions
1.  Make the dough.  Stir the warm water, milk, sugar, half the Tbsp of oil, and yeast together and let sit for a few minutes.  If using powdered yeast, it should foam.  I used fresh and it seems to fizz but not foam.  It actually seems like I can hear all the woken yeast life partying underwater.  I know I'm a little strange.
2.  Sift together the flour, salt, baking powder, and baking soda.  Pour in the liquid mixture and knead.    Do this for 15 minutes, then form a soft, but non sticky ball.  Use the other half Tbsp of oil to coat the ball.  Cover and let sit in a warm place.. like the oven (turned off please).  Leave it alone for minimum 2 hours.  It should double in size.
3.  While that is happening, make the stuffing.  I was planning on using chicken, but I had some ground beef ready to go and it worked out just perfectly.  In a large bowl, mix everything together with your hands until well incorporated.  Refrigerate for at least 30 minutes.
4.  When the dough has risen, knead it back into a ball, then separate it into 12 equal pieces.
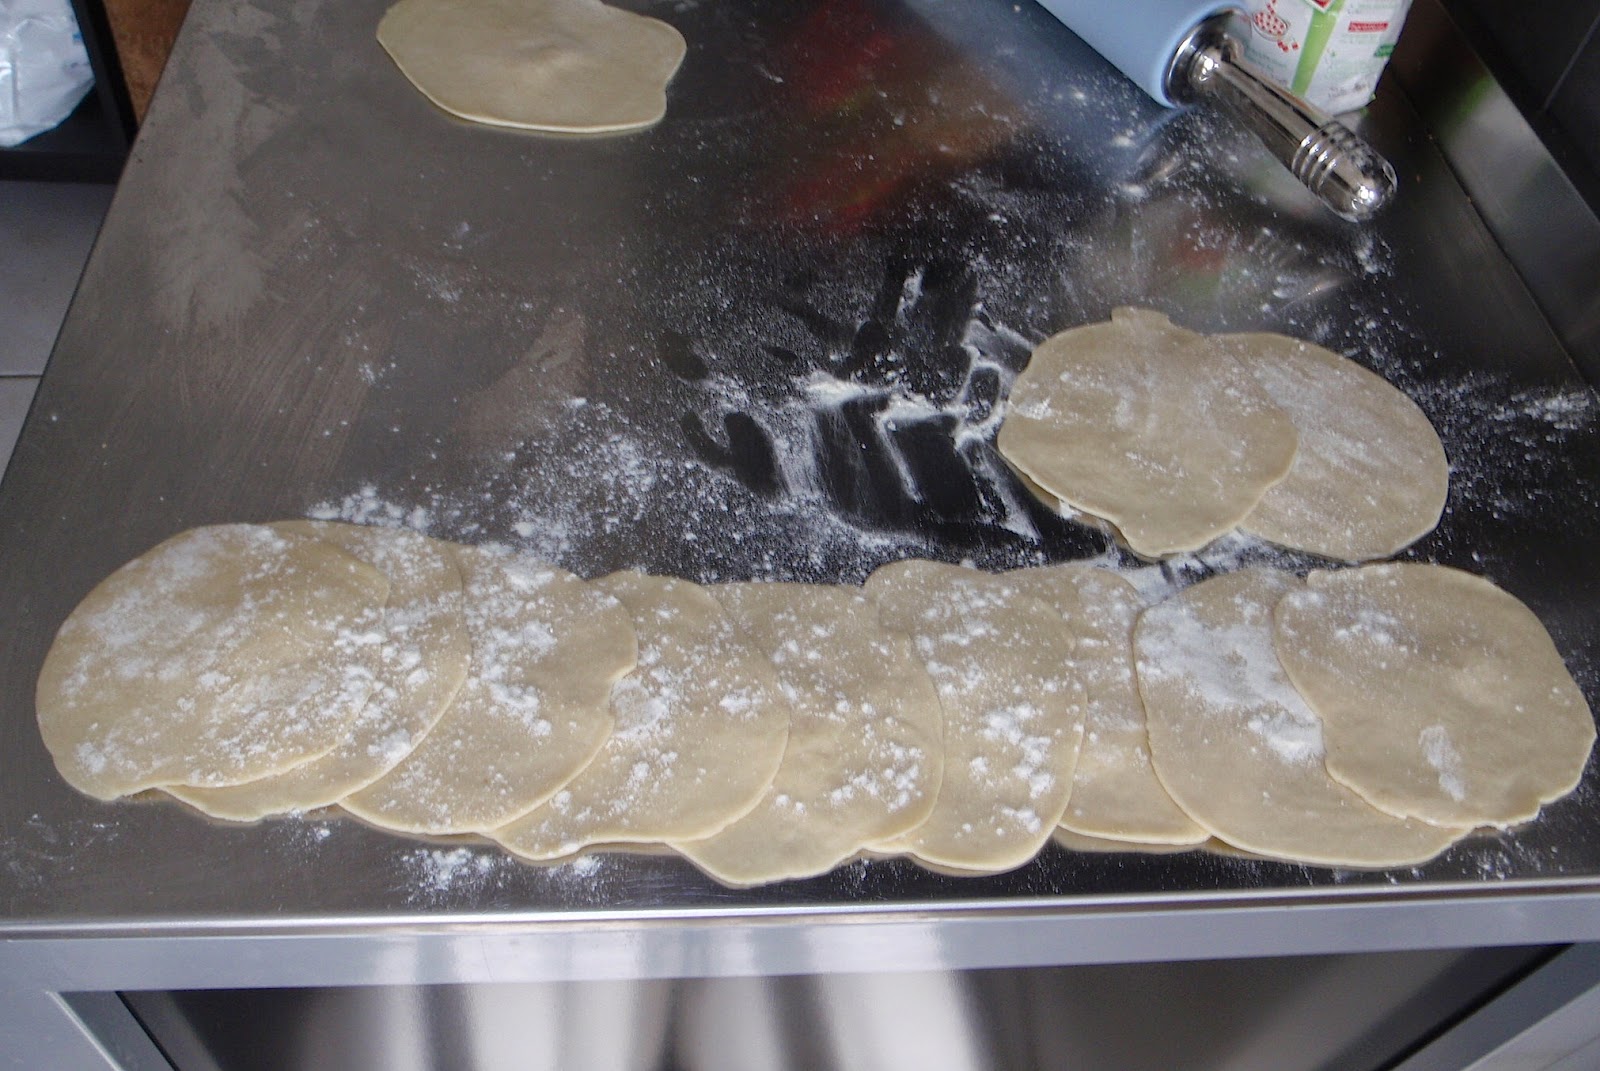
5.  Roll each piece out into a 4 inch diameter disc.
Leave it a bit thicker in the center and thinner on the edges.  Get all the pieces ready and be sure to flour them to prevent them from sticking to each other.
6.  Take about 1 1/2 Tbsp stuffing and place into the center of one dough piece.  Then the technique is to make little folds starting on one side
and continuing all around the stuffing until the end is reached.
This is a technique I'm guessing becomes more natural the more you do it.  I felt like I was doing it wrong, but the end result came out just wonderfully.
Do this to all the pieces, then cover with a towel and let sit again for 30-45 minutes.  They will puff just slightly and that is what you want.
7.  Place the bamboo steamer in a wide pan with simmering water.  Place a few baozi in there making sure to have a piece of parchment paper under each one.  This will prevent the baozi from sticking to the bamboo.
8.  Steam on high heat (with a closed lid) for 15 minutes.  Then take off heat but do not uncover for 5 more minutes.
You are ready to serve.
I served mine with some steamed bok choy and a shredded kale salad and a bit of sriracha sauce.

I think I will be making these more often now that the bamboo steamer has no more secrets from me! I will try different fillings and different dipping sauces as well as different sizes.  I had 2 of these with 2 steamed bok choy halves for dinner and it was enough to fill me.  If I made them a little smaller they would be perfect as hors d'oeuvres for my next happy hour party.

I just can't get over how fluffy these come out after steaming.  The texture was exactly what I was expecting, and while they may not be as perfect as chez Angkor, they are pretty darn close!

Print Friendly and PDF

Peanut Butter Pie

Something magical always happens when peanut butter is used in a recipe, whether it be sweet or savory.  It gives that extra depth or creaminess needed in curries or desserts.  Here is a dessert completely dedicated to peanut butter.  It's a recipe from the Homesick Texan, who's repertoire I've been browsing lately.
This is a custard style pie and is very rich, so eat only small slices.  It is not overly sweet, however, so it suits me just well.  The original recipe calls for a meringue, but nobody at my table really appreciates meringue, so I skipped it.
Serves 10-12
Ingredients
2 egg yolks, beaten
2 cups milk
3/4 cup (140g) sugar
5 Tbsp (45-50g) flour
1/2 tsp salt
1/2 tsp vanilla extract
3/4 cup (170g) natural peanut butter
1/8 tsp cinnamon
1/8 tsp cayenne pepper
1 shortcrust, pre-baked 15 minutes
chopped peanuts for garnish
Directions
1.  Whisk together the egg yolks, milk, sugar, flour, and salt.  Cook on medium heat while whisking for approximately 5 minutes.  It should somewhat thicken, but not too much.
2.  Take off heat and stir in the vanilla, peanut butter, cinnamon, and cayenne.  The cayenne balances the flavors.  It's just absolutely amazing in this pie.
3.  Pour the mixture into the pre-baked shortcrust topped with a few chopped peanuts.  I didn't go to crazy on the garnish.  Cook at 350°F 175°C for 15-20 minutes or until the center has set.
Wait about 20 minutes before digging in.
Serve warm or cold.

I was afraid the cayenne would not work well with my guests' palates, but everyone seemed to enjoy it.  This is a nice change from the more traditional and sugar loaded pies.
Decadent and rich, for peanut lovers only!

Print Friendly and PDF

Thursday, May 8, 2014

Bok Choy in a Bamboo Steamer

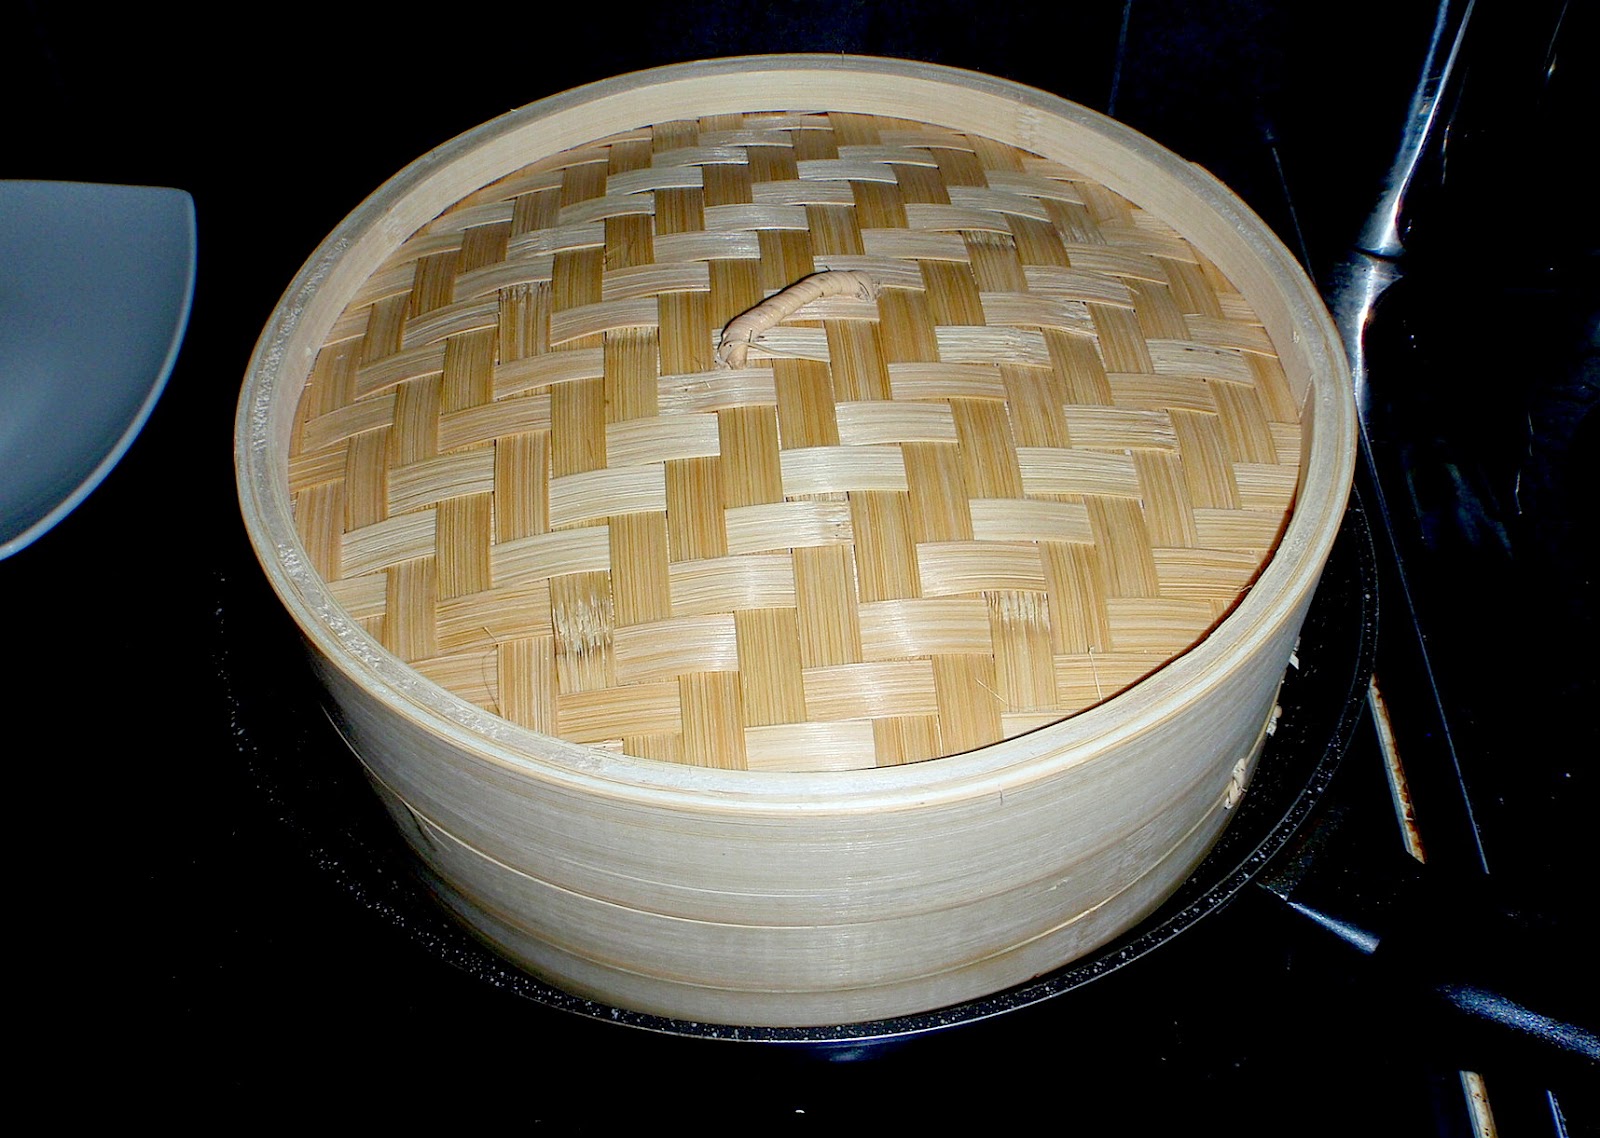
I got a new completely unexpected toy.. A bamboo steamer!
I understand the concept..but I've always used my pressure cooker to steam before.
Here is a traditional way to steam things that don't need very long...and to make some fun dim sum items as well.  My first experiment was a medium bok choy.
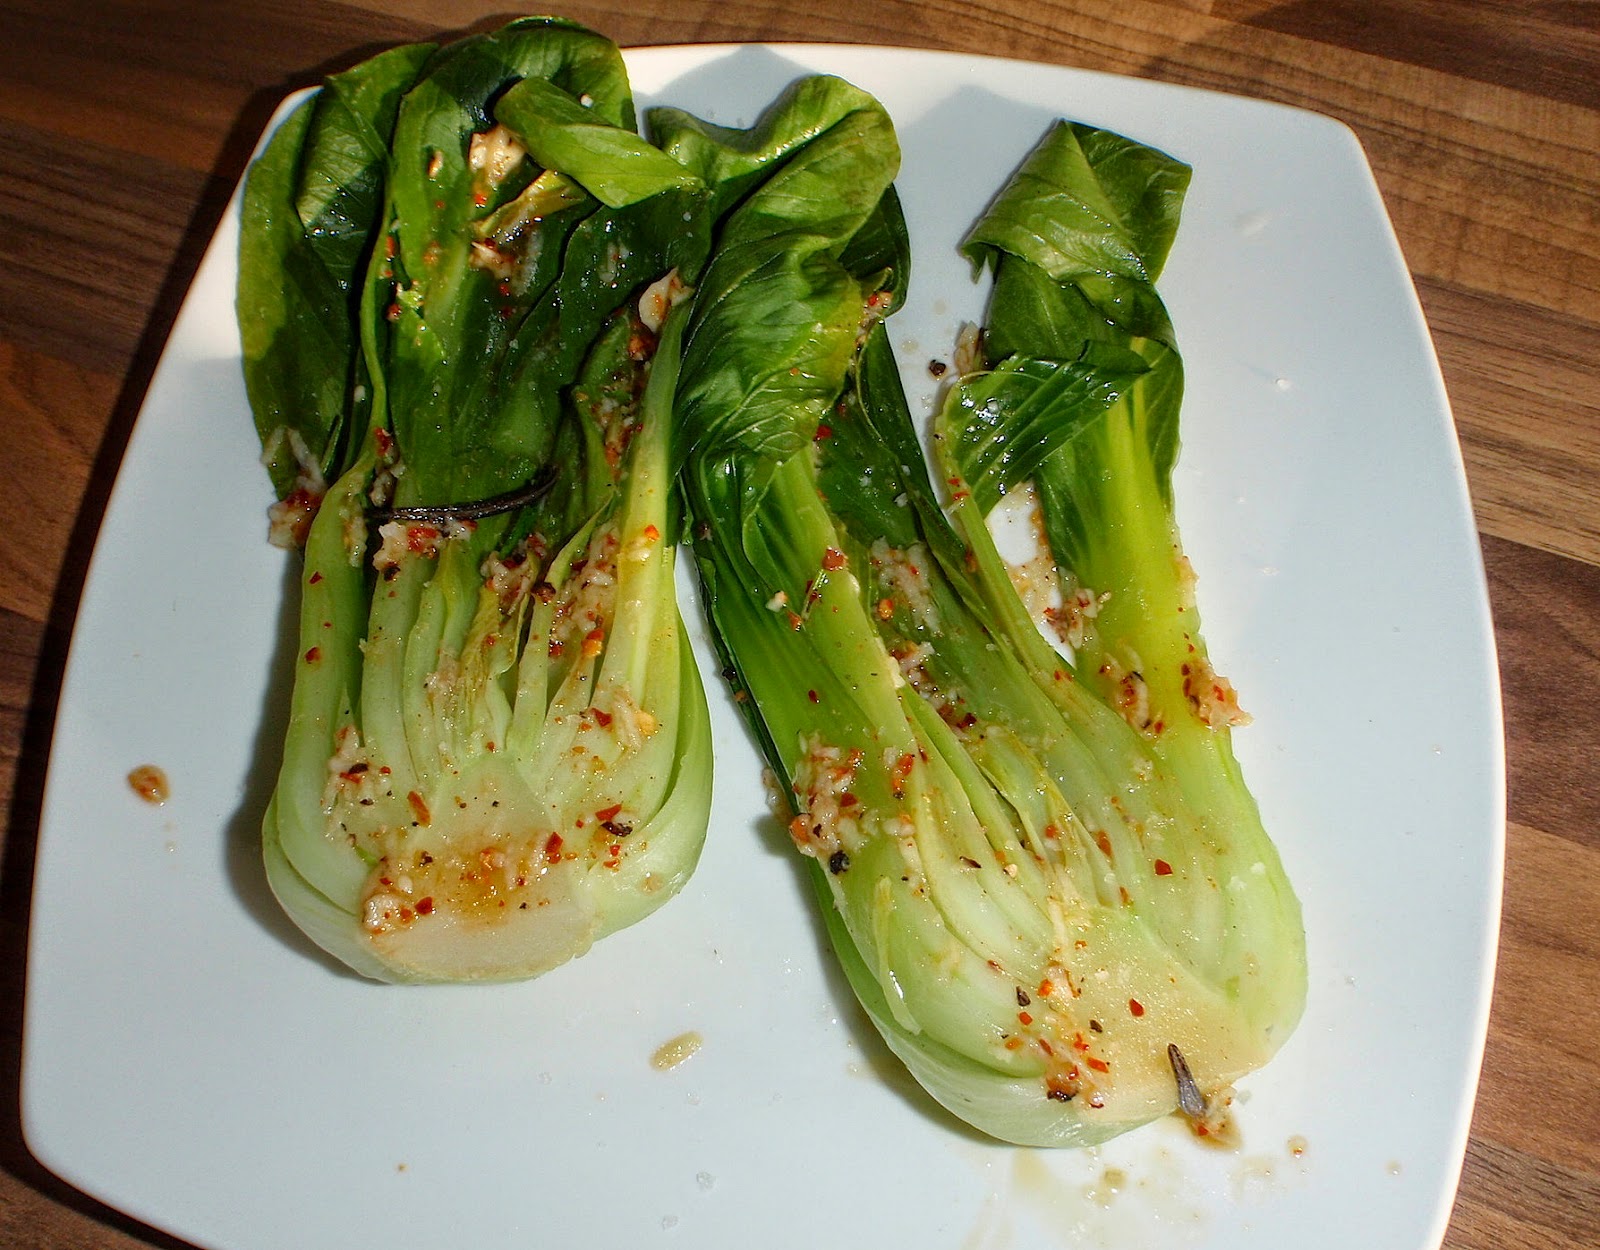
It is actually very simple.  Line the bottom with banana leaves or parchment paper, place clean vegetables inside.  I did 1 bok choy sliced in half.
Then cover and place in a pan of simmering water
The pan should be wide enough so that the sides of the bamboo basket don't touch the sides of the pan (to avoid burning).
For bok choy, cook for about 10 minutes or until the tough center becomes a bit tender.
While that is happening make the dressing..
Mix 1 grated clove garlic with 1/2 tsp grated ginger, 1 tsp sesame oil, 1 tsp rice vinegar, juice from 1/4 lime, some flake salt, and some crushed red pepper flakes.

I also did this again with Sos Bilis, sesame seeds, garlic, and ginger (from Malaysia) and it was out of this world.. no really.

Excellent side dish to anything you so desire.  I ate this with steak.  It was amazing.  I was very proud of my little vegetable.
I think I'm ready for Baozi..

Print Friendly and PDF

Monday, May 5, 2014

Springtime Crozets

I know I know, it's Cinco de Mayo and today's post goes against everything cinco de mayo stands for.  Mexico's victory over France.
But to be honest, I didn't make this today, I made it last night.  I had some Mole over turkey cutlets tonight...so ther is no sacriledge going on here I promise!
Here we have something very very French, Crozets with Buckwheat, but from a region of France very very near the Italian border, La Savoie.  My last business trip took me to Savoie, where the Beaufort reigns, and where dishes like Tartiflette or Diots are the specialty.  I'm very familiar with the tartiflette and all the other regional cheeses such as Tomme de Savoie and Reblochon, but I'd never had nor tried Crozets, which are a pasta made with wheat and buckwheat grown and milled locally and cut into small squares.  Now the locals eat them mostly in gratins, but it's spring ladies and gentlemen, and there are plently of asparagus and fresh peas available, so I couldn't bear the idea of making a white winter dish void of anything green or springy...and I'm very happy I trusted my instincts, because in my version of Crozets, you can actually taste the Crozets instead of fishing it out of all the grease and cream in the casserole.
Serves 4-5
Ingredients
400g Crozets au Sarrasin
1 bunch fresh green asparagus, roasted and cut into 1/2 inch pieces
1 large carrot, peeled, roasted, and diced
1 very large handful fresh peas
1 black tomato, cut into large chunks
1 cup cooked shredded chicken
2 Tbsp EVOO
2 large cloves garlic, grated
1 handful parmesan
1 large handful crumbled feta
Lots of fresh ground pepper
Just a drizzle heavy cream
4-5 cups chicken stock (to cook the pasta)
Directions
1.  Cook the Crozets in the chicken stock and half the garlic until al dente.  The package instructions say 15 minutes, I only did 8 and they were already soft.  At 6 minutes, add the peas.  Drain reserving 1 cup of the cooking water.
2.  Off heat, toss the pasta in a wok with the EVOO, other half of the garlic, asparagus, tomatoes, carrots, chicken, and parmesan.
3.  Turn the heat back on and heat through, juste enough to warm up any cold ingredients.  Add the heavy cream and a bit of reserved pasta water.

Serve with crumbled feta and fresh ground pepper.

Print Friendly and PDF

Sunday, May 4, 2014

Black Current Buckwheat Muffins

This week's muffins are gluten free!  I recently added that label to my posts and I've realized that most of my recipes are GF in general.  It's just that I usually eat a piece of cheese with baguette after dinner.. hehee.
I've been using buckwheat flour relatively often, but always mixed with whole wheat flour for fear of the loss of fluffiness, but these muffins are 100% buckwheat and very low in sugar (except for the fact that I added bit of black current jam in the center).  I'm not going to say that they resemble a wheat flour muffin, but that wasn't my goal at all.  I wanted a tasty muffin full of fruit and a nutty buckwheat flavor.. which is exactly what I got.
My basic muffin proportions come from my Banana Nut Muffins, and I just tweak things from there.
Yield 16 muffins
Ingredients
3 over ripe bananas, mashed
2 eggs
scant 1/3 cup (50g) cane sugar
1/2 cup black current jam + 1/2 tsp for muffin filling
1/3 cup (50g) canola oil
1/2 tsp cinnamon
1 Tbsp poppy seeds
3/4 tsp baking soda
1/2 tsp baking powder
1/2 tsp salt
1cup (130g) buckwheat flour
Toppings:
Chopped walnuts
Directions
1.  Beat together the eggs, sugar, jam, bananas, oil, and cinnamon.
2.  In a separate mixing bowl, sift together the flour, salt, baking powder, and baking soda.
3.  Gently mix the wet ingredients into the dry ingredients, then fold in the poppy seeds.  The texture should not be dry.. it should be very goopy.
4.  Grease your muffin tins and fill them 3/4 to the top, then push down 1/2 tsp black current jam into each one and sprinkle with the chopped walnuts.
5.  Bake in a 375°F (180°C) oven for 18-20 minutes or until a toothpick comes out clean after a nice stab.

Serve warm or cold.. both ways are marvelous and very breakfast worthy!

Next time I may entirely do without sugar (especially when using jam).

Print Friendly and PDF