Search this blog

Translate

Showing posts with label Happy Hour. Show all posts

Sunday, November 6, 2016

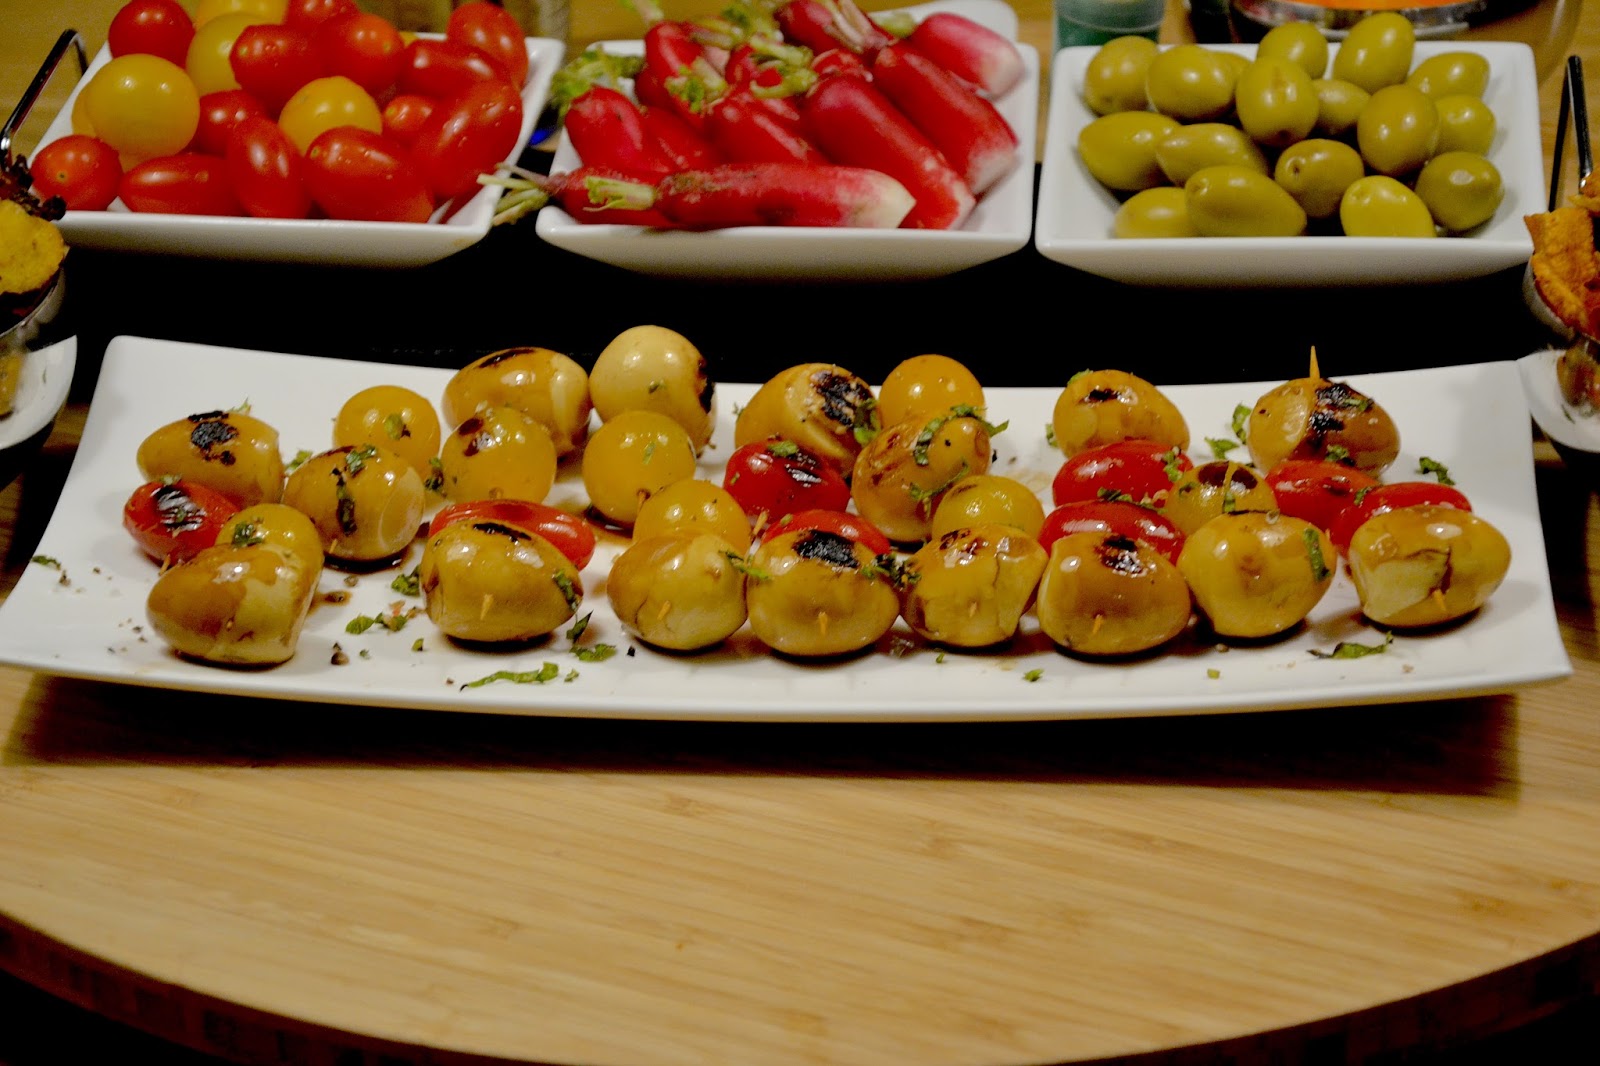
Griddled Marinated Quail Egg Skewers with Basil Salt

So apparently, you can give a woman a fish, and she'll feed you for a day.  Teach a woman how to fish, and she'll feed you for a lifetime... until there are no more fish to be caught, and she'll have to teach her how to dig up mushrooms.
Oh man, that started out nicely but I killed it.
Besides the overfishing bit, I believe this to be true.  These marinated eggs are the result of a certain method of fishing I learned earlier this year.  The fishing lesson was Asian Style with dark soy sauce, and my new creation is Balsamic & Olive oil with Basil salt.
I never would have imagined doing this to quail eggs if it wasn't for that very first discovery, so thank you Yotam for releasing your genius in me.
Griddled marinated cherry tomatoes are also the bomb.  Thank you, Me.
Makes 18-24 skewers (depending on how many quail eggs are packed together)
Ingredients
pack of fresh quail eggs
1 cherry tomato per quail egg
toothpicks for skewers
Marinade:
3 Tbsp balsamic vinegar
juice from 1/2 lime
1 Tbsp olive oil
pinch salt
Topping:
6-7 leaves fresh basil, finely chopped
few pinches Pink Himalayan Salt or other special salt
few cracks black pepper
Directions
1.  Soft boil the quail eggs.  To do this, I placed them in my steamer basked and steamed on high heat for 3 minutes, then let them cool before peeling.  They were perfect.. not too liquid, but velvet cream style.
2.  Make the marinade by mixing the balsamic vinegar, lime juice, salt, and olive oil.  Make the skewers by placing 1 egg and 1 cherry tomato on a toothpick.  Place the skewers in the marinade.  Let marinate for at least 1 hour.
3.  Get ready to grill.  I  used my stovetop griddle pan.  Drain the eggs from the marinade and place on the very hot griddle pan for about 1 minute, making sure to turn them at least once so they get the char marks on 2 sides.  Don't discard the marinade.  Use it on a salad or drizzle it on some grilled veggies.  Don't be wasteful.  Balsamic vinegar is delicious.
4.  Top with some cracked black pepper, pink Himalayan salt, and finely chopped basil.  Don't use table salt.  If you don't have Himalayan salt, use another specialty salt or at the very least, fleur de sel.  You don't want this to have an overly salty taste  but you want it to have texture with the special salt.
Serve at happy hour or as an appetizer.

The marinade was not as strong as the Asian style griddled eggs, but the slight balsamic hint of flavor was definitely there, and much appreciated by my tasters.
This works out so perfectly because you can really taste the grilled part.  The slight char marks make a big difference in taste and texture.  This really is a fool-proof situation here.
I love the bite size-ness of quail eggs and I LOVE that they are easy to find here.  This would transfer well on large skewers on a bbq with other things as well.

Print Friendly and PDF

Saturday, March 19, 2016

Marinated Grilled Quail Eggs with Sesame Salt

Here is something that might seem crazy.
Soft boil some quail eggs, marinate them in dark soy sauce, and then GRILL them before sprinkling with sesame seeds.
Yes!  Completely out of my mind craziness!
What happens is that the marinade really seeps into the whites without being too soy-ish or salty, the inside is perfectly creamy, and the outside is fun of sesame crunch.
It is an explosion of texture and flavor and it's naturally bite-sized, so perfect for a happy hour party!
From the brilliant mind of Yotam Ottolenghi.  I mostly respected the original recipe, which almost never happens around here.
Ingredients
20-24 fresh quail eggs
marinade:
2 Tbsp dark soy sauce
1 Tbsp olive oil
topping:
1/2 tsp coarse sea salt
2 tsp black sesame seeds
2 tsp white sesame seeds
Directions
1.  Soft boil the quail eggs.  To do this, I placed them in my steamer basked and steamed on high heat for 3 minutes, then dunked them in ice water before peeling.  They were perfect.. not too liquid, but velvet cream style.
2.  Make the marinade by mixing the soy sauce and olive oil.  Place the peeled eggs in the marinade.  He says to do this for 30 minutes.  I left mine for 2 hours.
3.  Make the topping by dry roasting the sesame seeds on the stove top, then blitzing them with the salt in a blender or food processor.  You don't want to make a powder, you just want to lightly break some of those seeds.
4.  Get ready to grill.  I  used my stovetop griddle pan.  Drain the eggs from the marinade and place on the very hot griddle pan for about 1 minute, making sure to turn them at least once so they get the char marks on 2 sides.
Serve dipped in the sesame salt.

I absolutely LOVED this.  It is one of the most interesting things I've served for happy hour.  Not only is it healthy, but it's just so easy to pop into your mouth with a toothpick!
I'm starting to think this Yotam dude is sort of a genius...

Print Friendly and PDF

Friday, December 18, 2015

Mouttabal Al-Yaqteen (Pumpkin Tahini Dip)

As an intro to my Falafel Soiree, I wanted something that fit the theme, but that was new and refreshing.  This Syrian pumpkin dip is as old as time, but it was a discovery to me.  I had no idea pumpkin or squash was that popular anywhere else but in the Americas.  It is quite simple to put together once everything is prepped.. it really only takes a few minutes.  The longest part would be roasting the pumpkin and letting it cool.
Fortunately, I must have seen this discovery in my near future the day I brought home a nice plump Delica Moratti pumpkin and roasted it whole for my pumpkin pie urge of the moment.  Since one pumpkin yields quite a bit of flesh, I froze the roasted flesh pound by pound.. you know, just in case.  I was probably preparing for more pie urges.. or some sort of creamy chili, but bless my soul.. that was the perfect amount for this lovely Mouttabal Al-Yaqteen!
Recipe from Desert Candy
Ingredients
450g (1lb) roasted pumpkin flesh (mine was Delica Moratti)
1 large clove garlic, smashed
75g (3/8 cup) tahini
juice from 1 lime
1/2 tsp cumin
pinch salt
toppings:
handful fresh pomegranate seeds
drizzle pomegranate molasses
Directions
1.  Blend everything together until it has a smooth homogenous consistency.  Taste and adjust the seasoning if needed.
2.  Serve topped with fresh pomegranate seeds and a drizzle of pomegranate molasses.
I served mine for happy hour with some Luques olives and some turkish cheese stuffed chiles.
I also had some Man'Ouché bread for dipping.
The fresh tart beads of pomegranate are really what take this over the top.  The pumpkin is lightly sweet with the nutty creaminess of the tahini, making it a perfect dippable texture.. but those little beads of sweet juiciness that explode as you bite into them give so much dimension it seems they were made to be paired together.  The molasses evens out the flavors as well.
As long as you have roasted pumpkin handy.. Mouttabal should be on your mind...

Print Friendly and PDF

Saturday, July 18, 2015

Lemon and Savory Navy Bean Dip

If you know me at all, you know I love my beans any time of day, any kind of way.  During happy hour, I usually lean towards hummus, which is the most incredible bean dip to ever exist on the face of our beautiful planet.  The photo of this white bean dip looks slightly like hummus, but tastes nothing like it, which is why I'm not even going to try to call this "White Bean and Lemon Hummus" as some unknowingly might.  If it doesn't have chickpeas or tahini, you can't call it hummus.. ok?
Now that that is cleared out of the way, this bean dip is perfectly suitable to be served at my table for it has a number of ingredients that make me spin on my toes.
I was gifted some fresh savory from the garden which I wanted to glorify, but fresh rosemary would have been very nice here as well.  The lemon zest gives it a nice zing paired with the garlic. and topped with some high quality olive oil, this dip will make your insides smile and lick your lips.
I unfortunately was not hosting a dinner party.  My supply of food urges outweighed the fact that I can't have anyone over properly until I finish painting and move my bed back into the bedroom.  No problem, though, this freezes very well (ungarnished) and can be popped out for any impromptu visits!
Yield about 3.5 cups
Ingredients
30 cL (10 fl.oz) dried navy beans, soaked overnight
2 bay leaves
1 sprig savory, still on the stick
2 dried chiles de arbol
1 tsp sea salt
5 cups water
5 cloves garlic, peeled
Leaves from 2 sprigs savory
Juice and zest from 1 lemon
Many grinds black pepper
2 Tbsp extra virgin olive oil (top quality)
Garnish:
Black salt (or any fancy salt)
Few grinds black pepper
Few drizzles of that olive oil
Directions
1.  Place the beans, water, bay leaves, savory sprig, dried chiles, and sea salt in a slow cooker and cook on low for at least 6 hours.
2.  Remove the bay leaves and savory, then drain reserving about 2 cups cooking liquid.
3.  Using a stick blender, blend the cooked beans with the dried chiles, garlic, savory leaves, 2 Tbsp olive oil, lemon juice with zest, black pepper, and a bit of the reserved cooking water.  If it's still hot, it will be a bit lumpy, but as it cools, the texture will become creamy.
4.  Once at room temperature, taste and adjust the seasoning.  You may need to blend in a bit more reserved cooking water to give it a smooth creamy texture as beans tend to stiffen as they cool.  I used about 1 cup.

Serve in dipping bowls topped with an extra drizzle of olive oil, some Hawaiian black salt, and an extra grind of black pepper.
I served mine with carrot sticks and tortilla chips alongside some haddock Ceviche.  Cucumber sticks would have been a nice dipping item as well.
The lemony garlicky savory goodness of this dip provides quite an enjoyable sensation in your mouth.  It made me want to spread it all over my body so I could grasp its tenderness and commune with my bean addiction..

Print Friendly and PDF

Saturday, March 28, 2015

Marinated Sardine Filets

I've done this before once or twice, and I'll do it again...
Because nothing screams "I'm Delicious" like a bunch of sardines that were filleted until 11 pm the night before, then very very well rinsed, doused with lime juice, whose acidity cooks the filets, then marinated in garlic, piment d'espelette, grinds of black pepper, a few pinches fleur de sel, and extra virgin olive oil.
This marinated overnight in the fridge,
and then they were plated as best as I could do before sprinkling them with chopped parsley and chives.
It's tough to plate.  I tried the parallel method and the radial method, but I'm not sure either of them really look as good as they should..
because this hors d'oeuvre is just phenomenal.
It should look spectacular.
I used atlantic sardines which were much smaller than the usual atlantic sardines are.  They were almost like large anchovies (in size, not taste).  I can't really say which are better between atlantic or mediterranean, but I do feel blessed to even have the choice between the two fresh beauties!

Print Friendly and PDF

Saturday, March 7, 2015

Mackerel Rocket Canapés

As much as I like to have my weekly adventure on uncharted sea territory, I also am comforted by the more common simple and indulgences such as sardines, anchovies, herring, and mackerel.  Not only are they less expensive than their fancier fish friends, they are the bottom of the sea-foo chain, so eat the most unaltered original seafood, plankton.  They are also most likely to be caught rather than farm raised, which means less antibiotics (possibly, more Mercury.. but that only brings me closer to my Freddy, so I don't mind).
The thing about the simpler fish is that they blow me away much more easily than the complicated and "must time it right" fish.  I suppose they are a comfort food, because they are in my comfort zone.. harder to overcook and transform into mush.
By the way, if you ever do overcook fish and transform it into mush, just change your game plan.  Throw it into some fried rice or as a topping to a noodle dish, or in some pasta or soup instead of making it the centerpiece.  You may just surprise yourself.
Canapé means couch in French, but it makes you seem more sophisticated than just saying "thinly sliced lightly toasted bread."
Serves 2-3 as an appetizer (the photo is just a sample)
Ingredients
1-2 mackerel filets per person (I had 3)
1 clove garlic, grated + 1 whole
few grinds cracked black pepper
pinch fleur de sel
pinch piment d'espelette
drizzle lime juice
few drizzles olive oil
handful arugula (rocket)
6-8 slices fresh or toasted baguette
Directions
1.  Rub the baguette slices with the whole garlic clove.  Distribute the arugula onto each slice and await the mackerel preparation.
2.  Prepare the filets with a bit of piment d'espelette, evenly distributed grated garlic, some black pepper, and lime juice.
3.  Spray a bit of olive oil in a pan and sear the filets on high heat for about 2 minutes, skin side down, then flip them and do the same skin side up.
4.  Remove from the pan, cut into sections, and place onto the prepared baguette slices.
5.  Sprinkle a bit of fleur de sel onto each slice.

Serve warm or at room temperature.

The simplicity of this recipe is what makes it so indulging.  I prepared it on a whim before preparing dinner and was rewarded with an embalming melding of flavors, from the pungency of the garlic, the sourness of the arugula, and the meatiness of the mackerel.  
Each simple ingredient connects with you individually before becoming the sum of its parts.. 

Print Friendly and PDF

Wednesday, December 31, 2014

Beetroot Tahini Dip

I wouldn't dare call this marvelous dip "Hummus."  Not because it lacks anything in deliciousness or because of it's ability to pair with anything Mediterranean (or anything at all) but simply because the translation of the word Hummus is Chickpea, and there aren't any at all in this creamy and deep yet light and sweet dip.  I basically replaced cooked chickpeas with roasted beets, and the recipe took on a whole new direction.  I was prompted to make something with beets in it for NYE because it would be one of the healthy light items on a menu filled with rich fois gras, escargots, egg rolls, Mont d'Or cheese for dipping crusty bread and a few veggies, and duck paraphernalia.  I think 2014 was the year of the duck, well, at least for me.
Anyway, the idea of mixing roasted beets with tahini is just genius.  Its already deep earthy sweet flavor becomes creamy and delightful and made an excellent and colorful accompaniment to my falafel and various other dippable vegetables.
Also, it's purple, which makes it worth it all together.
Yield 1 1/2 cups
Ingredients
500g (1 lb) beets, peeled (can be previously cooked)
2 large cloves garlic, crushed
Juice from 1 lemon
1 Tbsp olive oil + drizzles for roasting
3 Tbsp tahini
1/2 tsp ground cumin
1/2 tsp ground coriander
1 tsp dried piment d'espelette (or chile powder)
1/2 tsp fleur de sel
1 tsp cracked black pepper
Garnish:
Dollop of yogurt (optional)
Sesame seeds
Directions
1.  If you are using previously cooked beets (vacuum sealed or recently boiled or steamed) peel, quarter, drizzle with olive oil, sprinkle some fleur de sel, and roast at 200°C 400°F for 30 minutes.  If you are using raw beets, keep them whole and unpeeled and cook for 1 hour or until tender.  You can peel them after they are roasted.  They will taste better that way.
2.  Blend your peeled roasted beets with all the rest of the ingredients until if reaches a homogenous consistency.
I blended the beets with garlic first with the lemon juice and added the dry spices later on, adding in some olive oil as needed.
3.  Serve chilled or at room temperature sprinkled with sesame seeds.  I put a well in the center with a dollop of yogurt.  That is a completely optional step and will not have negative impact if left out (which is why I still consider this a vegan recipe).
I love when my offerings are a feast to all the senses.  Your eyes dance with glee while discovering the vibrant purple glistening color, your olfaction will breathe in Earth, your tongue will dive into the velvet and let your whole mouth partake in the adventure, and finally, you will taste everything you may have sensed, with a little extra suprise of heat....because, well, it's my creation, so I put some piment d'espelette in it.
It's funny because as my tasters were devouring, one said.. 
"Ooh is there spice in there?  It creeps up on you afterwards!"
That thought was followed by..
"Oh right, Steph made it.  It would be more strange if it didn't have any heat."
They are finally starting to understand me!!!

Print Friendly and PDF

Monday, November 10, 2014

Buffalo Cucumbers and Dill Filled Celery Sticks

When you have recurring guests, you must activate your creative juice so as to not bore them with recurring appetizers and hors d'oeuvres.  Using similar ingredients, this is somewhat a challenge.  I usually like to have raw veggies at my happy hour as opposed to potato chips and peanuts.  Don't get me wrong, those sometimes make an appearance, but maybe not all by themselves.  My peanuts will be a topping or a filling, and my potato chips will be.. um.. wait.. no.. I never serve potato chips.  Sorry.
I sometimes have tortilla chips to use as a vessel for salsa or guacamole or whatever dip I'm serving.. but potato chips are never really invited to the party.  Can't really do much with those...
My usual veggies include carrots and cucumbers.  I like cucumbers as a vessel for hummus because that creamy mixture of passion and chickpeas is made to be shoveled into the mouth on the end of a cucumber stick!  Oh yes, with some Lebanese bread as well, but I just have a thing for cucumbers.  This week, though, I invited celery.  Celery is the perfect vessel for dipping.  It has that naughty little curve that is just made for scooping.  Its acidity balances out any peanut butter or cream it may encounter, and is a delight to munch on, so this time, I decided to go Buffalo-style with my cucumbers drenched in a Frank's Redhot vinaigrette and the little celery companion for the creamy aspect to counter the tangy RedHot.
Buffalo Cucumbers
Ingredients:
1 long cucumber, semi-peeled and cut into sticks
3 large cloves garlic, unpeeled
1 Tbsp olive oil
1 small shallot, diced
1/2 cup Frank's RedHot sauce (do not substitute anything else please!)
crushed peanuts for garnish
crumbled blue cheese or feta (optional)
Directions:
1.  Roast the garlic in their sheaths for about 15 minutes at 200°C 400°F.  Remove and squeeze out the garlic into a bowl.
2.  Make the vinaigrette by whisking together the mashed garlic, olive oil, and Frank's.  Stir in the diced shallots.
3.  Toss the cucumber sticks with the vinaigrette and set aside in the refrigerator to let the juices develop for at least 20 minutes.
4.  Toss again to redistribute the juices and serve with some crushed peanuts.
Serve as a salad or as finger food for happy hour.  With some crumbled blue cheese or feta it would be quite a fiesta of flavors.
Dill Filled Celery Sticks
Ingredients:
stalks from 1 bunch celery, cut into sticks
1 clove garlic, grated
juice from 1/2 lime
3 sprigs fresh dill, chopped
5-6 celery leaves, finely chopped
few cracks black pepper
pinch fleur de sel
pinch piment d'espelette
3 Tbsp cream cheese
1 Tbsp cream
Directions:
Whip together all the ingredients and spread it into the celery crevices.
*this one is not vegan.. don't be silly now

This works just as well as a spread on bagels, dip for carrots or breadsticks, or even on some toast with a few capers.  I just wanted to fill the celery wedges with something tangy.
This was the perfect American-themed happy hour (with carrot sticks and artichoke dip, of course) to go with my All American Spiced Chili dinner.

Print Friendly and PDF

Saturday, November 8, 2014

Marinated Anchovies

Today the sun seeped into my skin and whispered to me, "they are ready to be welcomed by you."
That could only mean one thing.. I'm going to be marinating fresh anchovies for happy hour tonight.. and nothing going to stop me.
With respect to my rule C of dinner parties, these will make for quite a happy happy hour.
When I buy anchovies, I always buy the marinated ones, never the salted ones.  I don't enjoy all the grime and salt as much as I enjoy the pure filets with their exquisite texture.  During these past few weeks, I've been lingering around my fishmonger waiting for fresh anchovies to become available.  There comes a time in one's life when one feels ready.  Ready to take it to the next level.  Ready to do it my own way.  Ready to cook using something other than heat.
Unfortunately, all the fishmonger was able to offer me were sardines.. which are great, but my one tracked mind was not fixated on marinating sardines today.. I wanted ANCHOVIES!  I almost started the debate about whether or not the anchovy is the sardine's spawn, but I let it slide, knowing that he would call me over when he did finally have anchovies.  You can't rush such things.
I was right about feeling ready.  It was just the right time for these marinated anchovies to be happening in my life..
Ingredients
450g (1 lb) fresh whole anchovies
1st marinade:
juice from 1/2 lime
1/2 cup balsamic white vinegar (or white wine vinegar)
1/4 cup cider vinegar
2nd marinade:
few pinches fleur de sel
1/2 tsp chili flakes
2 large cloves garlic, sliced
few cracks black pepper
3/4 cup very good quality olive oil
Directions
1.  Prepare the filets.  Cut the heads and tails off the anchovies and with a sharp knife, slit the bellies. Using your fingers, remove the guts.  Remove the central bone.  You don't need any magic tools here, just your fingers.  It all comes off easily.
Rinse the filets well and pat dry.  This is important.  Don't leave any gut slime on there.
2.  Prepare the first marinade.  Mix all the ingredients together.  Place a layer of anchovy filets in a container and pour the marinade mixture over until the filets are just covered.  Add another layer of filets and cover again with the vinegar mixture.  Do this until you no longer have any filets or vinegar.  If the filets are not submerged, just pour on some more vinegar or lime juice.
Let marinate in the refrigerator for at least 4 hours.  During this time, the filets will cure, but will retain their real anchovy flavor.  Use good quality vinegars because your filets will have the vinegar aftertaste in the end.  Adjust the lime-vinegar quantities as you wish.
3.  Bathe.  After about 4 hours, the marinade might be a little off-putting.  Mine was murky and I was afraid it wasn't going to cut it.
Rinse the filets in cold water, then pat dry.
4.  Prepare the second marinade.  Place a layer of anchovy filets in a container and sprinkle a bit of fleur de sel, chili flakes, pepper, and a few slices of garlic.  Cover with olive oil and repeat the process until you no longer have filets or olive oil.  If the filets are not submerged, add more olive oil.
Let marinate in the refrigerator for at least 2 hours.
They will keep for a week in the fridge as long as they are submerged in olive oil... but they won't last you that long anyway..

Enjoy.
I'm not sure about proper anchovy-eating etiquette, but I have little escargot forks that I use to grab a filet or 2 and put it directly into my mouth.  I may get a few drops of oil on the table, but that doesn't bother me.

These were a great success.  They retained their real anchovy flavor instead of being pure salt as the ones you buy in cans.  The flesh stays firm and the happiness emanates throughout the room.  Needless to say, every last one of these was eaten with great respect.

Anchovies, I hope you are finding great comfort within me... I will always be ready and willing to welcome you..

Print Friendly and PDF

Monday, November 3, 2014

Chipotle Black Eyed Pea Dip

The time has come again for yet another Happy Hour evening followed by game night.
No, not video games... we haven't killed off enough brain cells to enjoy those yet.. (no offense to anyone who indulges in said activity.  I just don't get it.)
Although I try to change up the rotation regularly, there are always certain things to expect when crossing my threshold:
a.
There will be a dip and it will most likely involve beans.  Be it hummus, artichoke, eggplant, pinto, or even blended dal, you will be practicing the art of dipping.
b.
There will be heat.  At the very least, one of my offerings will be spicy, if not 80% of them.  That's how I roll.  If I know ahead of time about your less than stellar scoville stamina, I may make minor adjustments, but there will be at least one item you won't eat.  Your loss. 
c.
There will be something from the sea.  It will be shrimp, anchovies, sardines, or all of the above, but they will represent.  This time there were shrimp and kelp caviar (which I didn't photograph) but was rather excellent.
d.
There will be music.  Really really good music.. on vinyl.  That is non-negotiable.  I have a large selection, but don't bring a cd or a usb drive.  That just doesn't cut it here.
e.
You will discover something.  Yes.. I like to have something to share that will make you say "ooh" or "aaah" or "wtf?"  Sometimes all three.  It isn't necessarily food related, but most of the time is is.

Once those conditions are re-united, the evening can begin.  
Here is my a. criteria for the evening which is similar to my chipotle black beans, but with a few minor touches that completely make the difference.
Serves 4-5
Ingredients

3/4 cup dried black-eyed-peas, soaked at least a few hours
1/4 cup dried pinto beans, soaked as well
5 cups water
1 sprig sage, chopped
1 chicken or vegetable bouillon cube
3 chopped shallots
2 Tbsp tomato paste
4 cloves garlic, grated
3 chipotle chiles in adobo sauce, some chopped
1/4 tsp ground cumin
Juice from 1 lemon
1 Tbsp cracked black pepper
Directions
1.  Put everything in the slow cooker and cook on low for 7-9 hours.
2.  If you decide to make it a dip, remove some of the beans with liquid and blend.  Garnish with grated cheese if you wish.  
I suggest not blending the entire batch, that way you can have several options;  dip, breakfast, lunch, soup, etc..
I served mine with some tortilla chips and carrot sticks (strangely, not shown in this photo).  There were also some lemon chile pepinos to keep with the Mexican theme.
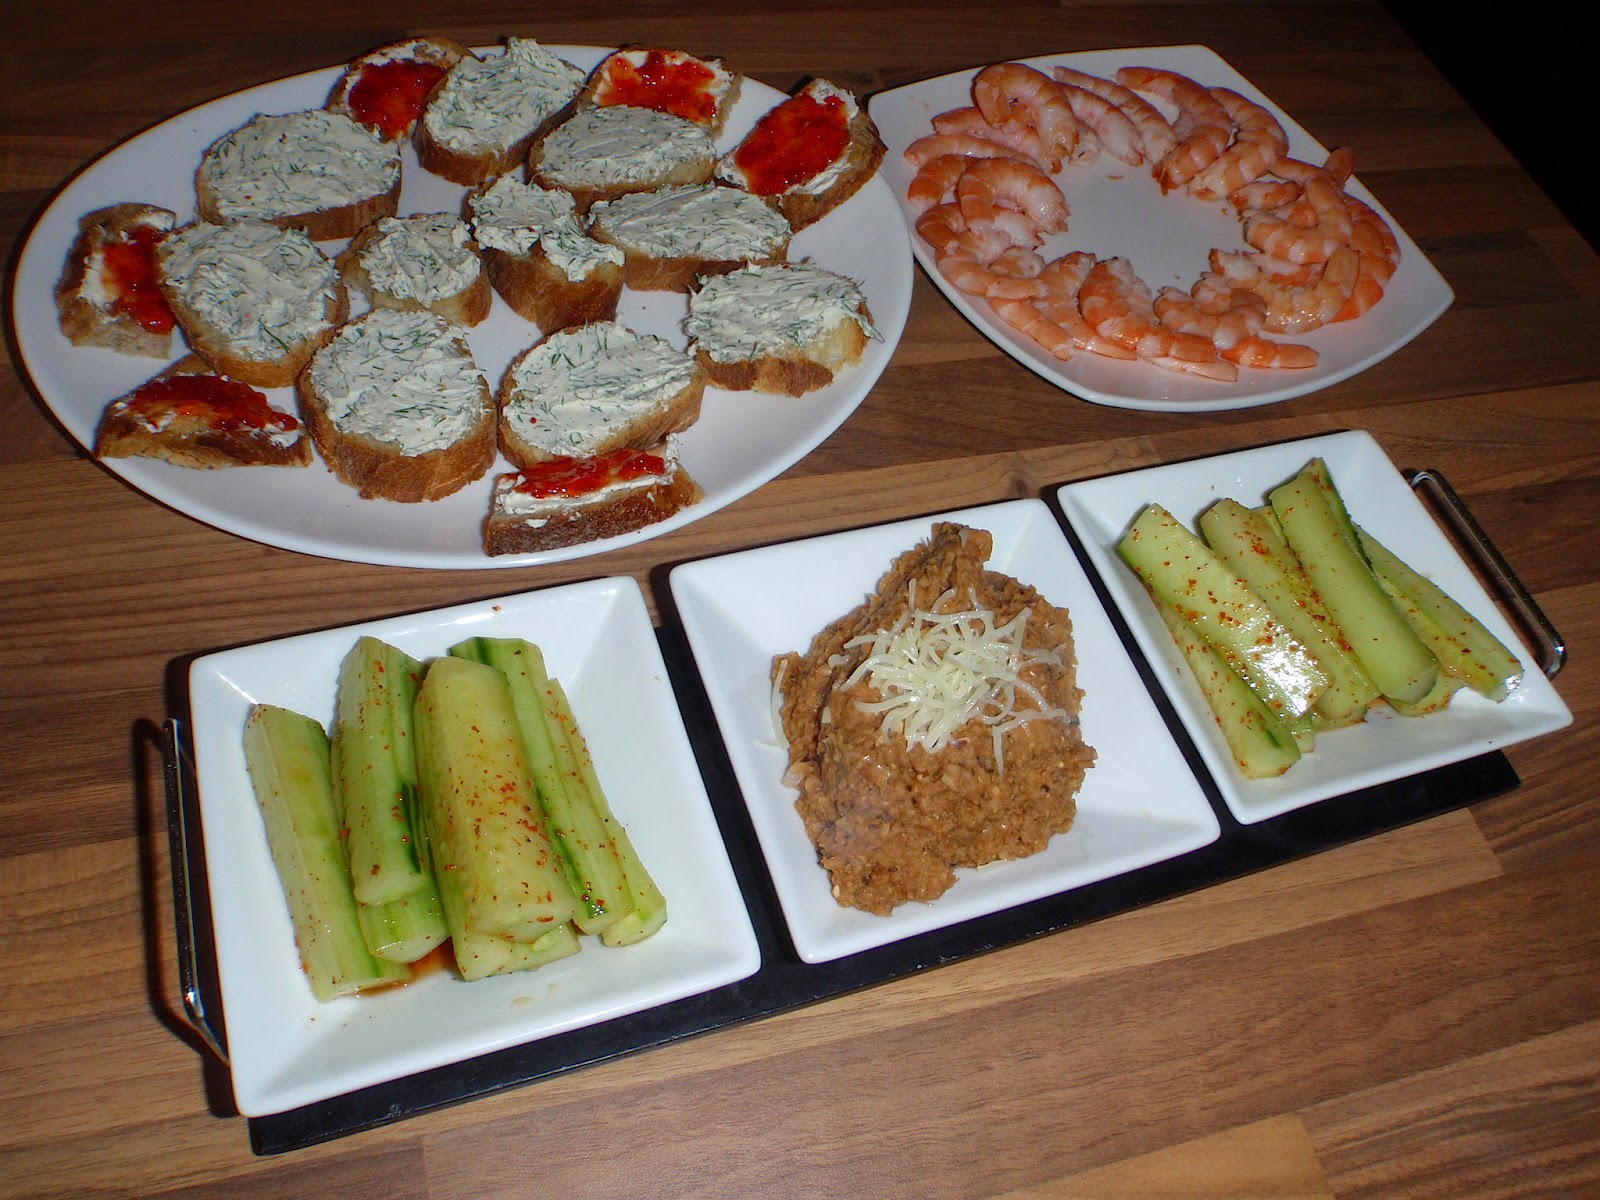
What are those toasts in the background?  Aah a dill spread to which I later added capers, and some goat cheese with red chile jam which everybody thought was strange at first, but then asked for more.. to which I had to refuse.. because that jam was made for me for my personal stiletto moments. So.. no, sorry.
The next day, I spooned some of the non-blended beans over my morning egg.
Then again, over some rice with some extra garnish such as avocado, chopped tomatoes, and shredded cabbage..
 Oh yes lets get messy!! Yes Yes!!
I love beans.. have I ever mentioned that?

Print Friendly and PDF

Thursday, August 7, 2014

Chana Dal and Split Fava Lazy Hummus

Hummus = Love
Served with its special man'ouché Lebanese bread and local olive oil, it becomes the most sublime mezze you can possibly be served.
The thing about making very good quality hummus is that it can be very time consuming.  Ok ok.. while the chickpeas are soaking overnight, you are (presumably) sleeping.  While they are simmering away in the crockpot, you are going about your day as usual.  Technically, those are the longest parts, but they are not the most bothersome.  The part I dislike the most about making hummus from scratch is the unsheathing of each and every chickpea.  I usually make big batches and freeze portions, so I end up with many many chickpeas (or favas) to peel.  I once spent about 2 hours just peeling chickpeas!  Don't get me wrong.. I'll do it, and I never regret it, but its not quite as indulging as.. say.. kneading dough, or rolling rotis, or filling samosas or dumplings.  It just feels like work you would give to an intern to free up your skilled little fingers for more important tasks.
For those of you who feel the same way as I do, and don't have an interne to keep busy, I've found the miracle solution to the hummus dilemma!
Use split chickpeas!
Yes!
Chana dal is just that: a sheathed, split chickpea.  Split favas are sheathed (and split as the name implies) fava beans.
I call this a "lazy" version of Hummus-Ful Bi Tahini  only because the cooking time is reduced and the peeling time is no longer part of the deal.
yield about 3 1/2 cups
Ingredients
1/2 cup dried chana dal, soaked
1/2 cup dried split fava beans, soaked
4 cups water (for cooking)
150g excellent tahini (Al Wadi if you want it to be perfect)
Juice from 1 lime
1/2 tsp cumin
1/2 tsp salt
3 garlic cloves
Enough cooking water for the hummus to be of desired consistency
some excellent EVOO for drizzling
black sesame seeds for garnish (I chose black to go with the black salt on my eggplant caviar)
Directions
1.  Place the soaked chana dal and split favas in a pot with the water.  Bring to a boil, then reduce heat and simmer for about 15 minutes until the chana are tender.  You may want to regularly scoop the foam off the top.  I'm not sure that does anything, but that is the traditional way and that is how the best hummus is made in its mother land.
2.  Remove the cooked chana and favas into a blender and pulse a few times to break them apart.  Add in the lime juice, garlic, salt, cumin, and tahini and blend, adding some of the cooking water to smooth it out if too dry.
How much water should you add?  Well, at this point it is still hot, so you want it to be a little more "wet" than you expect the finished product to be.  As it cools down, it will thicken, and you don't want your hummus to be dry now do you?
3.  Actually, warm hummus is delicious too.
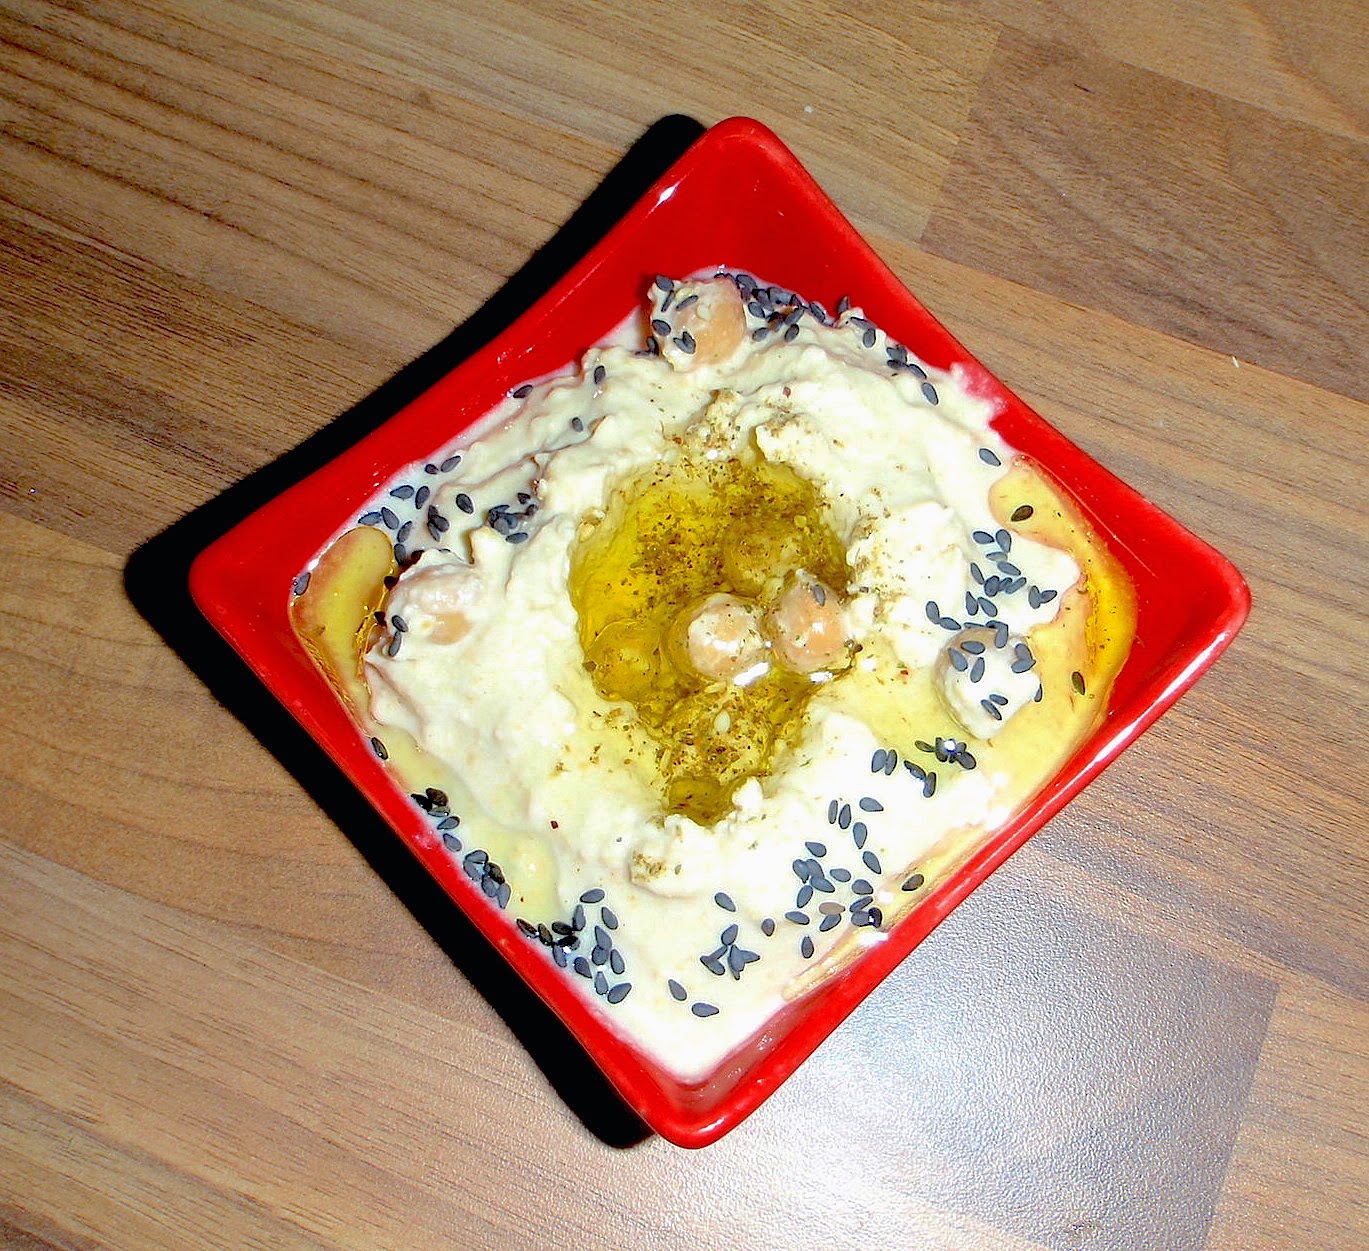
Serve by making a small well in the middle of your serving dish and drizzling a small pool of olive oil into the center.  Sprinkle some sesame seeds all around and contemplate the beauty.
The hummus is on the left, the eggplant caviar on the right.
So does it taste different than the traditional lengthy hummus making business?
Call me crazy, but I found it to be creamier and more addicting than usual!  
I would have to taste them side by side to really give an honest opinion, but this is one of the best outcomes I've produced so far.  
In terms of time vs quality, this version is the ultimate hummus, even if they call you "lazy" after hearing your secret.
Works well with piment d'espelette olive oil as well.

Print Friendly and PDF

Spicy Roasted Eggplant Caviar

My love affair with eggplant continues (and is not ready to end).  This time, I exposed its caviar and sublimed it with pure adornments such as olive oil from Nyons, toasted pine nuts from Pakistan, and black lava salt from Hawaii.  Did you know the active coconut charcoal made to blacken the lava salt is an antitoxin and digestive aid?  Intriguing!
Something magical happens when you combine quality with spice and mix it together with love.  Today, that is this caviar.
The difference between my eggplant caviar and the traditional baba ganoush is the use of tahini.  Since I was already serving some lazy hummus at my little dinner party, I didn't want to double up on the tahini doses and risk having the variety be too similar.
yield about 2 cups
Ingredients
2 eggplants (600g) halved lengthwise
1/4 cup yogurt
1 clove garlic, grated
1 Tbsp lime juice
2 Tbsp quality EVOO plus more to drizzle
1 tsp red pepper flakes
1 tsp piment d'espelette
1/2 tsp smoked paprika
1/2 cup toasted pine nuts
Few cracks black pepper
1 tsp Hawaiian black lava salt (or smoked salt)
Directions
1.  Rub some olive oil over the eggplant halves and roast flesh side down for about 50 minutes at 190°C 375°F.
2.  Scoop out the flesh and blend together with the yogurt, garlic, lime juice, olive oil, red pepper flakes, and black pepper.
3.  Stir in the toasted pine nuts.  
4.  Add the black salt just before serving with a drizzle of excellent olive oil.

This was a creamy smokey spicy dream come true...
The pine nuts make it even more interesting than the regular old eggplant caviar and that lava salt just takes it over the top!

Print Friendly and PDF

Saturday, June 28, 2014

Sunburst VegetableTartelettes

Nothing screams summer like feta, olive oil, basil, and vegetables bursting with sunshine.  All those things in a mini buckwheat crust tart, and you've got yourself something tasty and cute.  I'd always gone for the "normal" sized pie before, but it is more complicated to eat as finger food, and every slice is exactly the same.  The advantage of making tartelettes is that you can customize some of them.  I added tahini and lemon to some, went all zucchini or all tomato in another, and mixed everything in the rest.
Oh and did I mention there is eggplant happening tonight?
Ooo I hope nobody's hungry tonight so I can eat them all!
I had originally intended to make this mini quiches, but then had this marvelous idea to make deviled eggs with dill and capers alongside the tartelettes.. which would mean too much egg in one sitting.  I'm quite happy to have made these all veg.  The creamy eggplant just melts into all the nooks and crannies in a way that satisfies me so.
Unfortunately, I completely failed my deviled eggs... having missed my friday morning market (since I was out of town) I bought "other" eggs that were much much bigger and so I messed up the cooking time.  I steamed them for 8 minutes, but instead of hard boiling, they were soft boiled, and completely unusable for my deviled eggs.. so now I have a 6 egg sort of cucumber caper dill dressing just sitting in a tupperware...really pissed off.
Anyway, the tartelettes were enough to fill the guests, who didn't even notice half of the happy hour plan went down the drain, which is always a victory.
Yield 12-14 mini tarts (almost bite sized)
Ingredients
For the Buckwheat Shortcrust:
125g (4.4oz) buckwheat flour
125g (4.4oz) whole wheat flour
100g (3.5oz) room temperature butter
1 Tbsp yeast extract (non active)
1/2 tsp salt
1 tsp paprika
1 tsp thyme
1 egg yolk
approximately 5 cL water
use the method, then divide into the number of tarts you want to make

For the Filling:
1 spirelli'd zucchini
1 medium eggplant, cubed
2 chopped tomatoes
2 loves garlic, minced
handful chopped basil
about 1 Tbsp crumbled feta per tartelette
random squeezes of lemon
few random tablespoons tahini
few pinches fleur de sel
couple grinds of black pepper
some olive oil

Directions
1.  Season the vegetables separately with some fleur de sel, pepper, and a drizzle of olive oil.  Squeeze some lemon juice on the eggplant as well.
2.  Find whatever moulds you can to make a small enough sized tartelette.  I used silicone muffin moulds and then some cookie cutters and then some flat round dish I found.  You can also be a normal person and use tartelette tins.  Press the dough into each mould.  Do not precook the dough.
3.  In each mould, place a bit of basil, garlic, and then whatever order of veggie you want.  I made some with a zucchini contour and tomato and eggplant center, covered with feta and drizzled with olive oil.  In others I did eggplant with a bit of tahini, lemon, feta, and olive oil.  In another, only tomato, in another, only zucchini.. etc.  Fill each mould completely and press everything in so it is nicely packed.
4.  Bake at 180°C 350°F for about 1 hour, then remove and let cool at least 15 minutes.

These almost bite-sized little wonders are the definition of summer.. especially with that light crunchy buckwheat crust that makes them so easy to pop you just can't stop!
Welcome to the beginning of Summer.
I don't know why but I feel this one is going to be spiritually memorable...

Print Friendly and PDF

Tuesday, June 10, 2014

Deviled Eggs with Tuna

Deviled eggs has been requested many times, but I've never gotten around to making them because;
-It was never the right "time"
-I didn't have enough eggs at the time of request
-I thought I had to "snow" egg whites for some unknown reason and I'm not a big fan of that
-Peeling hard-boiled eggs is annoying with an ugly result

Well, it turns out that;
-Any time is the right time..guests or not, hors d'oeuvres or dinner..deviled eggs are always welcome
-I've since increased my weekly egg purchase, so this week I did have enough eggs
-There is no eggwhite beating involved, only forkmashing
-If you steam the eggs, peeling is easy and beautiful!

So without any reasonable excuse and the motivation inspired by my bamboo steamer basket, deviled eggs happened tonight for dinner...and the best part is I made enough for tomorrow's lunch as well, whiwh makes the pleasure last much longer than just popping one or two at happy hour.
Yield 16 halves (4 meals if served with sides)
Ingredients
8 farm fresh medium eggs
1 can of tuna, drained
1 1/2 Tbsp good quality mayonnaise
1 1/2 tsp strong mustard
Juice from 1/4 lemon
2 Tbsp chopped scallions
1 Tbsp chopped cilantro
1/8 tsp crushed piment d'espelette
1/8 tsp freshly ground black pepper
Crumbled feta for garnish
Paprika sprinkled for garnish
Directions
1.  Steam the eggs on high for 7 minutes, then place in an ice bath to stop the cooking.
2.  Peel and halve the eggs.  They should be hard boiled, but not chalky, as so..
3.  Scoop out the yolks into a bowl and add the tuna, mayo, lemon juice, mustard, pepper, piment d'espelette, scallions, black pepper, and cilantro.  Stir well with a fork until the mixture is even and scoop worthy.
4.  Place one heaping tsp of the mixture into each egg half.  Garnish with some crumbled feta ans a shake of paprika.
Refrigerate until ready to serve.  I ate this immediately alongside some roasted asparagus and a salad with chopped cucumber, tomatoes, capers, and aah yes, feta.
Goat feta.  It is driving me crazy.  I don't know if I should ask forgiveness for trespassing its purity or feel grace that I have been blessed enough to reveal its ability to comprehend...

These are known as Oeufs Mimosa in French.  I am unable to correctly label this as either French or American, so I labeled as both.  I suppose the feta is more European, but these are clearly cross cultural with those scallions and cilantro!

Print Friendly and PDF

Sunday, May 25, 2014

Indian Basil Seed (Sabja) Iced Tea

Yesterday morning I went to one of my favorite amusement parks, the Asian supermarket.  It's kind of like going on a treasure hunt.  I had a list of things I know I want.  I had the Chinese phonetic pronunciation and the english description of the product, but once there, you have to really read the ingredients to be sure you have the correct item.. plus it helps to avoid buying products with msg and genetically modified soy.  Anyway, while perusing the spice isle, I saw something I'd never seen before in real life (or maybe something I'd never searched for) Thai basil seeds.  I immediately knew what to do with them since I'd seen many Indian summer drinks with these little seeds.  I also knew they have a wild variety of health benefits, so I placed them in my cart and felt motivated to continue my search for odd Sichuan pastes.  I hosted a dinner party last night and I thought I could make this into a refreshing happy hour beverage that would be new and fun.  My guest always know whether they like to or not, they'll be tasting something "strange" when coming here.
While researching, I found that these little basil seeds DO have a plethora of health benefits.
I may be onto a wild discovery...
-  reduces indigestion
- cures colds
-respiratory disorders
-anti-stress
-helps with skin infections
-weight loss
-anti inflammatory
-reduces heartburn
-improves memory
-treats diabetes
How did I not come across these before?
Plus, all you need to do is soak just 1-2 Tbsp in 2 cups of water for 30 minutes and then you can add them to up to 2 L of whatever drink you want.. lemonade, plain water, juice, falooda...
They are fun too.  The texture is slippery and they look like lump eggs when they are soaked.  The inner part stays hard, but the whole concept made me think of Boba (bubble tea) that is so hard to find here in France.  Plus I'm sure these are much much healthier!
I made some Indian Iced "Tea" with honey, cardamom, and pepper.
Ingredients
2 Tbsp basil seeds (sabja) soaked in 2 cups water for 30 minutes
2 L warm water
6 Tbsp honey
1/2 tsp cardamom
1 tsp finely ground pepper
Directions
1.  Dissolve the honey in the water, then add the cardamom and pepper.
2.  Mix well, then refrigerate until well chilled.
3.  Serve 2 tsp (or more) soaked seeds in each glass.

They will float to the top at first, then sink if you're a slow drinker.

It is such a refreshing change from the "traditional" happy hour drinks...

Print Friendly and PDF

Saturday, March 29, 2014

Hummus-Ful bi Tahini (Chickpeas and Favas)

With the most delicious hand pressed olive oil and home made Lebanese bread, I may be in paradise...
It's Saturday Night Fava
haa I love it!
The Patels will be here in less than 2 weeks, and I promised them not to spend too much time in the kitchen while they're here... And since I don't get many opportunities to cook for them, I must optimize what I can by making ahead the things I most want to show off to them but that take time.  Hummus freezes well..and so do samosas, which is perfect for it will leave me time to plancha with the father and discuss different coffee and beer making methods with the brother during happy hour.
The reason behind tonight's endeavors are clear, and it is a perfect way to make it a Lebanese evening with man'ouché and a fresh salad.
This time though, I did half chickpeas, half fava beans.  At first I thought it would be ugly, since the favas turned the cooking water brown and tainted the chickpeas.  The puree pre-tahini was a brownish color, but once the tahini was mixed in, it lightened it all up.
The taste is just amazing.  It has a fresh springy taste, though very similar to plain hummus.
To serve I made a little well in the center and poured in an excellent olive oil made and gifted to me by a friend, and to dip I made some Lebanese bread and cut some cucumber into sticks.
The Ma'nouché was perfect this time with fresh yeast and za'atar.. mm
Lets talk about that now, shall we?
Today was my first time using fresh yeast vs dry.  There is absolutley no compairison.  Hands down fresh wins.  It rises like a skyscraper and gives the bread such a nice texture and tastes like love.
Seriously, it tastes like love!

Print Friendly and PDF

Wednesday, January 1, 2014

Chutney Duo: Tamarind and Mint

It goes without saying that chutneys are an integral part of Indian cuisine and culture.  Go to any Indian restaurant and there will always be at least a trio of chutneys available for various dipping of appetizers or accompaniment of breads or meats.
I particularly enjoy chutneys with my samosas and pakoras.
The pakoras I chose to end 2013 with are made with Black-eyed peas.  The selection was perfect since black-eyed peas are the traditional American way of bringing luck and good fortune into a new year.
I love to fuse...
Here are two of the traditional chutneys to serve with these appetizers, which I chose as the start to 2014.  Twas a happy new year indeed.

Tamarind Chutney (left)
2 Tbsp tamarind concentrate
2 cups water
1/4 cup jaggery (I used brown sugar)
1 tsp salt
1 tsp chili powder
1 tsp cumin seeds
1 tsp fennel seeds

Dry roast and grind the cumin and fennel seeds.
On the stove top, dilute the tamarind concentrate into the water with brown sugar, salt, and spices.
Bring to a boil, then simmer until the chutney reaches desired consistency.  I probably left it for a good hour on a very low simmer.  Stir every once in a while to check.

Mint Chutney (right)
1/2 cup packed fresh mint leaves
10 sprigs cilantro
1/4 medium red onion
1 small tomato
2 cloves garlic
juice from 1 lime
1/2 tsp salt
1/2 tsp chat masala (I used tandoori masala + amchur)
1/2 tsp sugar

Blend everything together.

I personally prefer the mint chutney with samosas and tandoori things, but I prefer savory to sweet.  People in general (I've noticed) seem to prefer the tamarind chutney.

Needless to say, both were very much needed to accompany all this craziness…
I seriously cannot grip anything in my right hand.  My kneading-rolling-pinching muscles are sore all through my arm through to my triceps.
I think I'm going to be muscularly lopsided if I continue in this direction.

Print Friendly and PDF

Saturday, November 2, 2013

Kale Chips

Guess what I'm munching on...
Chili oil rubbed and lightly salted 180°C baked for 10 minutes
kale chips
ta daa
and I can't stop..

I feel like a crazy person

Print Friendly and PDF

Sunday, August 4, 2013

Roasted Cauliflower Cheddar Dip

I love it when people have no clue what to do with their vegetables...and end up donating them to me.  As if the conclusion to their thought process was: my cauliflower will have a better life with you.
It is probably true.  I don't often get to work with a whole head of fresh cauliflower, so when I do, I want to make it sublime.
My magic bullet will help me make it into a wonderful dip that will also be enjoyed by the donor.
Inspired by Off the Meathook
Ingredients:
1 head cauliflower, broken into florets
8 oz (235g) cream cheese
1/2 cup greek yogurt
1/2 tsp fresh rosemary
2 cups shredded cheddar (I'll be shredding with the bullet)
1 tsp mustard
4 dashes worcechestershire
2 pinches salt
1/2 tsp chili powder
20 grinds fresh pepper
Directions:
1.  Place the florets on a baking sheet and roast at 500°F 260°C for 15 minutes, then lower the heat to 350°F 175°C for another 20 minutes or until soft.
2.  Let cool to avoid burning yourself and purée until smooth.
3.  Add the rest of the ingredients and purée again until smooth.
4.  Tranfer mixture into a baking dish and bake for 30-40 minutes or until crusty and bubbly.
5.  Let sit 5-10 minutes before serving.

Serve with carrot sticks, celery, pita, radishes, cucumber, tortilla chips, bread.. whatever you can use to dip into this heavenly mixture and bring it to you mouth!
My donor liked it so much she ended up bringing some home with her.

Print Friendly and PDF

Monday, July 22, 2013

Tahini

I always wondered how they got that tahini into a lushious white sauce.. I always thought they added yogurt

It's just tahini stirred with water and a squeeze of lime juice.

Who knew it would turn white?

I recently learned that I detain the 2 best tahini brands you can get outside of Israel/Palestine.

Achva from Israel
Al Wadi from Lebanon

Lucky me!
And the winner is..... Al Wadi by far!! I just did a raw tablespoonful taste test and Al Wadi is like nectar.  Achva is good too, but really not the same.
This is going to make life so much sexier!
Here is the "Real" hummus ingredients according to the Hummus Blog:
1 cup dried chickpeas, soaked long long time, then cooked and peeled
1/2 cup (130g) excellent tahini
Juice from 1 lemon
1/2 tsp cumin
1/4 tsp salt (or more)
2 garlic cloves
Enough cooking water for the hummus to be of desired consistency

Oh and if I had an ice cream maker I would totally make Tahini ice cream!  I just tasted some and it is seriously out of this world!!!!

Print Friendly and PDF