Search this blog

Translate

Monday, September 28, 2015

Long Chinese Eggplant Japchae

Today was a good day.  Our Earth's amazing fruits have been offered to me for my intense discovery and enjoyment.
Long Chinese eggplants, also called finger eggplants found their way to my desk this morning along with a few jars of homemade jam.  Those eggplants have the word "finger" in them and they are purple!!  'Nuff said.
I also discovered some chiles from the Kabyle area of Algeria offered by a neighbor.  This dinner was the perfect combination of the gifts of life (minus the jam.. because it just wasn't going to happen for dinner).
Serves 3-4
Ingredients
3-4 long Chinese eggplants (finger eggplants), quartered lengthwise and cut into pieces
1 Tbsp oil (I used coconut)
Japchae:
2 Tbsp oil
1 onion, sliced into moons
2 carrots, grated
1 cup cabbage, shredded
1/2 cup sliced leeks
2 eggs
1 green chile (mine was from Kabyle)
250g Dangmyeon noodles (Korean sweet potato starch noodles), cooked and piping hot
Sauce:
1 tsp doubanjiang paste (Pixian broadbean chile paste)
2 Tbsp light soy sauce
2 Tbsp black vinegar
4 garlic cloves, grated
1 inch piece ginger, grated
Garnish:
few drops sesame oil
chopped green onions
sesame seeds
crushed peanuts
Directions
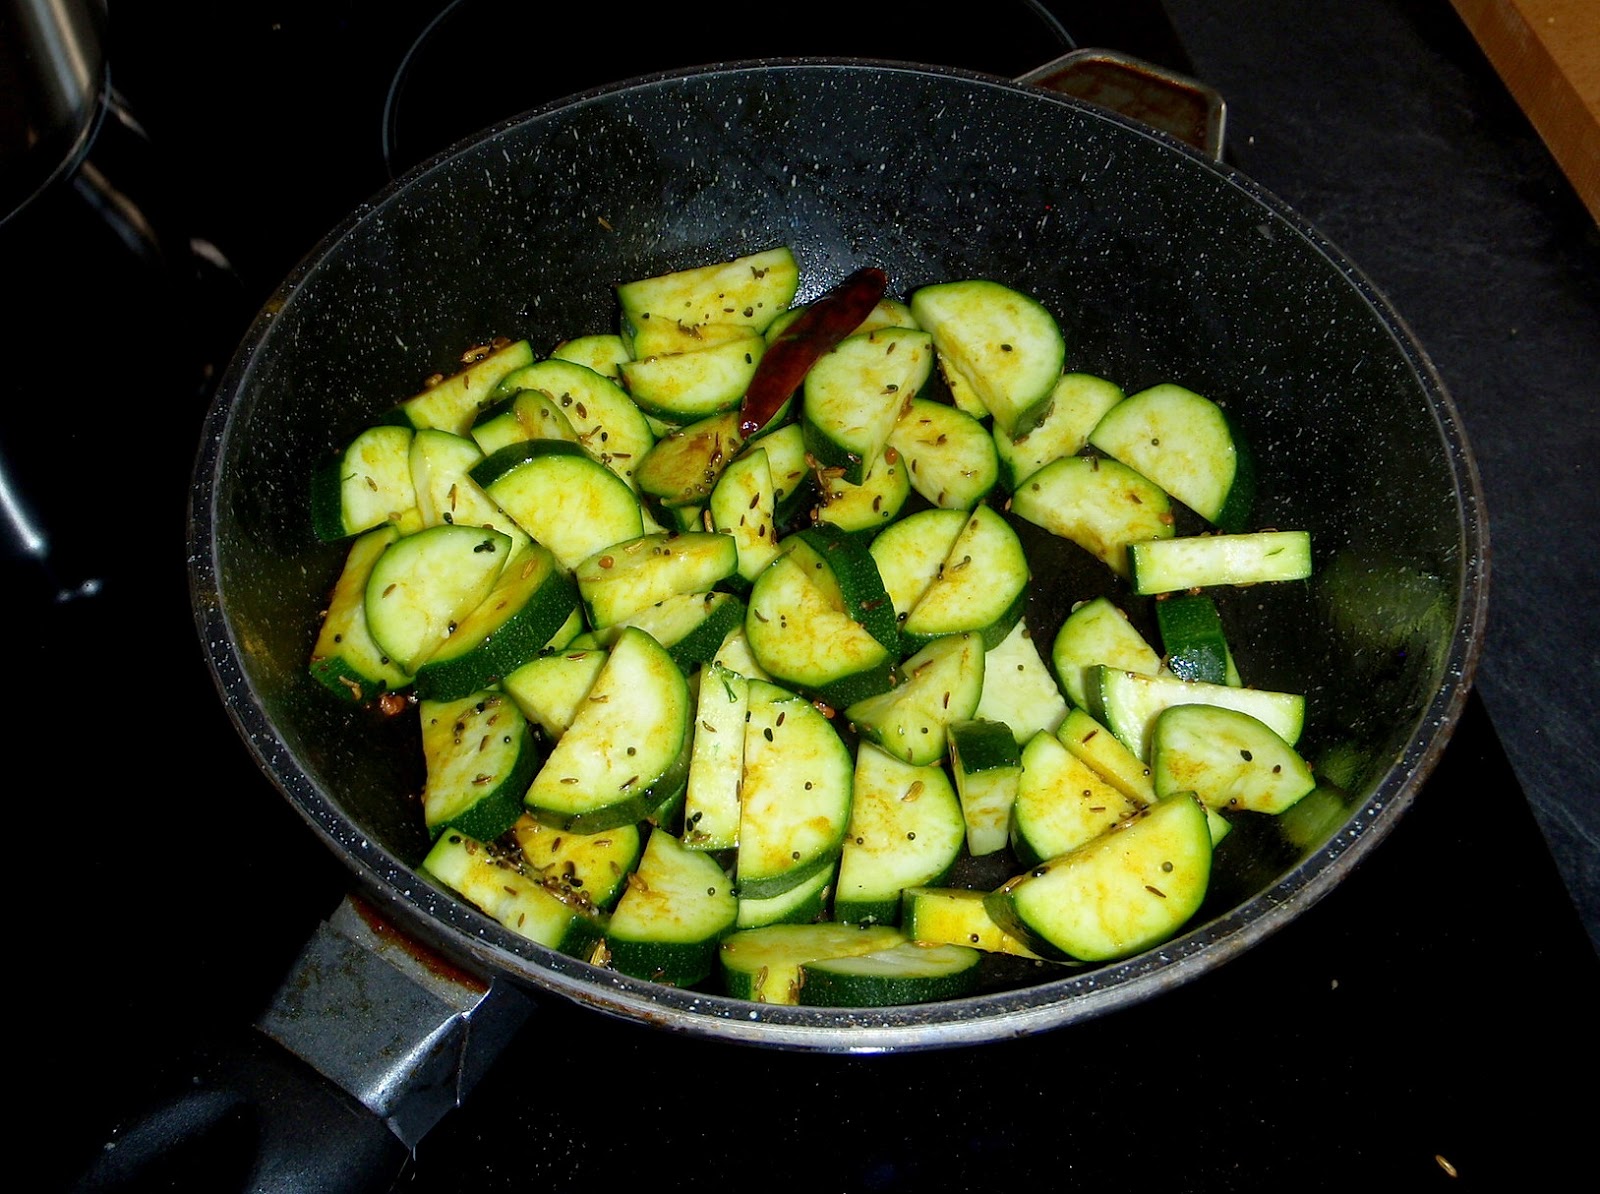
1.  Start with the eggplants.  Heat the oil in a wok or heavy based pan and cook the eggplant slices in one layer for about 3 minutes, then flip and cook until all sides are colored and they are bite tender.  Remove and set aside.
2.  Make your sauce by stirring all the ingredients together.
3.  Heat 1 Tbsp oil in the wok and cook the onions until translucent.  Push them to the sides of the wok and add the carrots and leeks in the center.  Stir fry for about a minute, then push to the sides and add the cabbage and green chile.  Stir fry for about 2 minutes, then push to the sides.
4.  Add the last Tbsp of oil in the center of the wok.  Crack the eggs and let them set a bit.  Stir to break them, then stir fry everything, adding half the sauce.
5.  Add the cooked hot noodles and the eggplants along with the rest of the sauce and heat through.
6.  Serve with desired garnishes

Anything mixing Korean style cooking, Chinese vegetables and Algerian chiles can only be a win win situation.  This was a slice of heaven on a cold day..

Print Friendly and PDF

Sunday, September 20, 2015

Panch Poran Zucchini and Butternut Masala

There are days when I try very hard to cook this way.. And there are days when I find myself unable to cook any other way.  Those are the days when I know I want moong beans, for example, and that's it.  I have to rummage my way around my fridge and pantry to work around that one urge.. Because When I want moong, I want the whole experience.  My brain goes into autopilot and I become the puppet of my subconscience.  Today, I surprised myself as I sat down to enjoy my mung dal that all these other friends had come to enjoy the party.. Especially Mr. Zucchini.  That fellow has never come to join my India evenings.  Today, my Id must have done some coaxing for him to join us.. And I'm very happy he accepted the impromptu invitation!
Serve 3 as a side
Ingredients
2 large zucchini, sliced lengthwise, then into 1/4 inch thick moons
1 Tbsp coconut oil
1/2 tsp cumin seeds
2 dried red chiles
1/4 tsp mustard seeds
1/4 tsp nigella seeds
1/4 tsp fenugreek seeds
1/4 tsp fennel seeds
1/4 tsp turmeric
1/2 tsp amchur (mango powder)
Juice from 1/2 lime
Pinch chile powder
Fleur de sel, to taste
1 cup cubed butternut squash (mine was already roasted)
Chopped cilantro for garnish
Directions
1.  Heat the oil in a wide heavy based pan (sautée pan).  Add the seeds and red chiles and cook for about 1 minute or until they crackle and sputter.  This mixture of seeds is called Panch Poran.  I like that name.
2.  Add the zucchini slices and stir to coat.  If your butternut squash is raw, add it as well.  If it is already cooked, wait until the end to add it.
3.  Cover and cook on high for 2-3 minutes.  During this time, the zucchini and squash will steam a bit while keeping some texture.
4.  Uncover and cook, stirring for another 3-4 minutes on high.  If your butternut squash is was already cooked, now is the time to add it.
5.  Add the lemon juice and mango powder along with a few pinches fleur de sel.  Stir and set aside until ready to serve topped with some chopped cilantro.

I served this with some Hara Moong Dal, Cabbage Sambharo, Turmeric Basmati Rice, and Rotis.

The whole deal was lovely but what I liked about this recipe is that the zucchini keeps its texture and does not melt down into complete mush.  Mr. Zucchini can be quite seductive when he puts his mind to it..

Print Friendly and PDF

Thursday, September 17, 2015

Fresh Mussels in a Spicy Tomato Sauce

After years and years of trying to either grow basil or keep a basil plant alive for more than 3 days, I finally conquered the challenge.
The secret?  I have absolutely no idea.
Maybe this time I tried to be careful to only pick the big leaves and leave the small leaves on the plant to develop.   Maybe this time I remembered to water it and put it on the window sill during the day and brought it in at night.  Maybe it's because I remembered to bring it in when it was too hot.. or put it on the south or east side of the house instead of full blast west as my previous living space faced.  Whatever the secret, I'm going to make it last as long as I can.  When those leaves start looking at me proudly and the plant is standing up straight, chest puffed out and shoulders back, I need to use them.  This is the type of deep deep inner desire that must be fulfilled quickly.  I'm always afraid to "waste" fresh basil by cooking it into dishes because it's so fragrant when raw and used as a topping that it can transform a dish.  I decided to go Cozze on it.
This is a repost of a Sicilian recipe I made after coming home from Italy,
Cozze alla Posillipo.
I didn't have clams this time.. only mussels, but they were big meaty mussels that perfectly filled my pleasure neurotransmitters to the maximum level.
This time I added 1 grated carrot to the sauce to help it become nice and thick.
I also added some freshly halved cherry tomatoes and chopped basil.
This is the type of dish I like to order when I'm out.  I know it's easy to make, but I never know if the seafood I'm buying is going to be good, so I only make it sparingly.
I'm recharged.. try to deplete me!

Print Friendly and PDF

Wednesday, September 16, 2015

Vegetarian Okonomiyaki - Japanese Pancakes

I very deeply believe that recipes come looking for me and not the other way around.  Social media may help with that, but as I scroll down looking for Bull Terrier pictures, I get flashes of beautiful things I had no idea existed.  These things take over my brain until I give in and recreate them my way.  Okonomiyaki is one of those things.  I thought I was familiar with Japanese cuisine, but seeing an image of this wonder made me realize that all I've ever experienced concerning Japanese food is what I've been able to try at restaurants.  I know absolutely nothing about Japanese street food.  Actually, the words "Japanese Street Food" never crossed my mind.  If I was asked what I thought it was, I would guess some teriyaki meat on a stick or things along those lines.  Now that I think about it, I'm pretty sure food on a stick is a big thing in Japan.
Anyway, this little treasure absolutely needed to be born of my hands.. and so it was..
Serves 4 (1/2 per person or 4 smaller pancakes)
Ingredients
3 eggs, beaten
1 Tbsp miso
160mL mushroom water (or broth or water)
100g flour
few tablespoons oil for cooking
300g shredded cabbage
2 large handfuls dried shitake mushrooms, soaked int hot water, then sliced
1 carrot, peeled and grated
2 Tbsp nutritional yeast
3 green onions, chopped
 Garnish:
toasted sesame seeds
picked sliced ginger
dried seaweed (I rehydrated mine)
sliced cherry tomatoes
Sauce:
sesame oil
thick dark soy sauce
glassy balsamic vinegar
Sriracha
Japanese spicy mayonnaise (I didn't have)
Directions
1. In a large mixing bowl, place all the vegetables until evenly distributed with each other.
2.  In a separate mixing bowl, whisk together the eggs, miso, water (I used the cooled water from the mushroom soaking), and flour.
3.  Pour the batter onto the vegetables and stir until all mixed together.  This should not be liquidy.. think hash browns.  Do not over mix, just coat.
4.  On a skillet or plancha, squirt a bit of oil and heat to high.  Divide the battered vegetables into 2 for mega Okonomiyakis or 4 for individual sized ones.  
I only had 2 medium pans.. this would be best on a large habachi style grill or plancha.  I did what I could to satisfy my urge.  I seriously thought I'd be making 1 per person, but it turned out to be a bit overwhelming in portion size.
Shape them into round pancake like things.
5.  Cook for about 3 minutes on high, then flip and cook on the other side for another 3 minutes.  I'm not a crazy person that tries to flip things in the air and catch them back in the pan.  If you are one of those.. go right ahead and give it a shot.  I covered the pan with a plate, flipped onto the plate, then slid the pancake back into the pan to limit the possible damage.
I also had 2 different pans, one stone and one ceramic.  The ceramic gave me a char and cooked quicker than the stone.  Interesting!
6.  Add your garnish, then try to make something pretty with all your sauces.
Serve hot or warm.. but not cold.  This is a right here right now type of thing.

The amount of cooking is very subjective and personal, but I enjoyed the charred one better than the custardish one.  It tasted more.. finished.
This dish is just as interesting to eat as it is to look at.  It's something completely customizable so there isn't really a fixed recipe.  The basics are that you need cabbage, need something meaty, need batter, and need need need toppings and sauce.  Crunchy toppings, fresh toppings, pickled toppings.. but toppings.  Sauce should be tangy, spicy, and a bit sweet.
Now I know why this Okonomiyaki spoke to me in the first place.  It is completely the way I let my desires develop in my the kitchen...

Print Friendly and PDF

Tuesday, September 15, 2015

Koosa with Pomegranate

When I did not live in France, I would always want to eat stuffed tomatoes and zucchini when I came on vacation (tomates farcies).  That was before I tried it the Syrian way.
The mix of cumin, cinnamon, nutmeg, cloves, coriander (from the five spice) and hint of cayenne takes both the zucchini and the stuffing to an entire different height of serotonin inducing happiness.
The only acceptable addition was pomegranate seeds as garnish.  The sour/sweet crunch of the little seeds pair incredibly with the lamb/beef flavor and helps keep the spices in balance.
Balance is good.
Serves 4-5
Ingredients
5 zucchini or kusa squash, halved and cored, pulp scooped out
2 Tbsp olive oil
1 yellow onion, diced
4 cloves garlic, sliced
1 can crushed tomatoes
1 cube lamb bouillon (or whatever you have on hand)
water to level
pinch cayenne pepper
1 tsp thyme
fleur de sel for garnish
cooked basmati rice for serving
1/4 cup pomegranate seeds (mine were dried)
chopped mint to garnish (I did not have)
stuffing:
450g (1 lb) ground beef or lamb (I used beef)
2 Tbsp uncooked basmati rice, soaked and rinsed
4 garlic cloves, grated
1 red onion, minced
1 tsp ground cumin
2 tsp fivespice (or allspice)
1 carrot, peeled and finely grated
many grinds black pepper
juice from 1 lime
1 Tbsp olive oil
pulp from 1 zucchini
pinch cayenne pepper
pinch salt
Directions
1.  Make the stuffing by mixing all the ingredients with your hands until homogenous.  Stuff the zucchini or squash halves with the mixture.
2.  Heat the olive oil in a very wide heavy based pan (wide enough for all the zucchini to lay in one layer).. otherwise, use 2 pans as I did.  Add the onions and cook until translucent.
3.  Add the thyme, crushed tomatoes, cayenne, and the bouillon cube.  Bring to a boil, then reduce for about 5 minutes.
4.  Add the stuffed zucchini halves along with the garlic cloves.  Add water to level (do not completely submerge).  Bring to a boil, then cover and simmer for about 25 minutes, rotating the zucchini halfway through.
5.  Add the dried pomegranate seeds to the sauce before serving.  If using fresh, just add to each plate.
I served over hot basmati rice, which was the perfect vehicle for that exquisitely spiced tomato sauce.
Syrian and Lebanese cuisine will always hold a special place in my heart.. and this recipe totally dethrones the French version.  I feel like that was a confession I should be ashamed of, but I'm not...

Print Friendly and PDF

Saturday, September 12, 2015

Roasted Sweet Potatoes with Tandoori Bok Choy

Cilantro chutney is my favorite type of leftover sauce with which to improvise.  I always make a big enough batch so I can either eat it with a spoon or find a creative new way to pair it.  It surprisingly goes with anything.. samosas, pappadums, steamed dhokla, chicken, fish, grilled or roasted vegetables, tortilla chips, bread.. my finger.  I even tried it with steak!  Sacriledge.. but who really cares.  That's not the point.  What I love is that the pairing sometimes completely blows me away.  When I make it for samosas, I know exactly what the outcome will be.. and that's good because it's exactly what I'm expecting.  Today I paired it with some roasted sweet potato slices.
Wow.
I don't think I can ever eat sweet potatoes without them.  They are like soulmates.. completely in contrast but beautifully symbiotic.  The sweetness of the sweet potato contrasts the harshness of the raw green.  With a little bit of coconut, it comes out as an incredible vegan main dish.
Since I was going for improvisational pairing, I decided to go completely vegan and pair this with a green veggie instead of meat.
After coming home from the Indian Wonderland Market downtown, my tandoori packet wanted to fuse with my blood cells.  It is made with all natural ingredients and no food coloring, but has a deep red color from the ground chiles.  If I didn't use it tonight, I would have snorted lines of it.  Tandoori seasoning smells so familiar it's aroma is like a sensual whisper.  It also goes well with grilled veggies.  I've done broccoli and cauliflower with very happy endings.. so grilled bok choy seemed like an interesting successful combination.
This meal was so simple to put together but so perfect in its uniqueness that I couldn't let it go without properly documenting it.

Cilantro Chutney - yield 1 1/2 cups
3 green onions
1 green chile
1/2 bunch cilantro
4 cloves garlic
juice from 1 lime
4 whole black peppercorns
1 tsp oregano
pinch fleur de sel
Blend it all together

Roasted Sweet Potatoes - serves 1
1 sweet potato, cut into 1/4 inch slices
2 Tbsp olive oil
pinch fleur de sel
1 tsp amchur (dried mango powder)
1 Tbsp dried coconut for garnish
Toss with olive oil, fleur de sel, and amchur.  Bake at 200°C 400°F for 30 minutes, then serve garnished with some cilantro chutney and coconut.

Tandoori Bok Choy - serves 1
1 medium bok choy, sliced in half lengthwise
pinch fleur de sel
1 tbsp olive oil
1 clove garlic, grated
healthy sprinkling tandoori spices (about 2 tsp)
Rub the bok choy halves with the grated garlic, making sure to get the garlic into the crevices.  Sprinkle with fleur de sel and tandoori spices, then drizzle olive oil onto the open halves, rubbing it all over the bok choy.
Heat a griddle pan or cast iron pan on high, then grill the bok choy face down for about 3-4 minutes.  It should have nice char marks.  Flip them over and grill another 3 minutes.

This seems like a light meal, but it was very filling and satisfied all my longing senses without having to cut lines of tandoori powder and inhale them...

Print Friendly and PDF

Monday, September 7, 2015

Fiery Papaya Peach Pico de Gallo

Some days you get lucky and stumble upon an extra spicy chile in a batch of very mild chiles.  
Those are the days you least expect it.  When you realize it.. it's too late.  Only in the aftermath does the chile reveal its true nature.. once it's long gone and into your system.. taking you over piece by piece.
In the case of this intentionally mild fruity pico de gallo, that sneaky chile got me thrice.  Once during the chile taste test.  It had absolutely no heat, so I used the entire thing.  The second time when tasting the salsa.  It had surprisingly more heat than when I tasted it alone, with a pleasurably hot yet controllable aftermath.
And then there was the next day... it intensified.  I had to lay down and drink goat's milk to avoid either having a seizure or fainting.
Just incredible..
Yield 1 1/2 cups
Ingredients
1/2 small papaya, seeded and diced
1 peach, peeled, stoned, and diced
3 green onions, chopped
1 tomato, diced
1 large light green chile (it's hit or miss, but mine was extra super spicy)
1/2 bunch cilantro, chopped
pinch fleur de sel
many grinds black pepper
pinch ground cumin
juice from 1 lime
Use over some black beans, in a salad, in fajitas, as a taco topping.. a dip with tortilla chips.
The sweetness of the papaya and peach pairs wonderfully with the crunch of the green onions and the tang of the lime.  You can obviously adjust the heat to your liking.  I personally think fruit and chile are matches made in heaven... 
just have a security net (milk or yogurt) within reach just in case.

Print Friendly and PDF

Sunday, September 6, 2015

Cabbage and Apple Salad in a Miso Vinaigrette

Did somebody say apples were boring?
Oh hail no!
There are very few items that are exciting all on their own.  I can list a few (mango, chile..) but most need some type of prep or paring to be extraordinary.
Example?  Apples in a main dish.
Of course apples as a fruit all on their own are good.  They're not mind tingling and drool enhancing, but they are enjoyable nonetheless.  Pair them with cinnamon and achieve a "mmmmm!" level.  Add ginger and the brain cells will start to tingle.
In a main dish, this is exactly why I like apples.  They act as the enhancer with their zesty freshness and crunch and work well with vinegar and umami flavors such as miso.
I sometimes do not plan to use them and they jump out at me as I'm analyzing my options as the best idea in the world.  This is one of those days...
Serves 1
Ingredients
Salad:
2 steamed or hardboiled eggs, shelled
1/2 apple, grated
2 handfuls grated cabbage
chopped cilantro
chopped green onion
Sauce:
1 Tbsp sesame oil
1 Tbsp black vinegar
3 cloves garlic, grated
1 tsp doubanjiang (fermented broadbean and chile paste)
1/2 inch ginger, grated
1 tsp black sesame seeds
1 tsp white sesame seeds
1 Tbsp miso paste
Directions
1.  Make the sauce by stirring all the ingredients together.
2.  Assemble, then spoon the sauce over.
3.  I can't believe dinner was that easy.

I have to admit, my black vinegar miso vinaigrette makes anything taste delicious.  It's the go-to vegetarian option for an Asian style sauce that usually uses oyster or fish sauce.
An apple a day...

Print Friendly and PDF

Saturday, September 5, 2015

Stuffed Roasted Artichoke

 The pleasure of delecting an artichoke down to its heart must be earned.  First of all an artichoke is a bud that has not yet blossomed into it's peacock like beauty.  It is picked at a stage of its young life where the heart is still tender and innocent.  Since it has not yet blossomed, it is closed firmly to protect its tender heart.  If you want to eat it, you must find your way around its protective spines to access that soft inner piece of glory.  Apparently, innocence is packed with vitamins...
Once it is picked at the correct stage of its development, there are a number of ways to prepare and eat it, all of which require determination.  I chose to stuff it with quinoa, millet, garlic, oregano, olive oil, and lemon juice mixture and then roast it topped with bread crumbs and parmesan.  The Italian way is usually the same but with breadcrumbs or meat.
This is an excellent decision.. as long as you get the cooking time right.  It can take anywhere between 40 and 90 minutes depending on the size of your artichoke.
Serves 1
Ingredients
1 large violet artichoke
1-2 cups water
juice from 1/4 lime
Stuffing:
1/2 cup quinoa millet mix
juice from 1/2 lime
2 Tbsp grated garlic
2 Tbsp olive oil
pinch fleur de sel
1 tsp dried oregano
1 tsp red chile flakes
Topping:
1 handful breadcrumbs
1 handful grated parmesan
olive oil to drizzle
Sauce:
3 Tbsp excellent quality olive oil
few squirts glassy balsamic vinegar
cracked black pepper
juice from 1/4 lime
1 Tbsp grated garlic
pinch fleur de sel
Directions
1.  Prepare the artichoke.  Trim the stem of the artichoke so that it can sit upright without propping.  Trim the top and cut off any spines.  My large violet artichoke did not have very spiny leaves.  Very carefully, try to open the center of the artichoke little by little by spreading the leaves from the center apart.  It should loosen up just a bit and you will start to see the very tender leaves and the hairy part. That hairy part is what develops into that pretty purple flower that looks like the top of a peacock's head.  It is also inedible and so you want to remove as much of it as possible so that the eating part of the experience can be as smooth and pleasant as possible.  Use a knife to gently cut the hairy part away from the heart, then use a spoon to scoop out as much of that stuff as possible.  You will be surprised as to how much is actually in there.
2.  Ah ok now you have a clean, emptied artichoke.  Give it a nice squirt of lime juice in the center and rub the leaves between your fingers in some of the juice.
3.  Now stuff it.  Mix together all the stuffing ingredients and spoon into the center of the artichoke and into the crevices of the looser leaves.
4.  Top with the breadcrumbs and parmesan, then give an extra glug of olive oil all around.  Place upright in an baking dish and fill with water.
5.  Cover with foil and bake at 200°C 400°F for 80 minutes.  It will braise on the outside and steam on the inside.
6.  During this time, make the dipping sauce by stirring all the sauce ingredients together and then squirting some of that glassy balsamic vinegar into it to get a swirly effect (that I didn't catch on camera).
7.  Remove the foil and bake for another 10 minutes or until the outermost leaves detach with a gentle tug.
Let cool for about 10 minutes before rewarding yourself for all your hard work.

The leaves have just a bit of flesh on them that are best with the dipping sauce.  Please eat with your hands.  You can use a fork if absolutely necessary to eat some of the stuffing as you work your way to the center.
Once the leaves have been properly consumed, the heart will start to expose.  The innermost leaves are the most tender and may be eaten completely depending on the type of artichoke in your presence.  The hairy part should be mostly gone, but you may need to remove the remaining part.
Then comes the heart.  At this point I had already eaten my stuffing.. which was very nicely cooked, nestled inside its protective bud.
The heart is the trophy you've earned after all the hard work and wait and possible injury.  It is the most delicate part after battling through its thicket of leaves.  It's like the princess you rescue after fighting the dragon.  
Only the worthy will discover her true beauty...

Print Friendly and PDF