Search this blog

Translate

Saturday, November 15, 2014

Sardines in Piment d'Espelette Olive Oil

When life hands you apples... well, marinate some fish!
Life has been handing me lovely delicate little surprises such as piment d'espelette olive oil.  There must be something going on around my aura that screams PIMENT D'ESPELETTE LOVER wherever I go.  I can randomly go somewhere for work or just to pick up some potatoes at a friend's house and come home with fresh piment d'espelette from a garden or some piment d'espelette olive oil.  Why?  I don't know.. but I'm not going to as many more questions because I don't want it to stop!  By the way, if you know me in real life, know that I do not like flowers, I'd rather something edible.. but if you know me, I don't need to explain that..
This is insanely similar to my Marinated Anchovies, but also quite different for in this method, there is only one "bath."  The lemon juice and olive oil cure the filets instead of going through a vinegar cure.
Ingredients
1 kg (approx 2 lbs) fresh whole sardines
juice from 1 lemon
3/4 cup piment d'espelette olive oil or other chile infused olive oil
2 cloves garlic, sliced
few pinches fleur de sel
few cracks black pepper
flat leaf parsley for garnish
Directions
1.  Filet the sardines by cutting off the head and tail, then splitting it through the belly.  Carefully remove the central bone, then rinse and pat dry.  This step takes longer with sardines than with anchovies, I learned.  I thought I'd spend about 30 minutes on this part but ended up spending an hour and a half.  Do plan ahead.
2.  Prepare the marinade by whisking together the olive oil and lemon juice.
3.  Arrange the sardines, skin side down in a container.  Sprinkle some fleur de sel, pepper, and some garlic slices, then pour on the marinade until level.  Continue layering on the sardines and marinade until you don't have any more left.  If you run out of marinade, just add more lemon juice toward the end.
4.  Let marinate at least 3 hours.  I let mine overnight in the fridge.

Serve garnished with some parsley and just a touch of the marinade over the top.
Again, I'm not sure about the etiquette on how to eat these, but I have a tendency to just use my fingers.  I think some people may eat these with some steamed potatoes or slathered on some crusty bread.  I approve of all these methods.
What I enjoy (as with the anchovies) is that the real sardine taste is preserved.  Of course, this is completely different than grilling them, and the flesh doesn't have that "cooked" feel.  The best part about this is being able to rediscover one of my favorite foods in a completely different way.

Print Friendly and PDF

Friday, November 14, 2014

Rugelach with Poppy Seed Filling

Some poppy seed paste just seemed to appear into my life, and I pondered for a long time what to do with it.  It's a serious question, especially when you know you only have a small amount, and want to make the best of it without having it go to waste.  I had a similar feeling with Kaya... and in no way do I regret my choices for the nectar, but I do wish I had an emergency supply of it for my impromptu kaya desires.  The poppy seed paste, after a finger dip (aaAaaahh!) gave me plenty of inspiration.  There were the traditional "replace the peanut butter or tahini in weekly cookies" ideas, but I wanted to make it even more special.  After doing a bit of research as to how to glorify poppy seed paste, I consistently stumbled upon rugelachs.. and my childhood memories started to rush through me.  I don't know why rugelachs are such an integral party of my cookie eating history, because I probably did not eat them very often.  When I did, though, they were a real treat.  They were so common that I never thought of their origins or tried to recreate them.
Until this week...
Rugelachs in the US are part of the Eastern European and Russian culture, mostly Jewish, that have become part of daily life, such as bagels or hummus.  The difference is that rugelachs are mostly holiday fare, whereas bagels, pastrami, and hummus are everyday fare.  Poppy seed filling is the way I remember them best, but variations include honey, nuts, jam, and even chocolate filling.
Poppy seeds are the best in my opinion, and are used in many other Eastern European pastries which I may have a chance to make.. unless I make khus khus curry with the remaining paste...
Yield 64 Rugelachs
Ingredients
250g (8.8oz or 2 cups) flour
1/4 tsp salt
160g (5.6oz) cubed cream cheese
150g (5.3oz) cubed butter
1 tsp vanilla extract (I used maple syrup)
1 egg yolk, beaten
filling:
115g (4oz) poppy seed paste (or ground poppy seeds)
1/2 cup whole milk
pinch salt
50g (1.7oz) sugar
1 beaten egg
zest from 1/2 lime
juice from 1/2 lime
sprinkling:
2 Tbsp cane sugar
1/2 tsp cinnamon
pinch nutmeg
Directions
1.  In a stand mixer or with your fingertips (as I did) mix the butter and cream cheese with the flour and salt.  Add in the beaten yolk and vanilla extract and mix well.  This will be quite messy if using your hands.  Just try to form it into a ball.
2.  Separate into 4 equal parts and wrap in plastic wrap.  Once wrapped, press into discs and refrigerate at least 2 hours.  Overnight is probably the best bet.  Do not skip this step, or you will never be able to roll the dough.
3.  While the refrigeration process is happening, make the filling.  Heat the milk and sugar in a pan until almost boiling.  Pour some of the mixture into the beaten egg and whip well.  Beat in the poppy seed paste, lime, and zest.  Pour back into the pot and heat, whisking until thickens slightly.  Remove from heat and let cool.
4.  Prepare your sprinkling.  Stir the sugar, cinnamon, and nutmeg together.
5.  Get ready to roll.  Remove a disc from the fridge.
Use parchment paper to prevent from sticking.  Sprinkle some of the spiced sugar onto each side of the disc.
With a rolling pin and parchment paper on each side, roll into a 10 inch diameter, 1/4 inch thick circle.  Similar to a pie crust.
Spoon 2 Tbsp of the poppy seed filling on.  Spread it around, then cut into 16 slices, as if it were a pie.
To roll the rugelach, start from the outside of the "pie" slice and roll toward the center.
Repeat with each slice, and for each disc.
6.  Sprinkle on some more spiced sugar and bake at 190°C 375°F for 20 minutes.
Let cool for at least 15 minutes before tasting.

The zest will pleasantly surprise you long after the rugelach as been swallowed.
That is a sign you have paid attention to the details..

Print Friendly and PDF

Thursday, November 13, 2014

Celeriac Soup with Caramelized Grannies

Please check out my exact state of mind during this creation.  There are no (real) words that describe my psyche better than that video.
This came out of an almost empty fridge and an intelligently stocked freezer.  I had 1/4 head of red cabbage and 1 apple in my fridge.  The rest was wind blown into a piece of clay to form life.
And yes, of course I did stick my fingers in it and scream.
Serves 3
Ingredients
1/2 celiac head (celery root) peeled and cubed
2 celery stalks, chopped
1 leek, cleaned and sliced crosswise
3 cloves garlic, chopped
1 handful cauliflower florets
1 Tbsp olive oil
4 cups water (enough to level)
1 cube chicken or vegetable bouillon
1 sprig savory or thyme
lots of fresh cracked black pepper
pinch nutmeg
pinch angel hair chile
1 Tbsp cream (optional)
1 Grany Smith apple, peeled and diced
1 Tbsp butter
1 Tbsp brown or cane sugar
Some shredded red cabbage for garnish
Directions
1.  Heat the olive oil in a large pot and add the sliced leeks.  Now, I always save my leek greens when a recipe calls for the whites.  In a soup, you don't really care if there are greens because you are going to be blending that bad boy.. so now's the time to use that emergency freezer bag of chopped leek greens unless you care about the color.  Mine was slightly green in the end.. but that doesn't bother me.
2.  When the leeks start becoming fragrant, add the garlic, celery stalks, celiac, and cauliflower.  Stir around and cook for a few minutes.  Let the juices flow and combine.
3.  Add the savory sprig and bouillon cube and enough water to level.  You don't want to drown it.  4 cups was enough for me.  Bring to a boil, then let simmer for about 15 minutes or until the celiac is tender.
4.  Remove the savory sprigs.  Usine an immersible hand blender, purée the soup.  If you're feeling dangerous, do this in a blender, but why dirty all those unnecessary dishes if you don't absolutely have to?  Immersible blender is the way to go for this.
5.  Add lots of black pepper, nutmeg, and a pinch of the angel hair chile.  Simmer while you prepare the apple topping.  At this point, you can taste and adjust the seasoning.  You may or may not want to stir in a bit of cream.  I was not going to... but then my insane Turkish voice told me to DO IT!  No regrets.
6.  Prepare the Grannies.  Melt the butter in a separate pan.  In this case, butter is the only way to go.  Add the diced Granny Smith apples and cook until they start to color.  Add the cane sugar and continue cooking until nicely golden and caramelized.  Set aside.

Serve ladled in bowls with a bit of caramelized apple and shredded cabbage.

This soup hit the spot exactly the way it should.
Yes.

Print Friendly and PDF

Monday, November 10, 2014

Spiced Chili from Dry Kidney Beans

Chili is a dish that has as many "authentic" versions as there are stars on the American flag.  The only real rules to chili is that it's got to have meat, tomatoes, and chiles or chile powder (at the very least).  It can be mild or spicy, but it's always better when it's spicy, but deep flavorful spice... not necessarily heat spice.  I like both.  Obviously.
Depending on the location, it can include beans.  Some are very passionate about whether or not Chili includes beans.  I like beans, so my chili always has beans, and the beans that I choose for chili are kidney beans.  The variations are taken to another level by the way chili is eaten.  In Tennessee, the chili is served in a bowl with some tamales on the side.  Chili with a spoon, tamales with your fingers.  In Ohio, it is served over spaghetti with lots and lots of cheddar cheese.  In Alaska, they make it with moose and eat it as soup.  In California, you can order it over fries.  In Texas, they eat it with rice.  You can find chili in various places such as in an omelet, over a hot dog, over a baked potato, or even in a burger.
I like my chili with beans and over rice.. and with toppings that crunch and melt.
Now that we've gotten that out of the way, I want to tell you about kidney beans.  I'd never cooked them from dry before because of the high level phytohaemagglutinin toxin they contain when raw or undercooked.  You must cook them for 10 minutes at least at a high enough temperature for the toxin to be killed off, and I wasn't sure my crock pot would do the job.  If you're not feeling it, precook them in boiling water.  My crockpot cooks at an already high enough temperature on the low setting, so I figured at the high setting for a few hours would do the trick.  I did check to make sure there were simmering bubbles during cooking though.  Nobody was sick, so I will be using this method again for kidney beans... and they DO taste much better when cooked from scratch rather than from a can.  There is no comparison..  
Serves 7-8
Ingredients
1 1/2 cups dried kidney beans soaked overnight
550g (19oz) lean ground beef
2 bell peppers pick 2 colors, chopped
1 red chile, chopped (mine was Moroccan)
1 green chile, chopped (Moroccan as well)
1 large onion, chopped
5-6 medium tomatoes, chopped
5 chopped cloves of garlic
2 tsp cumin
2 tsp oregano
2 tsp basil
2 tsp turmeric
1 tsp chile powder
lots of freshly cracked black pepper
2 tsp coarse sea salt
2 bay leaves
Garnish:
chopped green onions
shredded swiss cheese
sour cream
shredded cabbage
Directions
1.  Place the soaked beans in the slow cooker with 6 cups water, 1 tsp of the sea salt, and the bay leaves.  Cook on high for 3 hours.
2.  Drain but keep 1 cup of the cooking water.  Place everything but the garnish into the slow cooker and cook on low for 6-7 hours.
3.  Taste and add salt if needed.
4.  Assemble with the garnish.
Make sure to mix it around in your plate, "unmade bed" style, before indulging.
Pure delight which is also comfort food at its peak.
This is basically Obama's Chili recipe that was publicized during the 2008 elections, but with a few additional touches that take it up a notch.

Print Friendly and PDF

Buffalo Cucumbers and Dill Filled Celery Sticks

When you have recurring guests, you must activate your creative juice so as to not bore them with recurring appetizers and hors d'oeuvres.  Using similar ingredients, this is somewhat a challenge.  I usually like to have raw veggies at my happy hour as opposed to potato chips and peanuts.  Don't get me wrong, those sometimes make an appearance, but maybe not all by themselves.  My peanuts will be a topping or a filling, and my potato chips will be.. um.. wait.. no.. I never serve potato chips.  Sorry.
I sometimes have tortilla chips to use as a vessel for salsa or guacamole or whatever dip I'm serving.. but potato chips are never really invited to the party.  Can't really do much with those...
My usual veggies include carrots and cucumbers.  I like cucumbers as a vessel for hummus because that creamy mixture of passion and chickpeas is made to be shoveled into the mouth on the end of a cucumber stick!  Oh yes, with some Lebanese bread as well, but I just have a thing for cucumbers.  This week, though, I invited celery.  Celery is the perfect vessel for dipping.  It has that naughty little curve that is just made for scooping.  Its acidity balances out any peanut butter or cream it may encounter, and is a delight to munch on, so this time, I decided to go Buffalo-style with my cucumbers drenched in a Frank's Redhot vinaigrette and the little celery companion for the creamy aspect to counter the tangy RedHot.
Buffalo Cucumbers
Ingredients:
1 long cucumber, semi-peeled and cut into sticks
3 large cloves garlic, unpeeled
1 Tbsp olive oil
1 small shallot, diced
1/2 cup Frank's RedHot sauce (do not substitute anything else please!)
crushed peanuts for garnish
crumbled blue cheese or feta (optional)
Directions:
1.  Roast the garlic in their sheaths for about 15 minutes at 200°C 400°F.  Remove and squeeze out the garlic into a bowl.
2.  Make the vinaigrette by whisking together the mashed garlic, olive oil, and Frank's.  Stir in the diced shallots.
3.  Toss the cucumber sticks with the vinaigrette and set aside in the refrigerator to let the juices develop for at least 20 minutes.
4.  Toss again to redistribute the juices and serve with some crushed peanuts.
Serve as a salad or as finger food for happy hour.  With some crumbled blue cheese or feta it would be quite a fiesta of flavors.
Dill Filled Celery Sticks
Ingredients:
stalks from 1 bunch celery, cut into sticks
1 clove garlic, grated
juice from 1/2 lime
3 sprigs fresh dill, chopped
5-6 celery leaves, finely chopped
few cracks black pepper
pinch fleur de sel
pinch piment d'espelette
3 Tbsp cream cheese
1 Tbsp cream
Directions:
Whip together all the ingredients and spread it into the celery crevices.
*this one is not vegan.. don't be silly now

This works just as well as a spread on bagels, dip for carrots or breadsticks, or even on some toast with a few capers.  I just wanted to fill the celery wedges with something tangy.
This was the perfect American-themed happy hour (with carrot sticks and artichoke dip, of course) to go with my All American Spiced Chili dinner.

Print Friendly and PDF

Sunday, November 9, 2014

Granny Smith Tart with Fig Lining

It is no longer peach and apricot season.. and figs have been weaning away from the stalls for some time now.  Fall is the season for apples and pumpkin, sugar and spice.  How can you spread one last drop of summer into a fall dessert?  Use some of your summer preserves.. if you are so lucky to have some.  This summer, I made many offerings to others and was, in turn, rewarded with several gifts of various forms.  Homemade fig preserves was one of those gifts I've been enjoying from time to time on some bread with goat cheese, or even in some thumbprint cookies.  I hadn't given those preserves their proper turn at sublimation, yet.. until this tart.  Mixing figs and apples is just as genius an idea as mixing apples and cinnamon.. and while we're doing that, add in some cinnamon and ginger.. because it is fall, after all.
Serves 6-8
 Ingredients:
3 Granny Smith apples, peeled and sliced into wedges
1/4 tsp ginger powder
1/4 tsp cinnamon
2 eggs
3-4 Tbsp fig preserves
30g cassonade or brown sugar (omit if your preserves are very sweet)
1 handful slivered ground almonds
dash milk
shortcrust (I used half buckwheat, half T80 flour and added cinnamon and ginger)
Directions:
1. Cover the rim of the uncooked shortcrust with foil, poke the bottom a few times with a fork and pre-cook it for 10 minutes in the oven at 190°C 375°F.
2. In a large mixing bowl, whip together the eggs, sugar, 1 1/2 Tbsp of the fig preserves, and a dash of milk.
3. Spread the remaining 2 1/2 Tbsp fig preserves into the precooked crust
Lay the wedges down
Sprinkle on the almond slivers
 and pour in the egg mixture.
4. Bake for 1 hour at 175°C 350°F.
 5.  Let cool at least 30 minutes before attacking it.
This apple tart is exactly my type of dessert (until I get a sorbetière.)  It's not too sweet, just enough fruit, a bit of spice from the ginger, a crust that always gets rave reviews... with a naughty mix of fig and apples to make it unique.

Print Friendly and PDF

Saturday, November 8, 2014

Marinated Anchovies

Today the sun seeped into my skin and whispered to me, "they are ready to be welcomed by you."
That could only mean one thing.. I'm going to be marinating fresh anchovies for happy hour tonight.. and nothing going to stop me.
With respect to my rule C of dinner parties, these will make for quite a happy happy hour.
When I buy anchovies, I always buy the marinated ones, never the salted ones.  I don't enjoy all the grime and salt as much as I enjoy the pure filets with their exquisite texture.  During these past few weeks, I've been lingering around my fishmonger waiting for fresh anchovies to become available.  There comes a time in one's life when one feels ready.  Ready to take it to the next level.  Ready to do it my own way.  Ready to cook using something other than heat.
Unfortunately, all the fishmonger was able to offer me were sardines.. which are great, but my one tracked mind was not fixated on marinating sardines today.. I wanted ANCHOVIES!  I almost started the debate about whether or not the anchovy is the sardine's spawn, but I let it slide, knowing that he would call me over when he did finally have anchovies.  You can't rush such things.
I was right about feeling ready.  It was just the right time for these marinated anchovies to be happening in my life..
Ingredients
450g (1 lb) fresh whole anchovies
1st marinade:
juice from 1/2 lime
1/2 cup balsamic white vinegar (or white wine vinegar)
1/4 cup cider vinegar
2nd marinade:
few pinches fleur de sel
1/2 tsp chili flakes
2 large cloves garlic, sliced
few cracks black pepper
3/4 cup very good quality olive oil
Directions
1.  Prepare the filets.  Cut the heads and tails off the anchovies and with a sharp knife, slit the bellies. Using your fingers, remove the guts.  Remove the central bone.  You don't need any magic tools here, just your fingers.  It all comes off easily.
Rinse the filets well and pat dry.  This is important.  Don't leave any gut slime on there.
2.  Prepare the first marinade.  Mix all the ingredients together.  Place a layer of anchovy filets in a container and pour the marinade mixture over until the filets are just covered.  Add another layer of filets and cover again with the vinegar mixture.  Do this until you no longer have any filets or vinegar.  If the filets are not submerged, just pour on some more vinegar or lime juice.
Let marinate in the refrigerator for at least 4 hours.  During this time, the filets will cure, but will retain their real anchovy flavor.  Use good quality vinegars because your filets will have the vinegar aftertaste in the end.  Adjust the lime-vinegar quantities as you wish.
3.  Bathe.  After about 4 hours, the marinade might be a little off-putting.  Mine was murky and I was afraid it wasn't going to cut it.
Rinse the filets in cold water, then pat dry.
4.  Prepare the second marinade.  Place a layer of anchovy filets in a container and sprinkle a bit of fleur de sel, chili flakes, pepper, and a few slices of garlic.  Cover with olive oil and repeat the process until you no longer have filets or olive oil.  If the filets are not submerged, add more olive oil.
Let marinate in the refrigerator for at least 2 hours.
They will keep for a week in the fridge as long as they are submerged in olive oil... but they won't last you that long anyway..

Enjoy.
I'm not sure about proper anchovy-eating etiquette, but I have little escargot forks that I use to grab a filet or 2 and put it directly into my mouth.  I may get a few drops of oil on the table, but that doesn't bother me.

These were a great success.  They retained their real anchovy flavor instead of being pure salt as the ones you buy in cans.  The flesh stays firm and the happiness emanates throughout the room.  Needless to say, every last one of these was eaten with great respect.

Anchovies, I hope you are finding great comfort within me... I will always be ready and willing to welcome you..

Print Friendly and PDF

Monday, November 3, 2014

Chipotle Black Eyed Pea Dip

The time has come again for yet another Happy Hour evening followed by game night.
No, not video games... we haven't killed off enough brain cells to enjoy those yet.. (no offense to anyone who indulges in said activity.  I just don't get it.)
Although I try to change up the rotation regularly, there are always certain things to expect when crossing my threshold:
a.
There will be a dip and it will most likely involve beans.  Be it hummus, artichoke, eggplant, pinto, or even blended dal, you will be practicing the art of dipping.
b.
There will be heat.  At the very least, one of my offerings will be spicy, if not 80% of them.  That's how I roll.  If I know ahead of time about your less than stellar scoville stamina, I may make minor adjustments, but there will be at least one item you won't eat.  Your loss. 
c.
There will be something from the sea.  It will be shrimp, anchovies, sardines, or all of the above, but they will represent.  This time there were shrimp and kelp caviar (which I didn't photograph) but was rather excellent.
d.
There will be music.  Really really good music.. on vinyl.  That is non-negotiable.  I have a large selection, but don't bring a cd or a usb drive.  That just doesn't cut it here.
e.
You will discover something.  Yes.. I like to have something to share that will make you say "ooh" or "aaah" or "wtf?"  Sometimes all three.  It isn't necessarily food related, but most of the time is is.

Once those conditions are re-united, the evening can begin.  
Here is my a. criteria for the evening which is similar to my chipotle black beans, but with a few minor touches that completely make the difference.
Serves 4-5
Ingredients

3/4 cup dried black-eyed-peas, soaked at least a few hours
1/4 cup dried pinto beans, soaked as well
5 cups water
1 sprig sage, chopped
1 chicken or vegetable bouillon cube
3 chopped shallots
2 Tbsp tomato paste
4 cloves garlic, grated
3 chipotle chiles in adobo sauce, some chopped
1/4 tsp ground cumin
Juice from 1 lemon
1 Tbsp cracked black pepper
Directions
1.  Put everything in the slow cooker and cook on low for 7-9 hours.
2.  If you decide to make it a dip, remove some of the beans with liquid and blend.  Garnish with grated cheese if you wish.  
I suggest not blending the entire batch, that way you can have several options;  dip, breakfast, lunch, soup, etc..
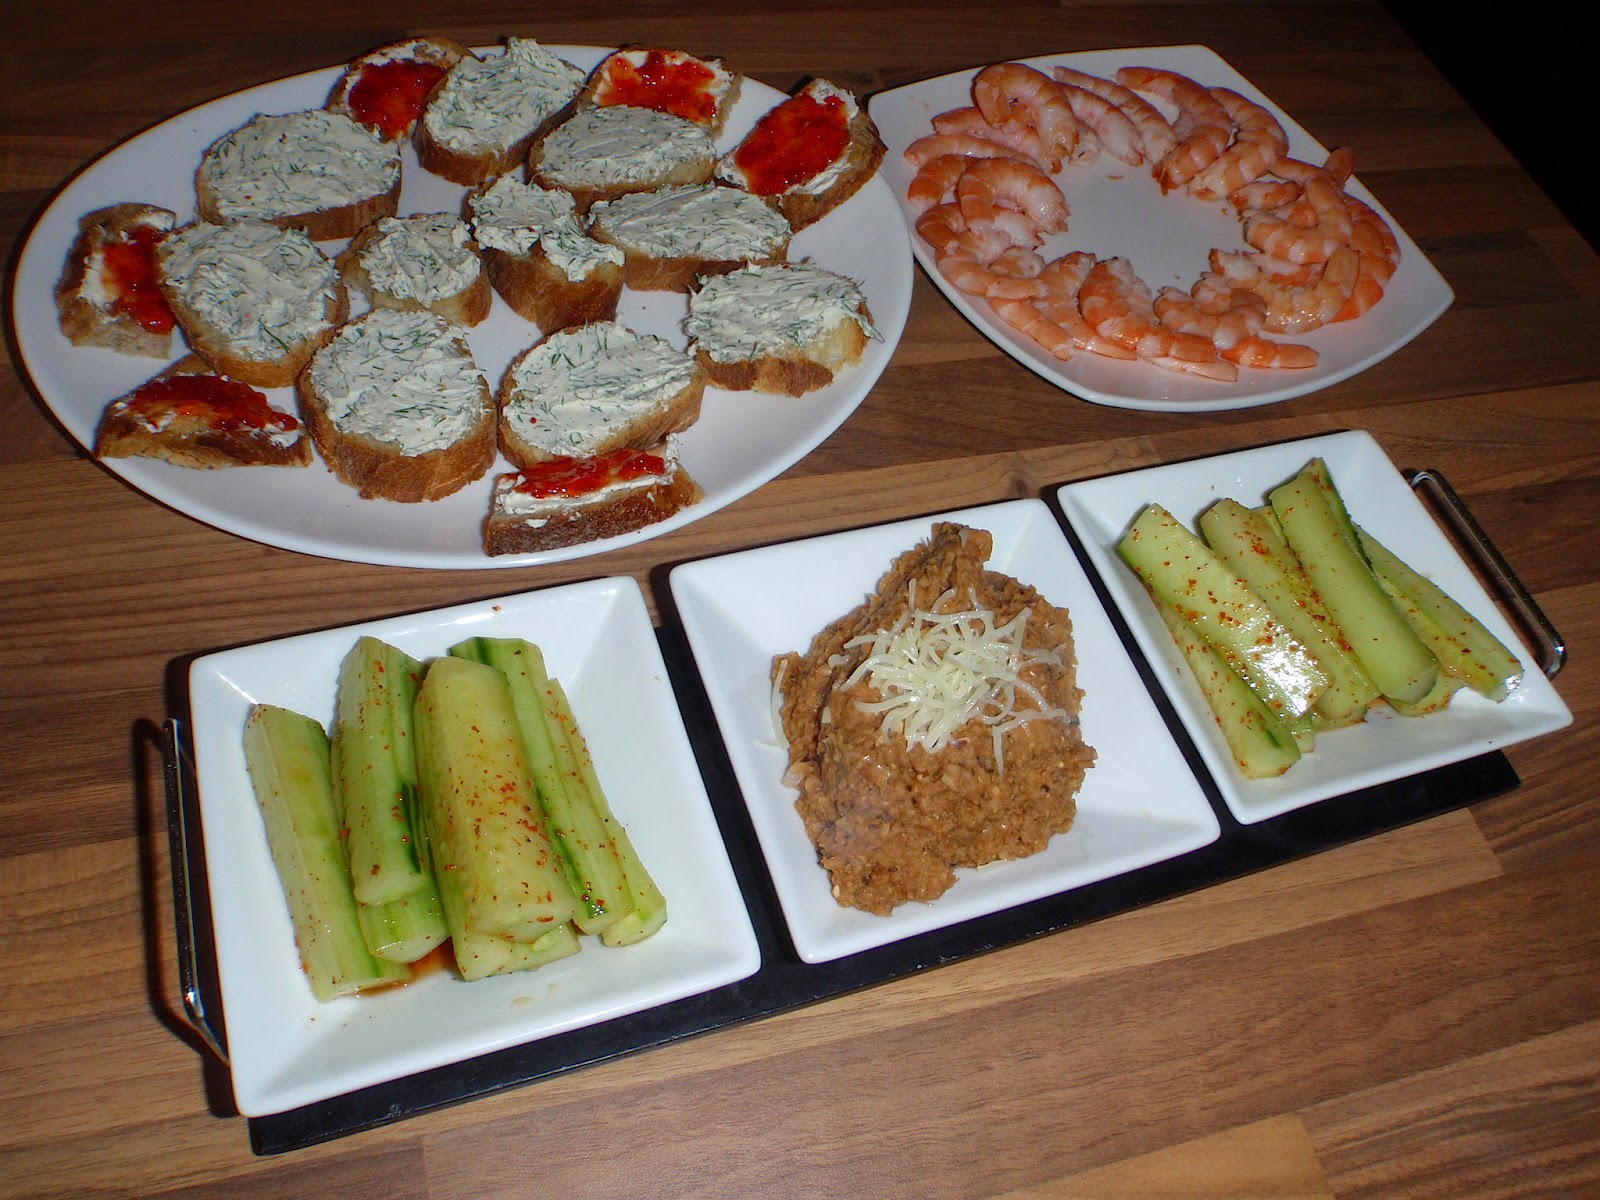
I served mine with some tortilla chips and carrot sticks (strangely, not shown in this photo).  There were also some lemon chile pepinos to keep with the Mexican theme.
What are those toasts in the background?  Aah a dill spread to which I later added capers, and some goat cheese with red chile jam which everybody thought was strange at first, but then asked for more.. to which I had to refuse.. because that jam was made for me for my personal stiletto moments. So.. no, sorry.
The next day, I spooned some of the non-blended beans over my morning egg.
Then again, over some rice with some extra garnish such as avocado, chopped tomatoes, and shredded cabbage..
 Oh yes lets get messy!! Yes Yes!!
I love beans.. have I ever mentioned that?

Print Friendly and PDF

Sunday, November 2, 2014

Long Pepper and Cardamom Cookies

After doing some research on what to do with some Javanese long pepper and having already tried it in some risotto for a satisfyingly tingly sensation, the long pepper cookie idea was incepted into my brain and I haven't been able to shake the thought since first inhaling the sweet aroma of those little berries.
This recipe is completely my own, and I let the energy flow through me in a natural way for this outcome.  I have a basic butter cookie rule that allows me to freestyle.  It's approximately 1:1:2 ration of fat, sugar, and flour.  Fat can be butter and tahini for example.  Flour can be normal or ground almonds.  With that ratio and a feel of what I want my dough to be before baking, I am able to let the creative part take over the rest.. which contributes to my zen-therapy.
Yield 2 dozen cookies
Ingredients
110g (3.9 oz) softened butter
100g (3.5 oz) cane sugar
2 Tbsp molasses
6 cardamom pods
15-18 Javanese Long pepper berries
1 tsp ground cinnamon
90g buckwheat flour
100g whole wheat flour
Pinch salt
1/2 tsp baking soda
Directions
1.  Dry roast the cardamom and Javanese long pepper until fragrant, then grind in a spice grinder.
2.  Cream the butter and sugar together, then add the molasses and mix until homogenous.
3.  Sift the flours, salt, baking soda, and ground spices together.
4.  Gently add the dry ingredients into the wet ingredients and mix with a wooden spoon until it all comes together.
5.  Ditch the wooden spoon and use your hands to knead it into a nice ball.  Not too wet, but not too crumbly either.  It should stay in a ball if you shape it without fallong apart but should not come off onto your fingers after shaping.  I'm now realizing that it is not that easy to describe the consistence if something with words.
I now understand why grandmothers use "until it looks or feels right" in their recipes.
6.  Preheat your oven to 175°C 350°F.
Make tablespoon sized balls with the dough and press them down onto a cookie sheer.  Press some extra cane sugar on the tops of the cookies so that they'll have a bit of sparkle and glamor when they're done.
7.  Bake for 13-15 minutes or before the edges start to darken.  These will harden if cooked too long so be careful!
8.  Quickly transfer to a cooling rack.  And try to wait at least 20 minutes before digging in.

The result?
Intriguing.  The long pepper is slightly smoky and lingers in a similar way that cardamom lingers.  The pair go well together and the aroma wafting from this creation will hypnotize every being within you...

Print Friendly and PDF

Saturday, November 1, 2014

Sucrine du Berry and Black Trumpet Pizza

If there were ever to be a pizza in this world to scream luxury and sensuality, this would be it.
This is not just your average pizza where the ingredients are slapped onto the dough and then cooked together for the final outcome.  I've made something similar before, but as a fine cheese ripens, my skills intensify with time.
This is a pizza where each layer was carefully mapped out and "cuisined" to bring out the best in the next layer... although the dough is always my standard recipe with fresh yeast.
Lets start with the base.
A cream base instead of tomato or pesto..but into my cream, I whipped in 1/2 clove grated garlic, a few cracks black pepper, and a dash of nutmeg.  These last 3 are to bring out the best in the grated sucrine squash that would be the succeeding layer.  The cream base also had a drizzle of truffle infused olive oil and was made an hour before spreading so the flavors could infuse.
The grated sucrine would then be delicately positioned over this cream base and turn into pure pleasure during the cooking process.
The next layer, the black trumpets, are truly a gift from above in the mushroom department.  Of all the lovely little mushrooms this world has to offer, the black trumpets are the ones tha tickle my T-Spot most of all.  It may also be visual, since they are black, but the texture is pleasant and they have an earthy fall flavor that sits well with garlic, cream, and most certainly the sucrine.  Mushrooms and squash go well together in general, but here on my luxury pizza, we have the best of both worlds.  A butternut type squash, which is the Venus of squash, and the black trumpet mushroom, which is the Zeus of all (affordable) mushrooms.
The black trumpets were sauteed in a bit of butter with some garlic until they released their nectar, then were cooked until they reabsorbed their nectar with a small spoon of the cream infusion before being spread over the sucrine.
To remind myself that this is indeed a pizza and not Manna, some buffalo mozzarella was added to the last layer along with some grated raw milk gruyere.
The masterpiece was cooked on its throne, the pizza stone, on the bottom rack of the oven at the highest temperature, 250°C 480°F, for 13 minutes.
The last hommage was a drizzle of truffle infused olive oil at the end for the mouth envelopping truffle sensation confirming that this is truly a divine creation.
A pizza such a sthis is best enjoyed hotter than warm, but not piping hot, because the cooked sucrine might burn the roof of your mouth, preventing you from enjoying the gifts offered by each and every being invited onto that pizza...

Print Friendly and PDF